For the past several months, my kids and I have been studying Earth Science using the Sassafras Science Adventures curriculum. (My kids still enjoy this curriculum after 2 full years. Click here for my full unsponsored review.) However, as the school year draws to a close, we’ve definitely fallen behind on our ACTUAL science experiments to supplement the curriculum. Anything that requires even the tiniest bit of preparation on my part seems to get thrown out the window. Thankfully, this really fun, easy, quick cloud in a jar experiment required almost no preparation at all.
As a research scientist and lifelong nerd, I love anything that gets my kids excited about science. If they have smiles and looks of amazement on their faces while we are doing science, I pretty much consider the whole day a success. This cloud in a jar activity was definitely a win for us. When I told my kids we were going to create our own mini-clouds, they looked at me like I was crazy. Within minutes, they were begging me to do it again.
Although getting my kids to say, “Woah, that’s cool!” is always my ultimate goal, it’s great if they can pick up a few science-y concepts or learn a few big words along the way. For this cloud in a jar science activity, these are the science concepts I tried to present to my kids. Even if my 6 year old only remembers the first item on the list, I’ll be happy. I’m hoping my 8 year old will remember a little more, but at the very least, I know he’s gained some familiarity that will serve him well in the future, even if it is just a vague memory.
- Clouds are made of water.
- In order for the liquid water on earth to turn into clouds, it has to first become a gas known as water vapor. (A process called evaporation).
- To form clouds, the water vapor has to collect, or condense, into tiny droplets of water. (A process called condensation.)
- In order for the water vapor to condense, it needs something to condense onto, like dust (or smoke or hairspray, in our case).
This activity was so quick and easy, we did it at least a dozen times. By the end of the day, even my 4 year old was saying, “Clouds are made by con-den-sa-tion.” I don’t think he actually understood what he was saying, but it was still pretty cute.
Recommended Age Range: Preschool, Kindergarten, Elementary, Middle School
Time Required: ~5 minutes — most of that time is waiting for the water from the sink to get hot!
Difficulty: Easy — but adult supervision required for the hot water and using a match.
Cost: Practically free
Materials:
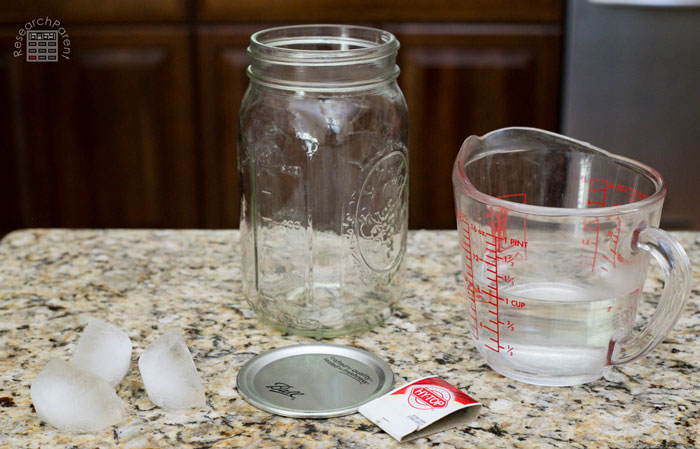
- Hot water (about 1 cup per cloud. It doesn’t need to be boiling…we just used the hot water from the sink.)
- A match
- 3 or 4 ice cubes
Supplies:
- A jar (we used a 4 cup mason jar)
- A lid (we just used the circle part of the mason jar lid and not the canning ring)
- Optional: A small cutting board, pot holder, or other insulating surface if you’ll be doing the experiment on something cold, like granite.
Instructions:
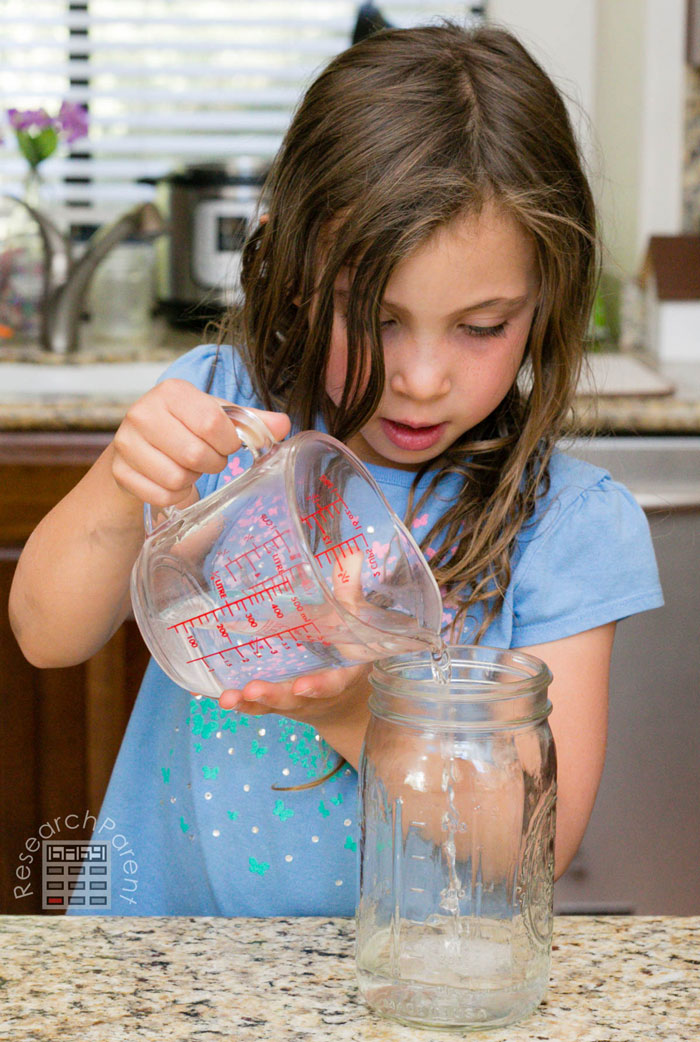
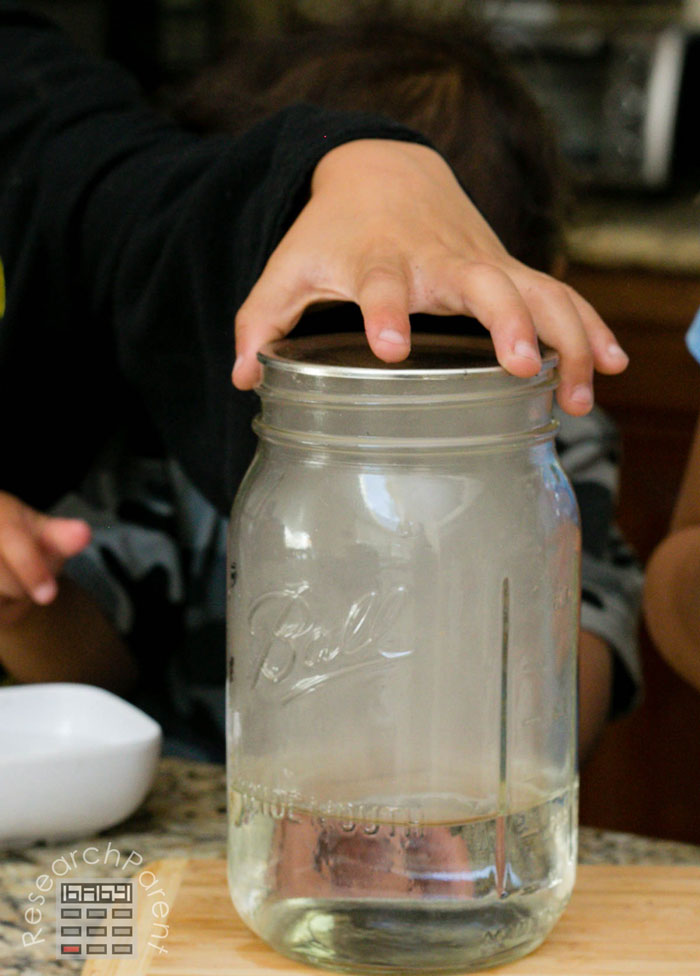
- First, pour 1 cup of hot water into a 4 cup jar. The amounts do not need to be precise. If you have a bigger or smaller jar, simply fill it about 1/4 to 1/3 full of hot water. The water also does not need to be boiling. Hot water from the tap is sufficient. If you DO use boiling water, it will make it harder to see your cloud as the jar will fill with steam and water will condense on the sides of the jar.
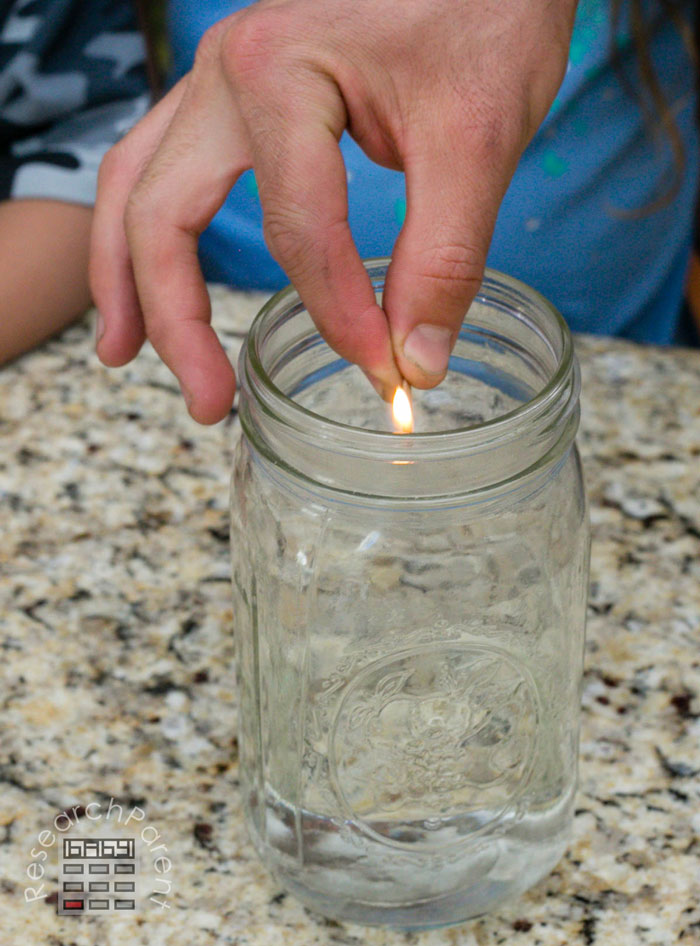
- Have a grown up light a match and place it inside the far. Hold it there for a second or two. Don’t burn your fingers!
- Drop the match into the jar.
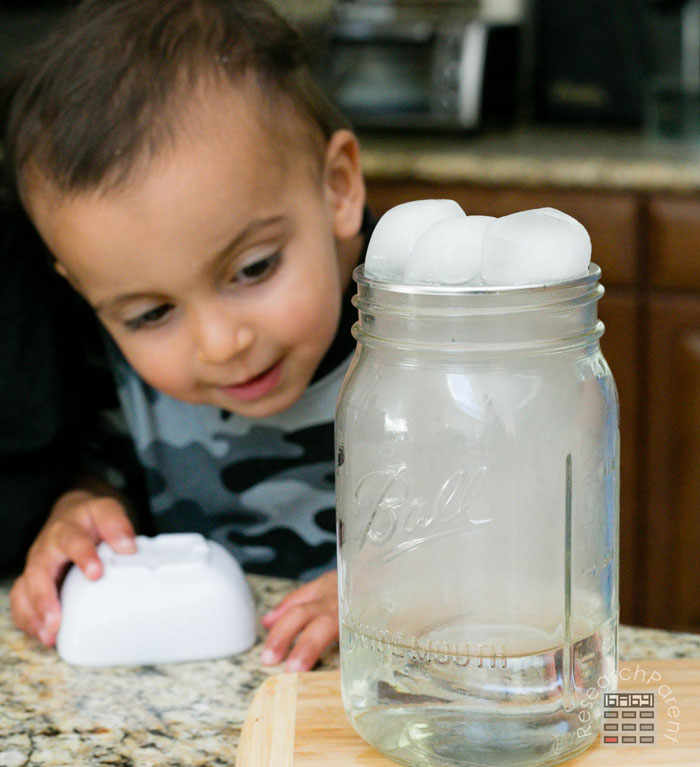
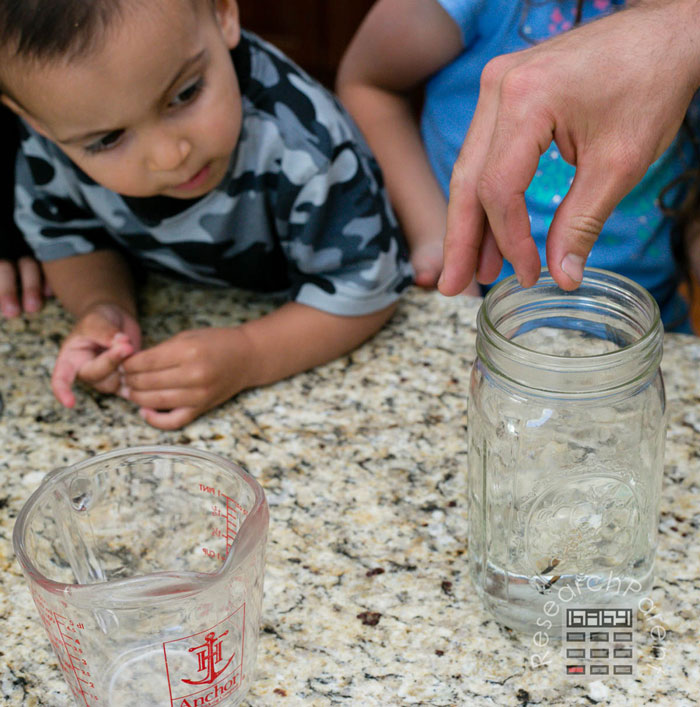
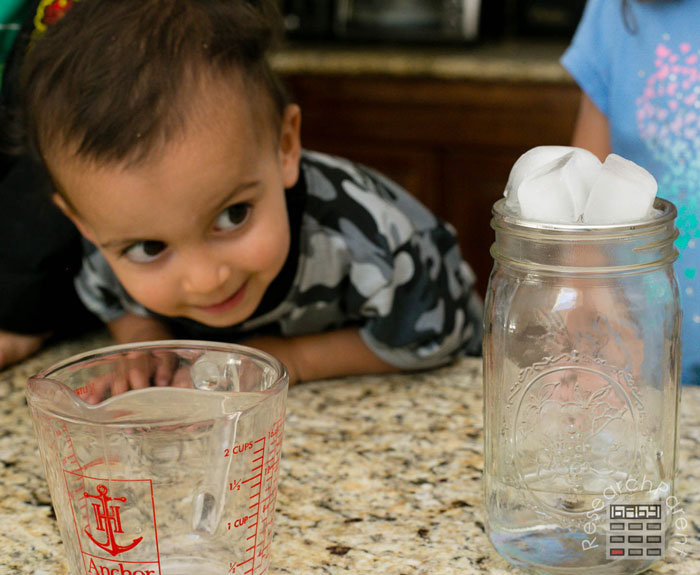
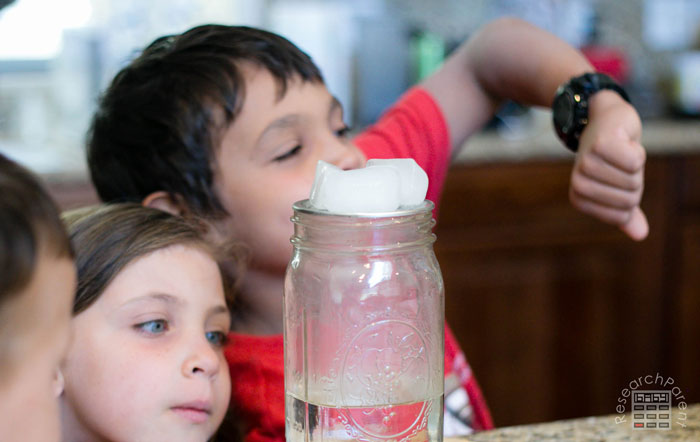
- Place the lid on the jar (it doesn’t need to screw on, just keep the water vapor from escaping). Then place ice cubes on top of the lid.
- Wait for 1 to 2 minutes. (We waited for 2 minutes each time, but there was clearly a cloud formed by about 1 minute.)
- Observe the cloud inside your jar. If there ISN’T a cloud inside your jar, it probably means you don’t have enough water vapor or smoke. Try again, but this time, go a little faster. Try not to give your water time to cool off before you light the match. Put the lid on right away after you drop the match, so the smoke doesn’t have time to escape. If you’re doing the experiment on a cool surface, you may want to use a pot holder or trivet to keep heat from escaping through the bottom.
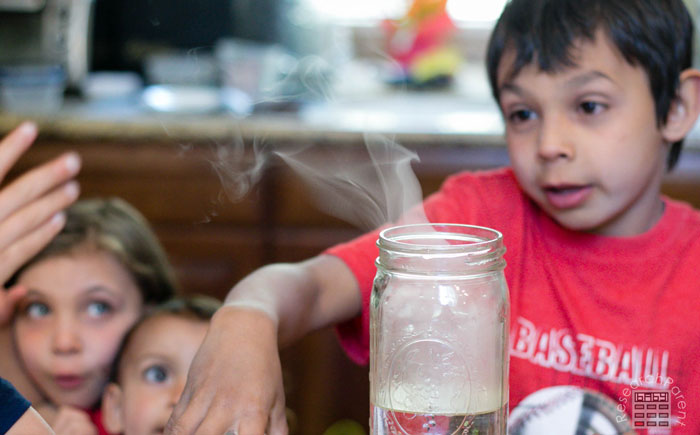
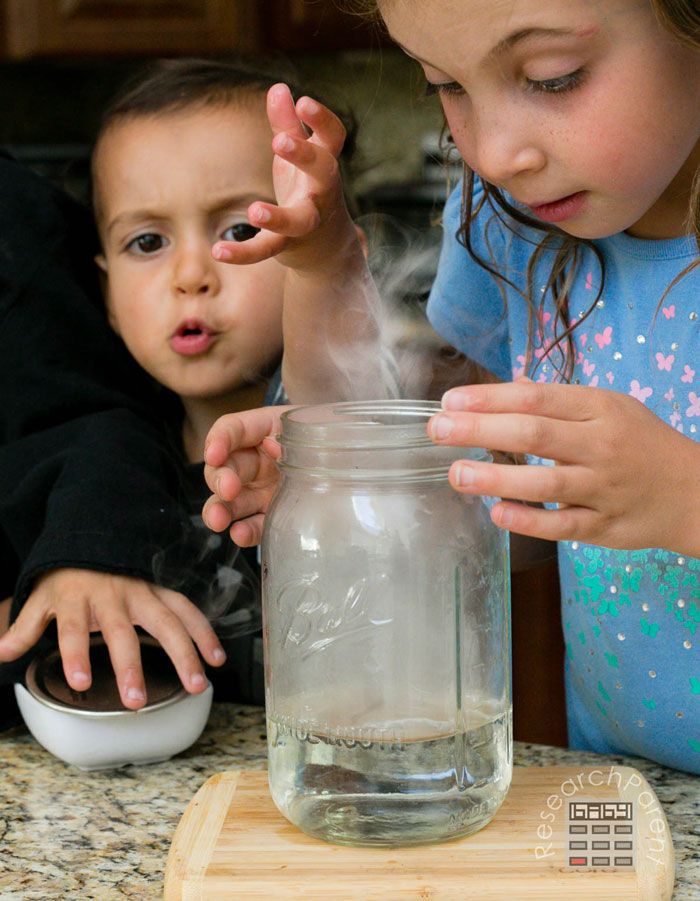
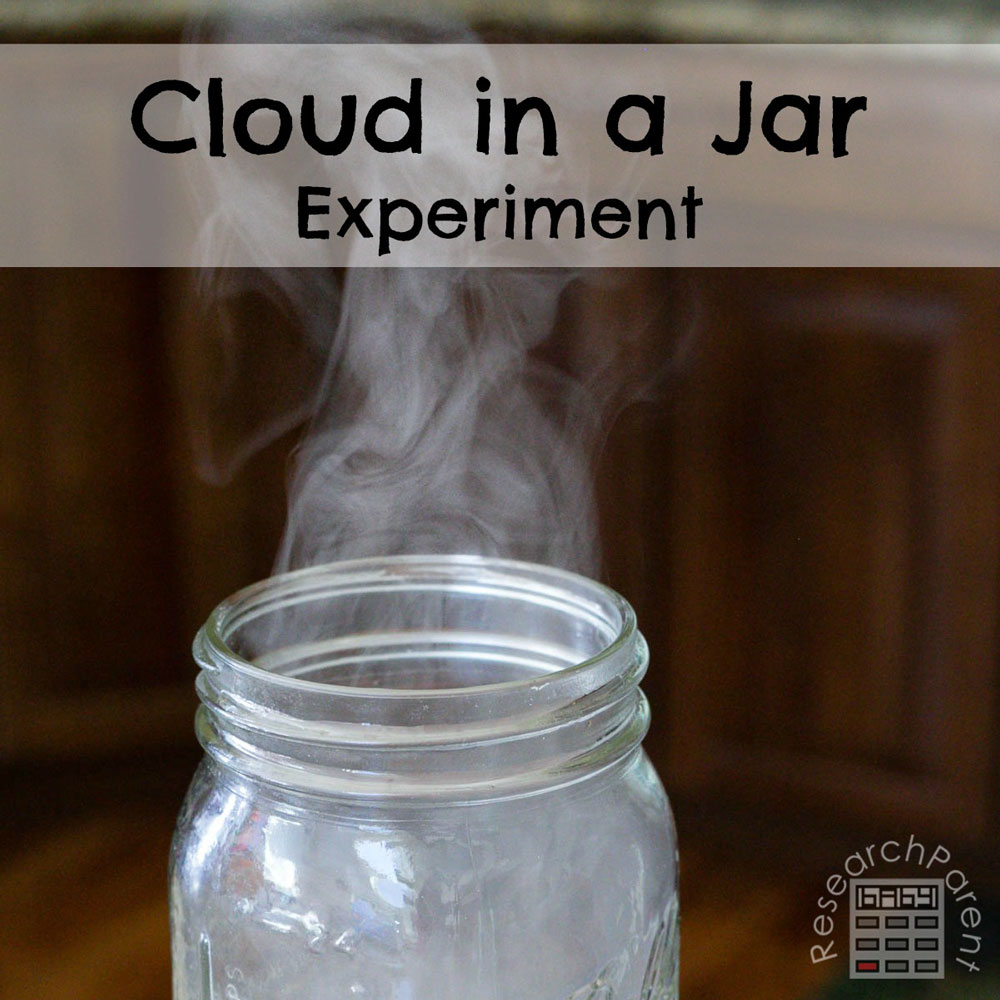
- Take the lid off the jar.
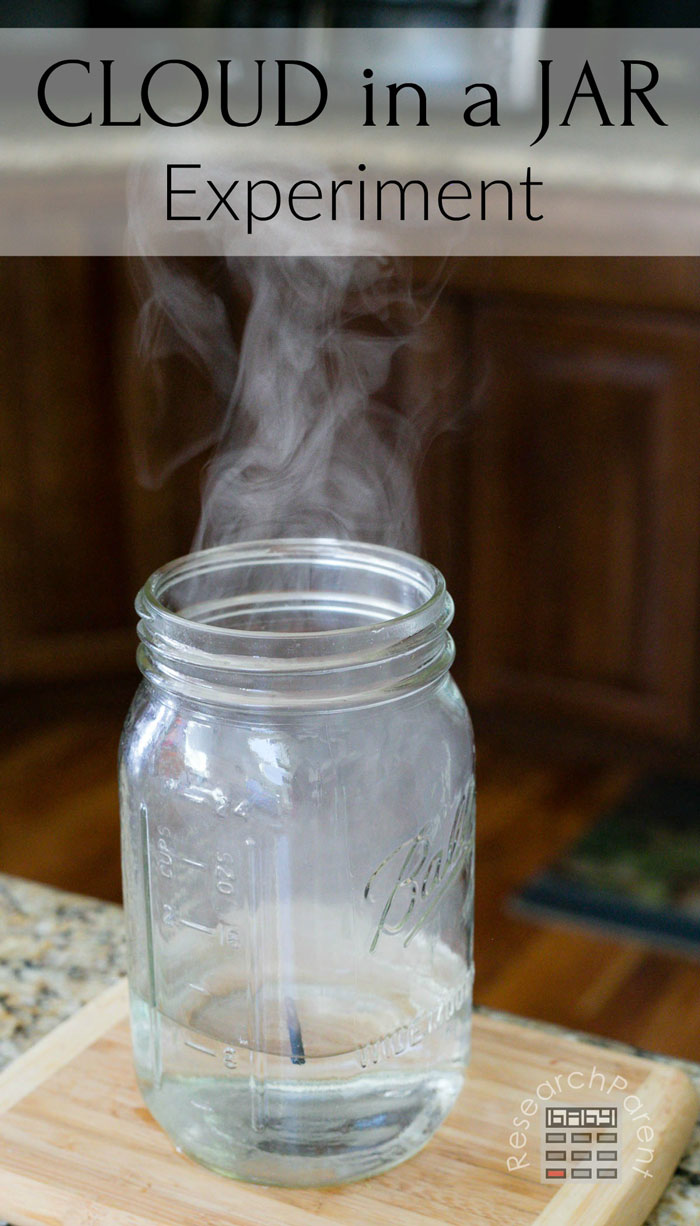
- Watch in amazement as the cloud escapes from the jar!

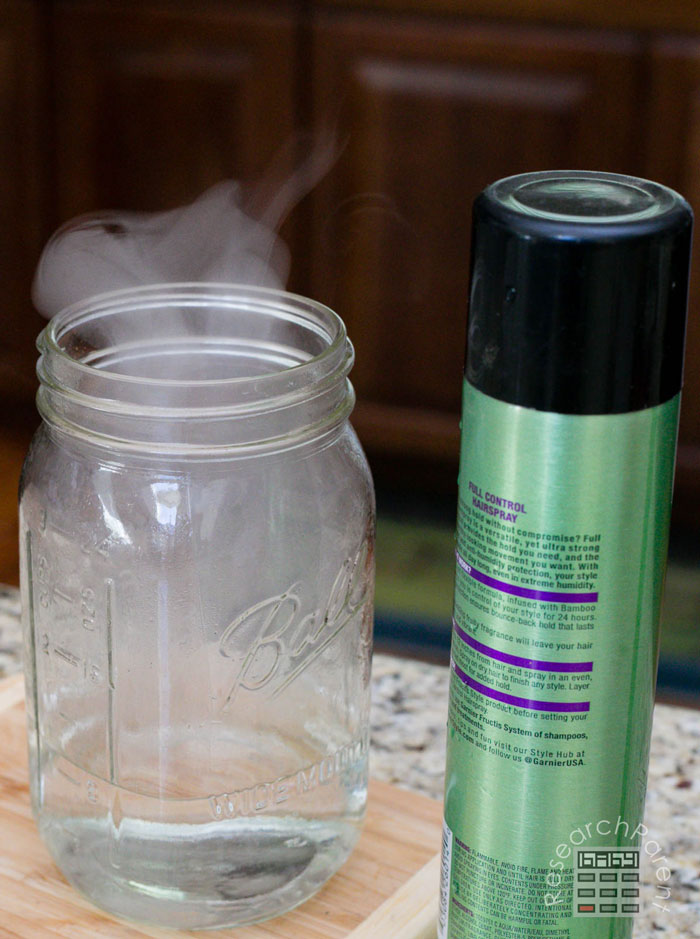
If you don’t want to use a match, you can try using hair spray. The water vapor can condense onto the particulates of hairspray instead of the smoke. We found our clouds with the match to be slightly more impressive, but the hairspray definitely worked as well. Just remember to be fast when putting on the lid and adding ice after spraying a little hairspray inside the jar.
Enjoy creating your own miniature cloud!
Click here for more Earth Science activities for kids.

Related Links
Chemistry Activities for Kids
Robotics Activities for Kids
Science Activities for Kids

This is definitely going to be on our summer fun learning activities!
It is a fun experiment. If tried with colored water you can see the cloud a lot better. You can also use a flash light and point it at the jar and it will be easier to see the cloud better. It is a very fun experience and I will do this experience again. It never gets old.
Thanks for the tips! We’ll have to try it out again. :)
I have a questions Dr. Michelle
As an Educator, I know Science is important. I have the opportunity to teach 5 to 7-year-olds geology, biology, physics and chemistry. Aah, how do i do this? the classes are 12 weeks long. I thought to divide the sciences in groups of three. This is an intro class, so I want it to be hands-on and informative. Each class is once weekly for about 40 minutes each. I want to be confident in lesson plans and all. help! what do you recommend?
I would check out the Janice Van Cleave books. They have experiments that are inexpensive and doable and I know she has books focused directly on a wide variety of scientific topics.
I made a cloud in a bottle that rains using water and smoke as gas. Using hot water does not rain itself because its temperature is 30°C degrees. My cloud in a bottle was raining because its temperature is 25°C degrees. If i open the lid it not go out its still raining.
How neat! Thanks for sharing!