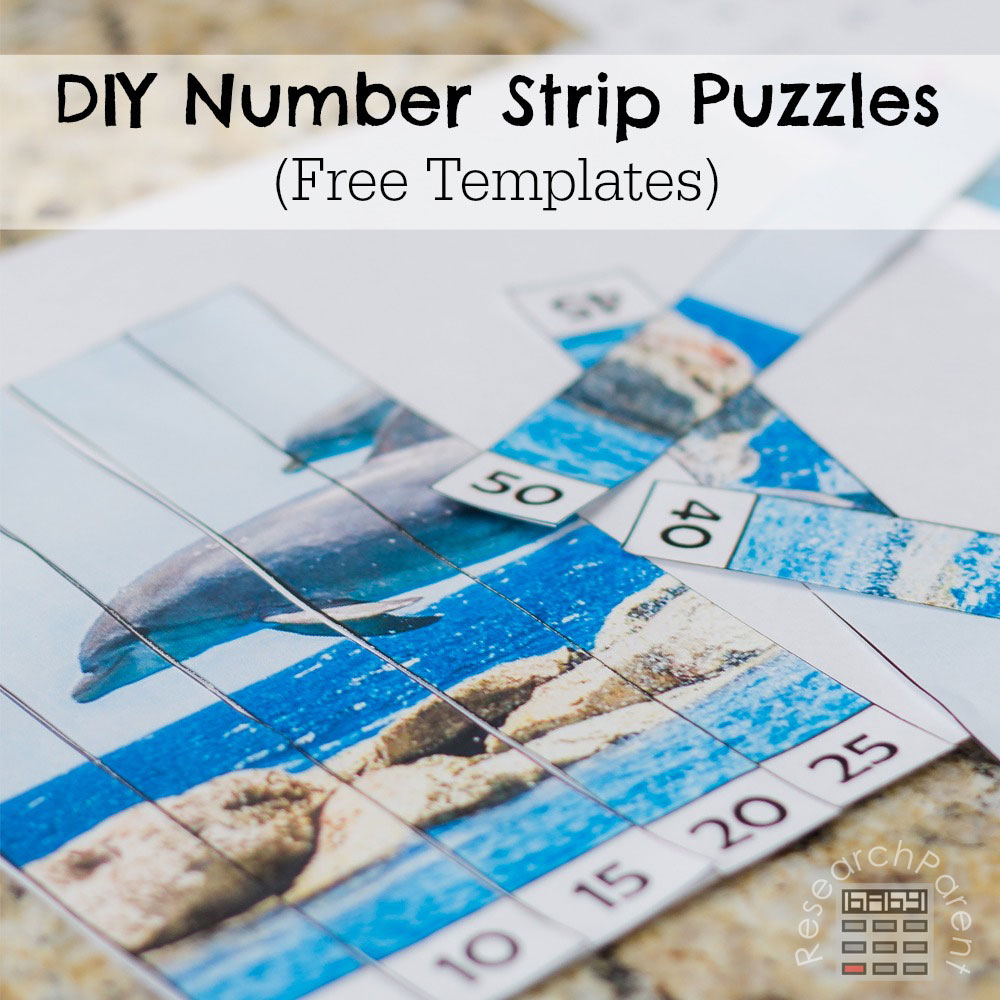
I first learned about number strip puzzles from the website 3 Dinosaurs. I LOVE all the free educational material on that site, especially for the preschool age group. My 5 year old daughter in particular is currently pretty passionate about these number “puzzles.” She has a dream of combining all her work together into a book. I decided to make my own number strip puzzles for 2 reasons: 1) I wanted a way to extend her learning by having her practice counting by tens, fives, evens, etc. 2) I’d like to be able to choose the picture so I can motivate her based on her interests.
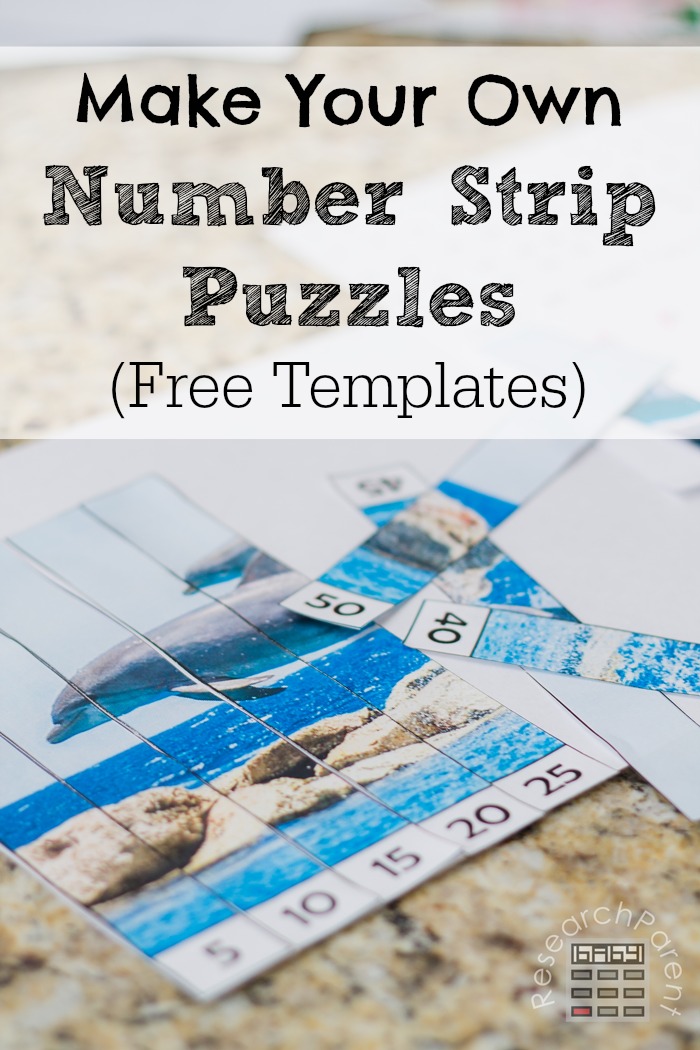
The great thing about making your own number strip puzzles is that it’s not only easy, but you can personalize the image to the child. Whatever you think would motivate your kid…Disney princesses, Pokémon, their favorite animal, etc…it’s simple to turn it into a number strip puzzle. You could even use pictures of your child.
Really, the concept is simple. By downloading the templates below, you can use any photo-editing software to overlay one of these number puzzle frames on the image of your choice. Below you’ll find a step-by-step tutorial for using the online photo editor, PicMonkey (affiliate link — note, you can use the free version for this tutorial, but paying for a membership will give you cool fonts and other features). There are templates to help your child learn to count to ten, count to 20, count to 30, count by tens, count by fives, and learn their even and odd numbers up to 20.
Number Frame Templates
- Number Puzzle Frame: 1 to 10
- Number Puzzle Frame: 11 to 20
- Number Puzzle Frame: 31 to 30
- Number Puzzle Frame: Count by Tens
- Number Puzzle Frame: Count by Fives
- Number Puzzle Frame: Count by Evens
- Number Puzzle Frame: Count by Odds
Recommended Age Range: Preschool, Kindergarten, Early Elementary
Time Required: ~10 minutes
Difficulty: Fairly Easy (Does require a tiny bit of basic computer skills, like saving and locating files)
Cost: Free (except for whatever printer ink/toner gets used)
Materials:
- Paper
- One of the Number Frame Puzzle templates above
- Digital image of your choice
Supplies & Tools:
- Computer with internet access
- Printer
- Paper trimmer or scissors
- Glue stick
Instructions:
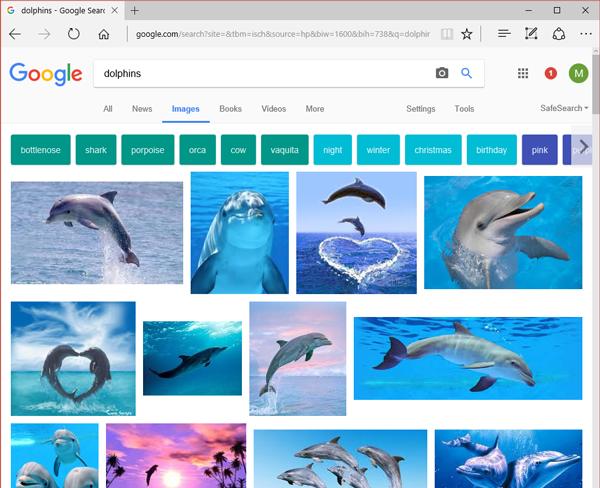
- First, if you haven’t already done so, you need to select which image you would like to use and make sure you know where it is saved on your computer. I recommend using Google Images. Since this is for personal use, you don’t need to worry about violating any copyright or trademarks.
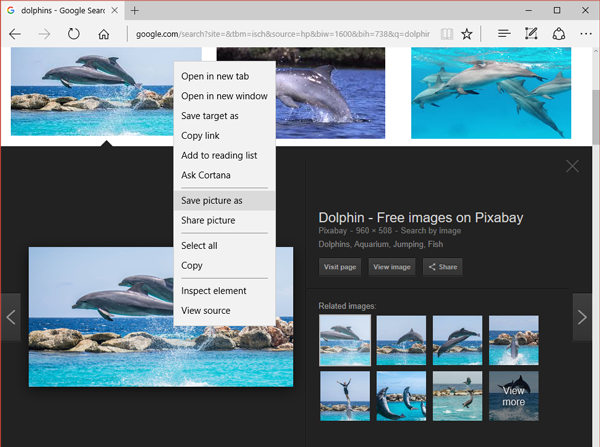
- If using Google Images, click on the picture you want, then right-click and select “Save Picture As” to save the image to your computer.
- Next, make sure you have the number frame template you would like to use saved to your computer. Here they are again:
- Next, go to Picmonkey.com.
- First click on Edit, then click on Computer in order to select an image from your computer. Locate the picture image that you want to use for your puzzle.
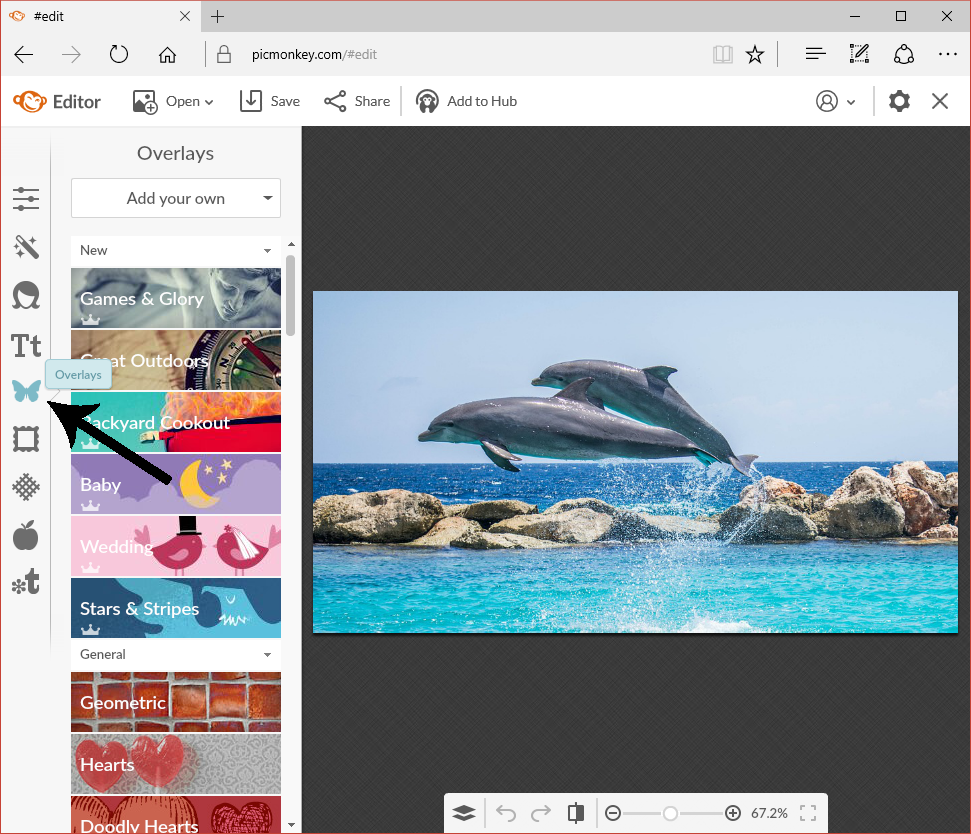
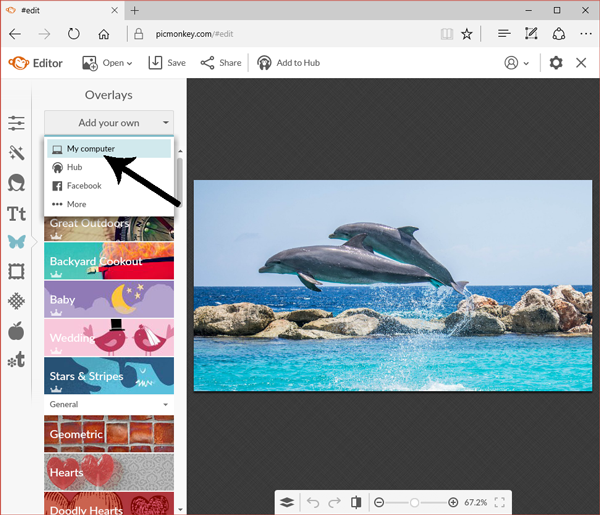
- Once your image is open, click on the Overlay (butterfly-shaped) button on the left hand side.
- At the top of the page, click on Add Your Own, then My Computer. Locate the Number Frame template you would like to use.
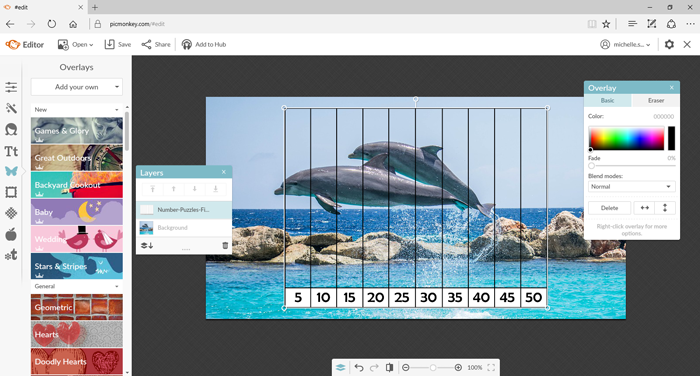
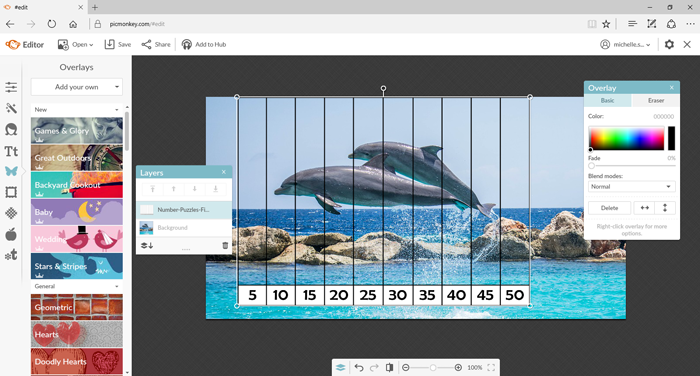
- Now you should have the number frame template on top of your picture. Drag the Overlay and Layers boxes out of the way of your image. You could also just close them.
- Next you just need to move the frame and resize it until it is covering the part of the picture that you want. You can move it by clicking in the middle of the overlay and dragging. You can resize the overlay by clicking on the corners or edges and dragging. Note: If you want to stretch the overlay, just hold down shift while you are dragging.
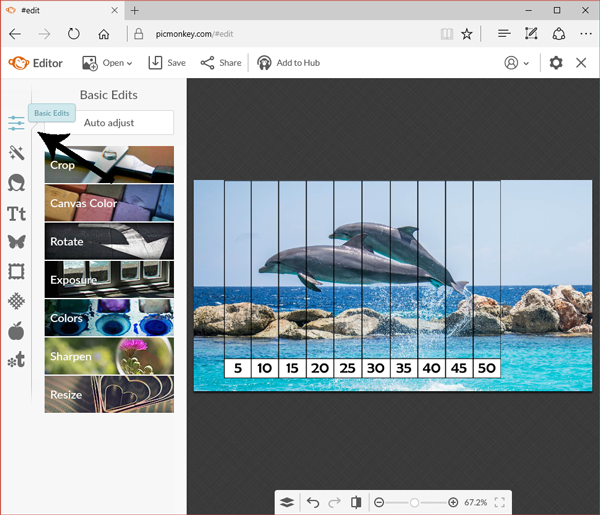
- Next, you can crop the picture around the template. Note that you don’t really HAVE to do this step, since you’re going to cut out the pieces anyway, but you can save ink by getting rid of the parts of the image you don’t want. Click on the Basic Edits button near the top left. It looks like 3 sliders.
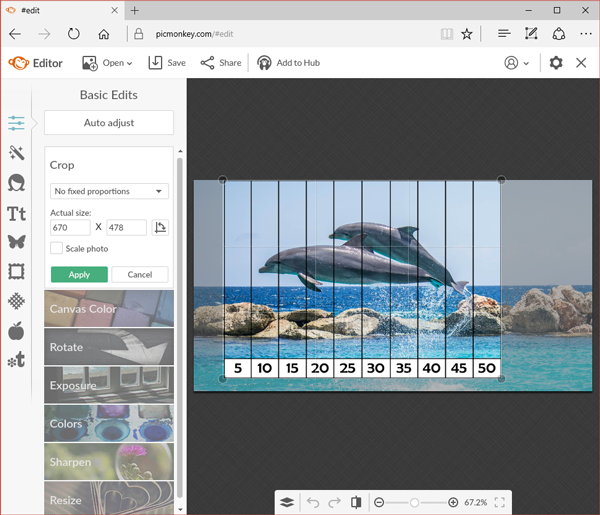
- Click on Crop. Drag the corners of the crop box to fit around your number puzzle. Then hit Apply.
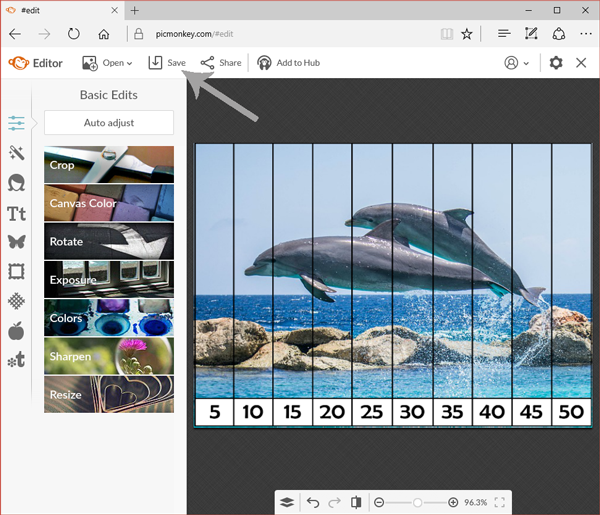
- Now you are ready to save your image. Click on Save at the top.
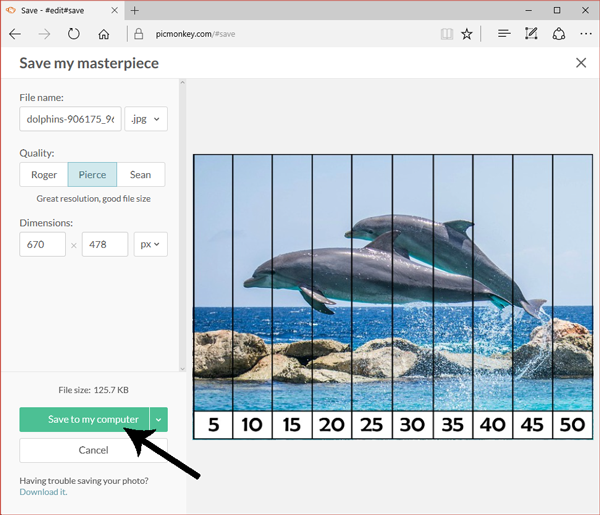
- Click on Save to My Computer. Make sure you know where the file is being saved on your computer and what it is named.
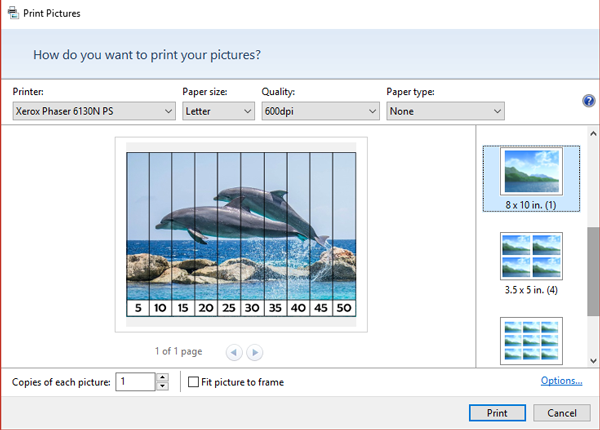
- Next, print the file you just saved. On a PC, you can just right click the picture and select Print. It will give you options of how big you want to print your picture. Make sure you de-select the box that says “Fit Picture to Frame” to make sure none of your picture gets cut off. You could also insert the image into a document before printing if you want it to be sized a certain way.
- After you’ve printed your picture, cut if out.
- Give the pieces to the child to work on along with a blank piece of paper and a glue stick.

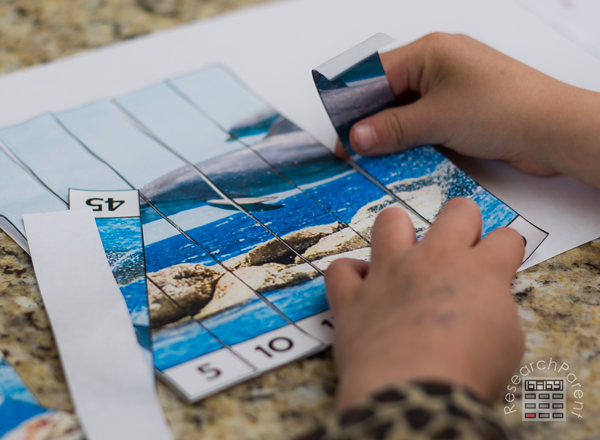
A great thing about these puzzles is that they are self-correcting. If the child does not put the numbers in the correct order, the picture will not look right.
However, if your child desires help figuring out the order, I fully recommend giving them some help. My 5 year old does not know how to count by 5’s, so when we did this puzzle, I wrote down all the numbers 1 to 50 on a piece of paper then had her circle every 5. She still might not know how to count by 5’s, but she’s gaining familiarity. Funny story: recently she was showing someone how she could count by tens by reading one of these number puzzles. After they expressed some awe at her amazing mathematical talents, she sadly admitted that she cheated. Apparently, she considers me having told her how to read numbers (10, 20, 30, etc.) as cheating.
Enjoy!
Related Links:
Math Activities for Kids
Best Gifts for Kids
Homemade Fun for Kids


Hello,
Thank you for sharing this great information. I was wondering if you know how to make the templates or did you get them from somewhere else. I need a vertical 1-10 template instead of a horizontal one. Any information you could share would be most appreciated.
Thank you so much.
Donna Geary
Hi, Donna! I’m sorry, I created the template from scratch using Photoshop and I don’t currently have a vertical one. If I have time in the next couple weeks to make a vertical template, I will reply back to this post to update you!