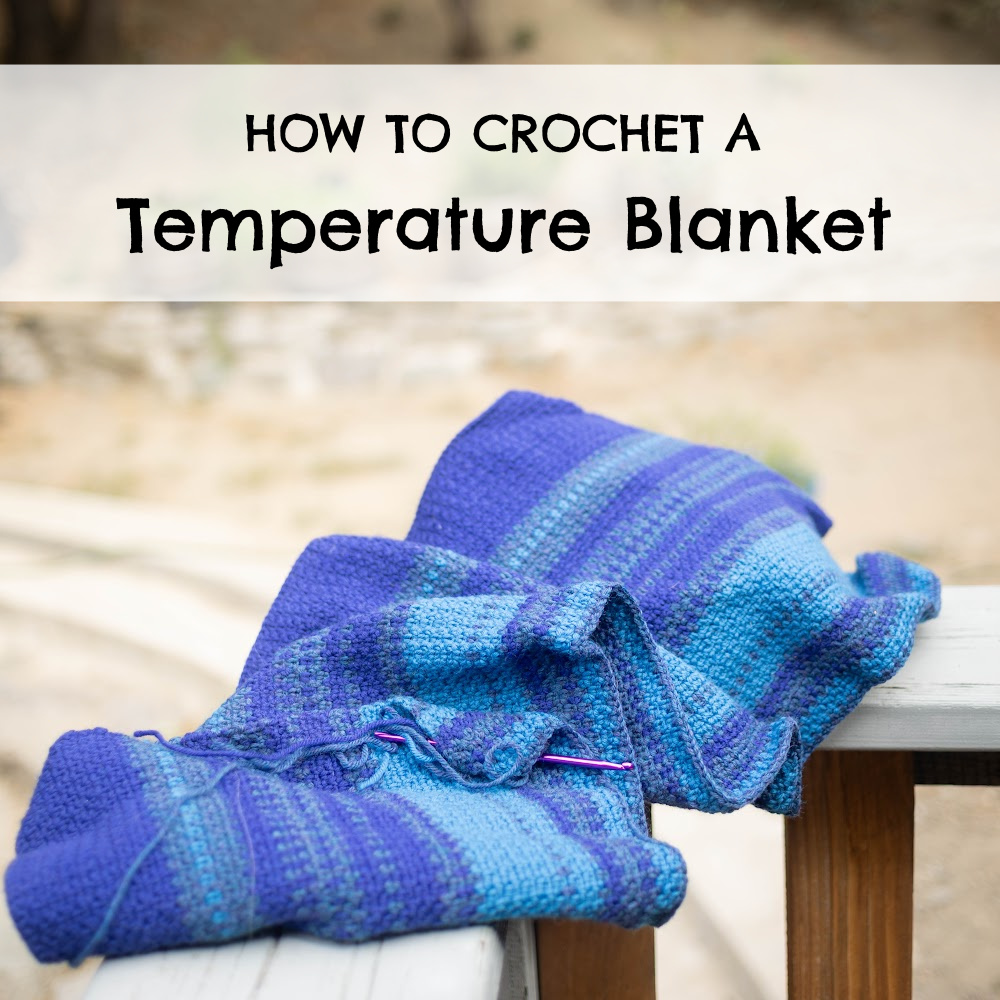
NOTE: This post and the blanket I am making is a work-in-progress. I’m posting it now so that I never forget the decisions I made. I need constant reminders even after short breaks. Also, I have 3 more kids I want to make these for, so really, this post is a gift to my future self. 😘
When I was a kid, I was surrounded by homemade afghans in bright oranges and greens. (It was the eighties. 😜) I vividly remember drinking hot chocolate with marshmallow fluff on my grandma’s couch watching Saturday morning cartoons wrapped in one of the family’s homemade crocheted blankets. I loved them so much that when I was 18, I taught myself to crochet and tried to make my own large afghan. I probably only got through about a third of the blanket before I stashed my project in a closet and then threw it away several years later when I stumbled across it. By that point, I didn’t even like the colors I had chosen anymore.
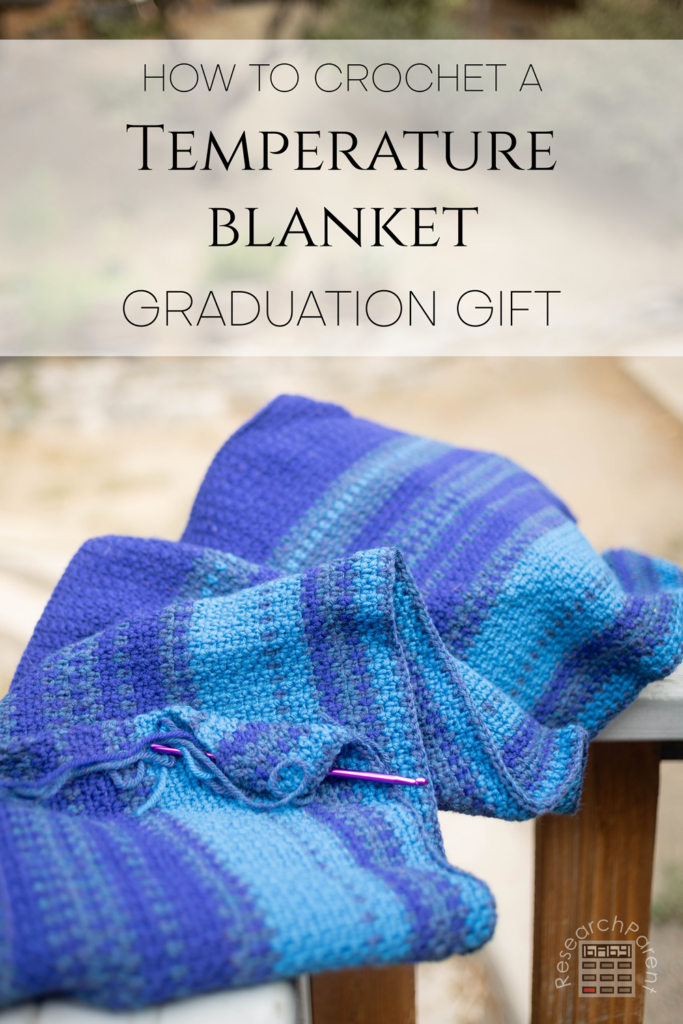
My first project was too ambitious for a newbie. At least it was for me. It had a variety of stitches that required me to count. It was WAY too large and I was still very slow. Since then, over the years I have knitted or crocheted several simple baby blankets and lap blankets to give as gifts and keep in my home. All of them have had fairly small dimensions since I learned from my early mistake. Now that I have a teenager who will be graduating from high school in a couple years, I have a new goal. I want to make a blanket for each of my kids to take with them when they go off into their own adult lives. A piece of home to have and to keep where ever they may end up.
I’ve settled on a temperature blanket for three main reasons.
1) It is simple. You pretty much can’t use fancy stitches or it will get WAY to large. That means no counting, no forgetting what I’m doing mid row. It seems like the perfect blanket to mindlessly pass the time while I’m watching TV or in the car or chatting with a friend. I know it’s going to take awhile, but I really think I can do this.
2) It will be one-of-a kind. I am going to allow each of my kids to choose their own color scheme. Given the choice of colors and the seemingly randomness of the “temperature” model, I can pretty much guarantee that no one else will have the exact same blanket.
3) It will be personalized to them. The way a temperature blanket works is that you choose the colors of each row based on the temperature at a specific location on a specific date. I am going to use the dates corresponding to their first year of life and the location corresponding to our hometown. Not only will no one else have a blanket like theirs, but no one else COULD have a blanket exactly like theirs. It’s underlying meaning is specific to them.
Now that I have decided what I want to do, I have the task of deciding EXACTLY what I am going to do. I decided I’m going to document my process as a gift to my future self, since I have four kids and this way I won’t have to reinvent the wheel every couple of years. Also, I thought these instructions might be helpful to others who might want to attempt similar projects.
STEP 1: CHOOSING THE YARN
I suppose there are other places one can start when making a temperature blanket, but where I decided to start was on choosing a brand of yarn to use. First I tried going to Hobby Lobby, but since I knew that my oldest wanted to do a monochromatic color scale and that I was going to need many shades of blue, I wasn’t happy with the selection I found there. I needed there to be at least 5 shades of blue that he liked all in one brand of yarn.
On top of that, I needed the yarn to be fairly thin. This blanket is going to have 365 rows and I don’t want it to be comically long. The yarn weight that I decided on, and this may need to be updated later after I’ve actually made my first blanket, is DK weight (also called #3 or light weight).
In terms of material, the cheapest yarn options would be acrylic. There are advantages to this in that it’s fairly easy to care for, doesn’t get dirty easily, and is probably the most inexpensive of all the options. I’m pretty sure all the blankets I grew up with were made of Red Heart yarn and they seem to be holding up great, even after 50 years. However, since I want this blanket to be special since it is the ONE blanket I am making for each of my children, I decided I don’t mind paying extra. I chose to pick from natural fibers (wool, bamboo, linen).
After I put together all of my requirements (lots of colors, DK weight, natural fiber, durability, ease of care, cost, availability), I ended up deciding on Cascade 220 Superwash yarn which I purchased from Love Crafts. It turned out that of all my requirements, the most difficult to meet was the variety and availability of color options, and this brand fit the bill easily. The cost was a little higher than I would have liked, but since it is meant for a special gift, I’m willing to pay.
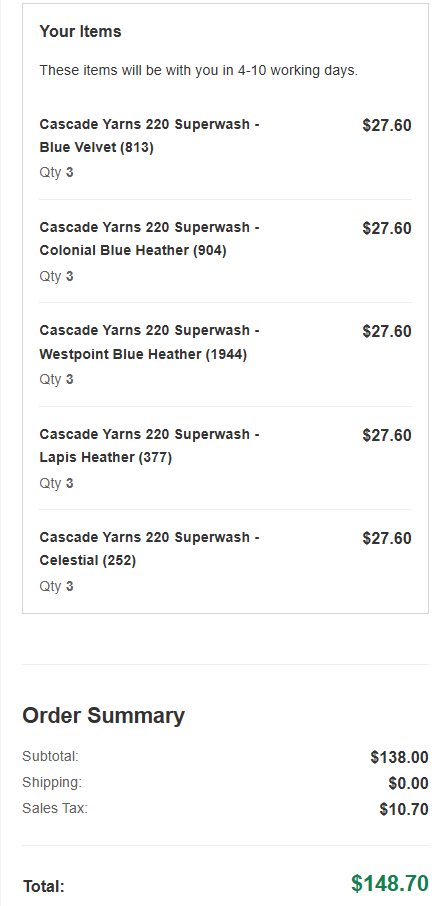
I’ll discuss below how I ended up deciding how much of each yarn to get, but I ended up purchasing 3 skeins of each of 5 colors on sale for $9.20 each. Here is a copy of my receipt.
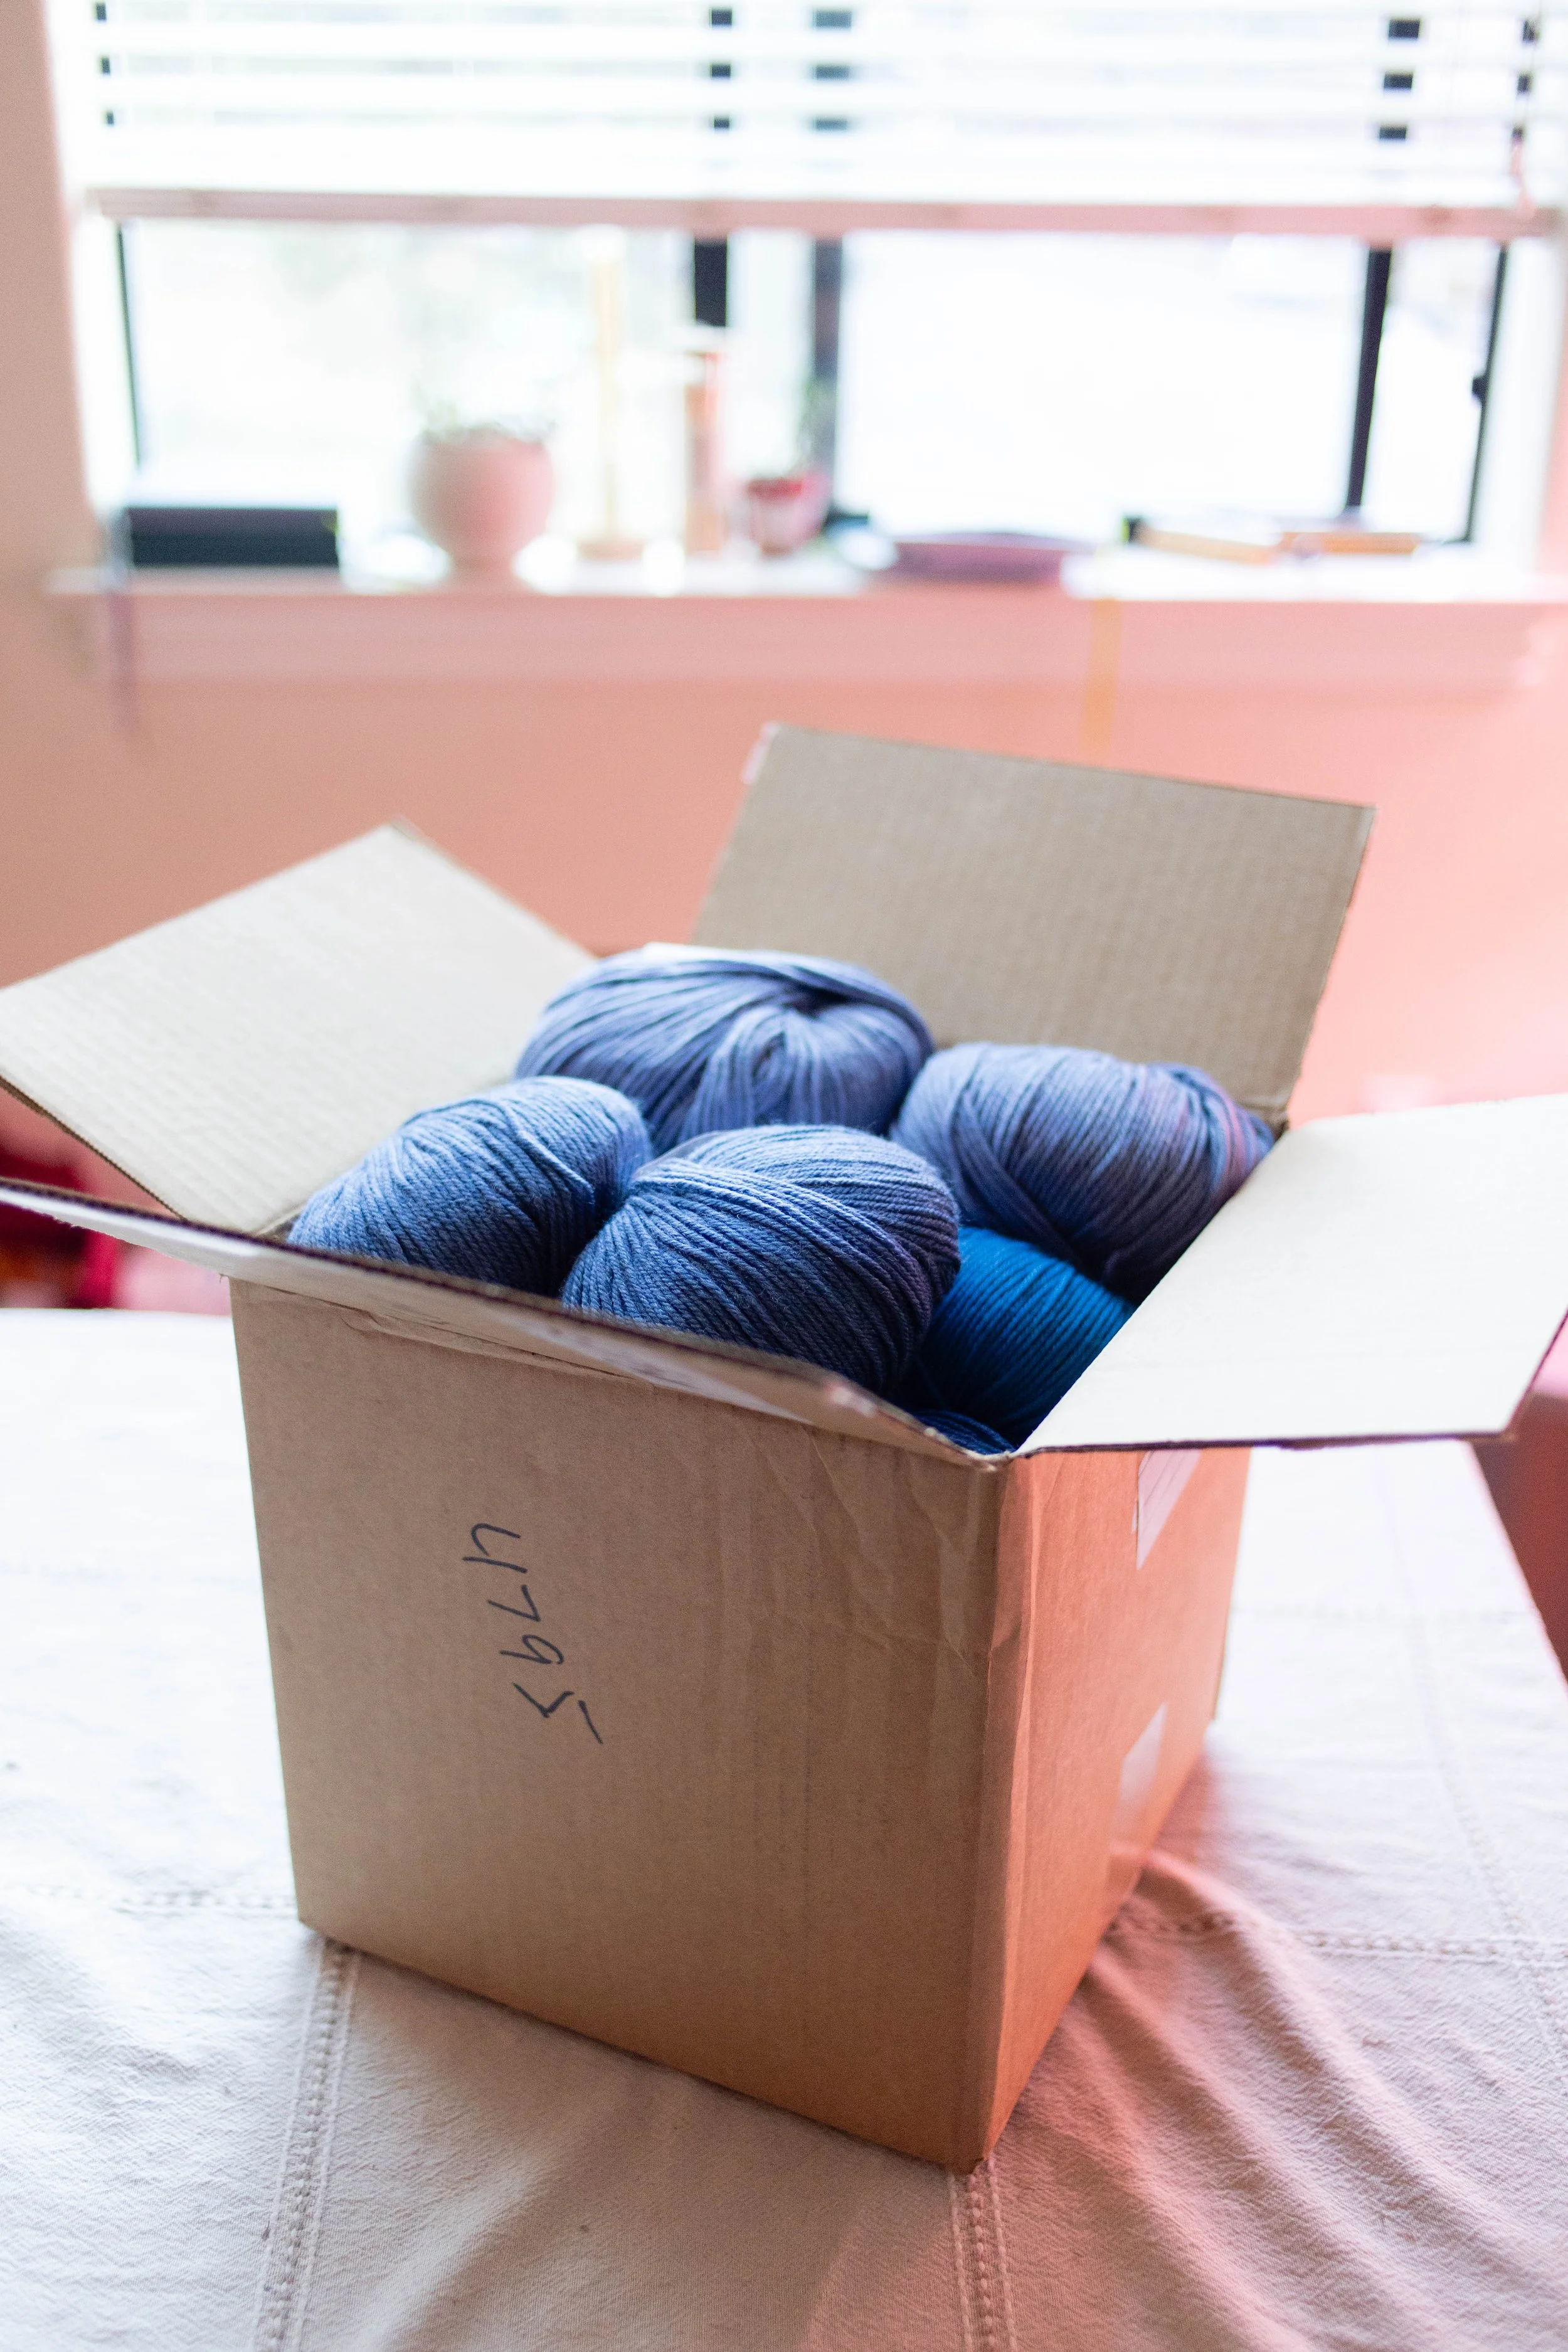
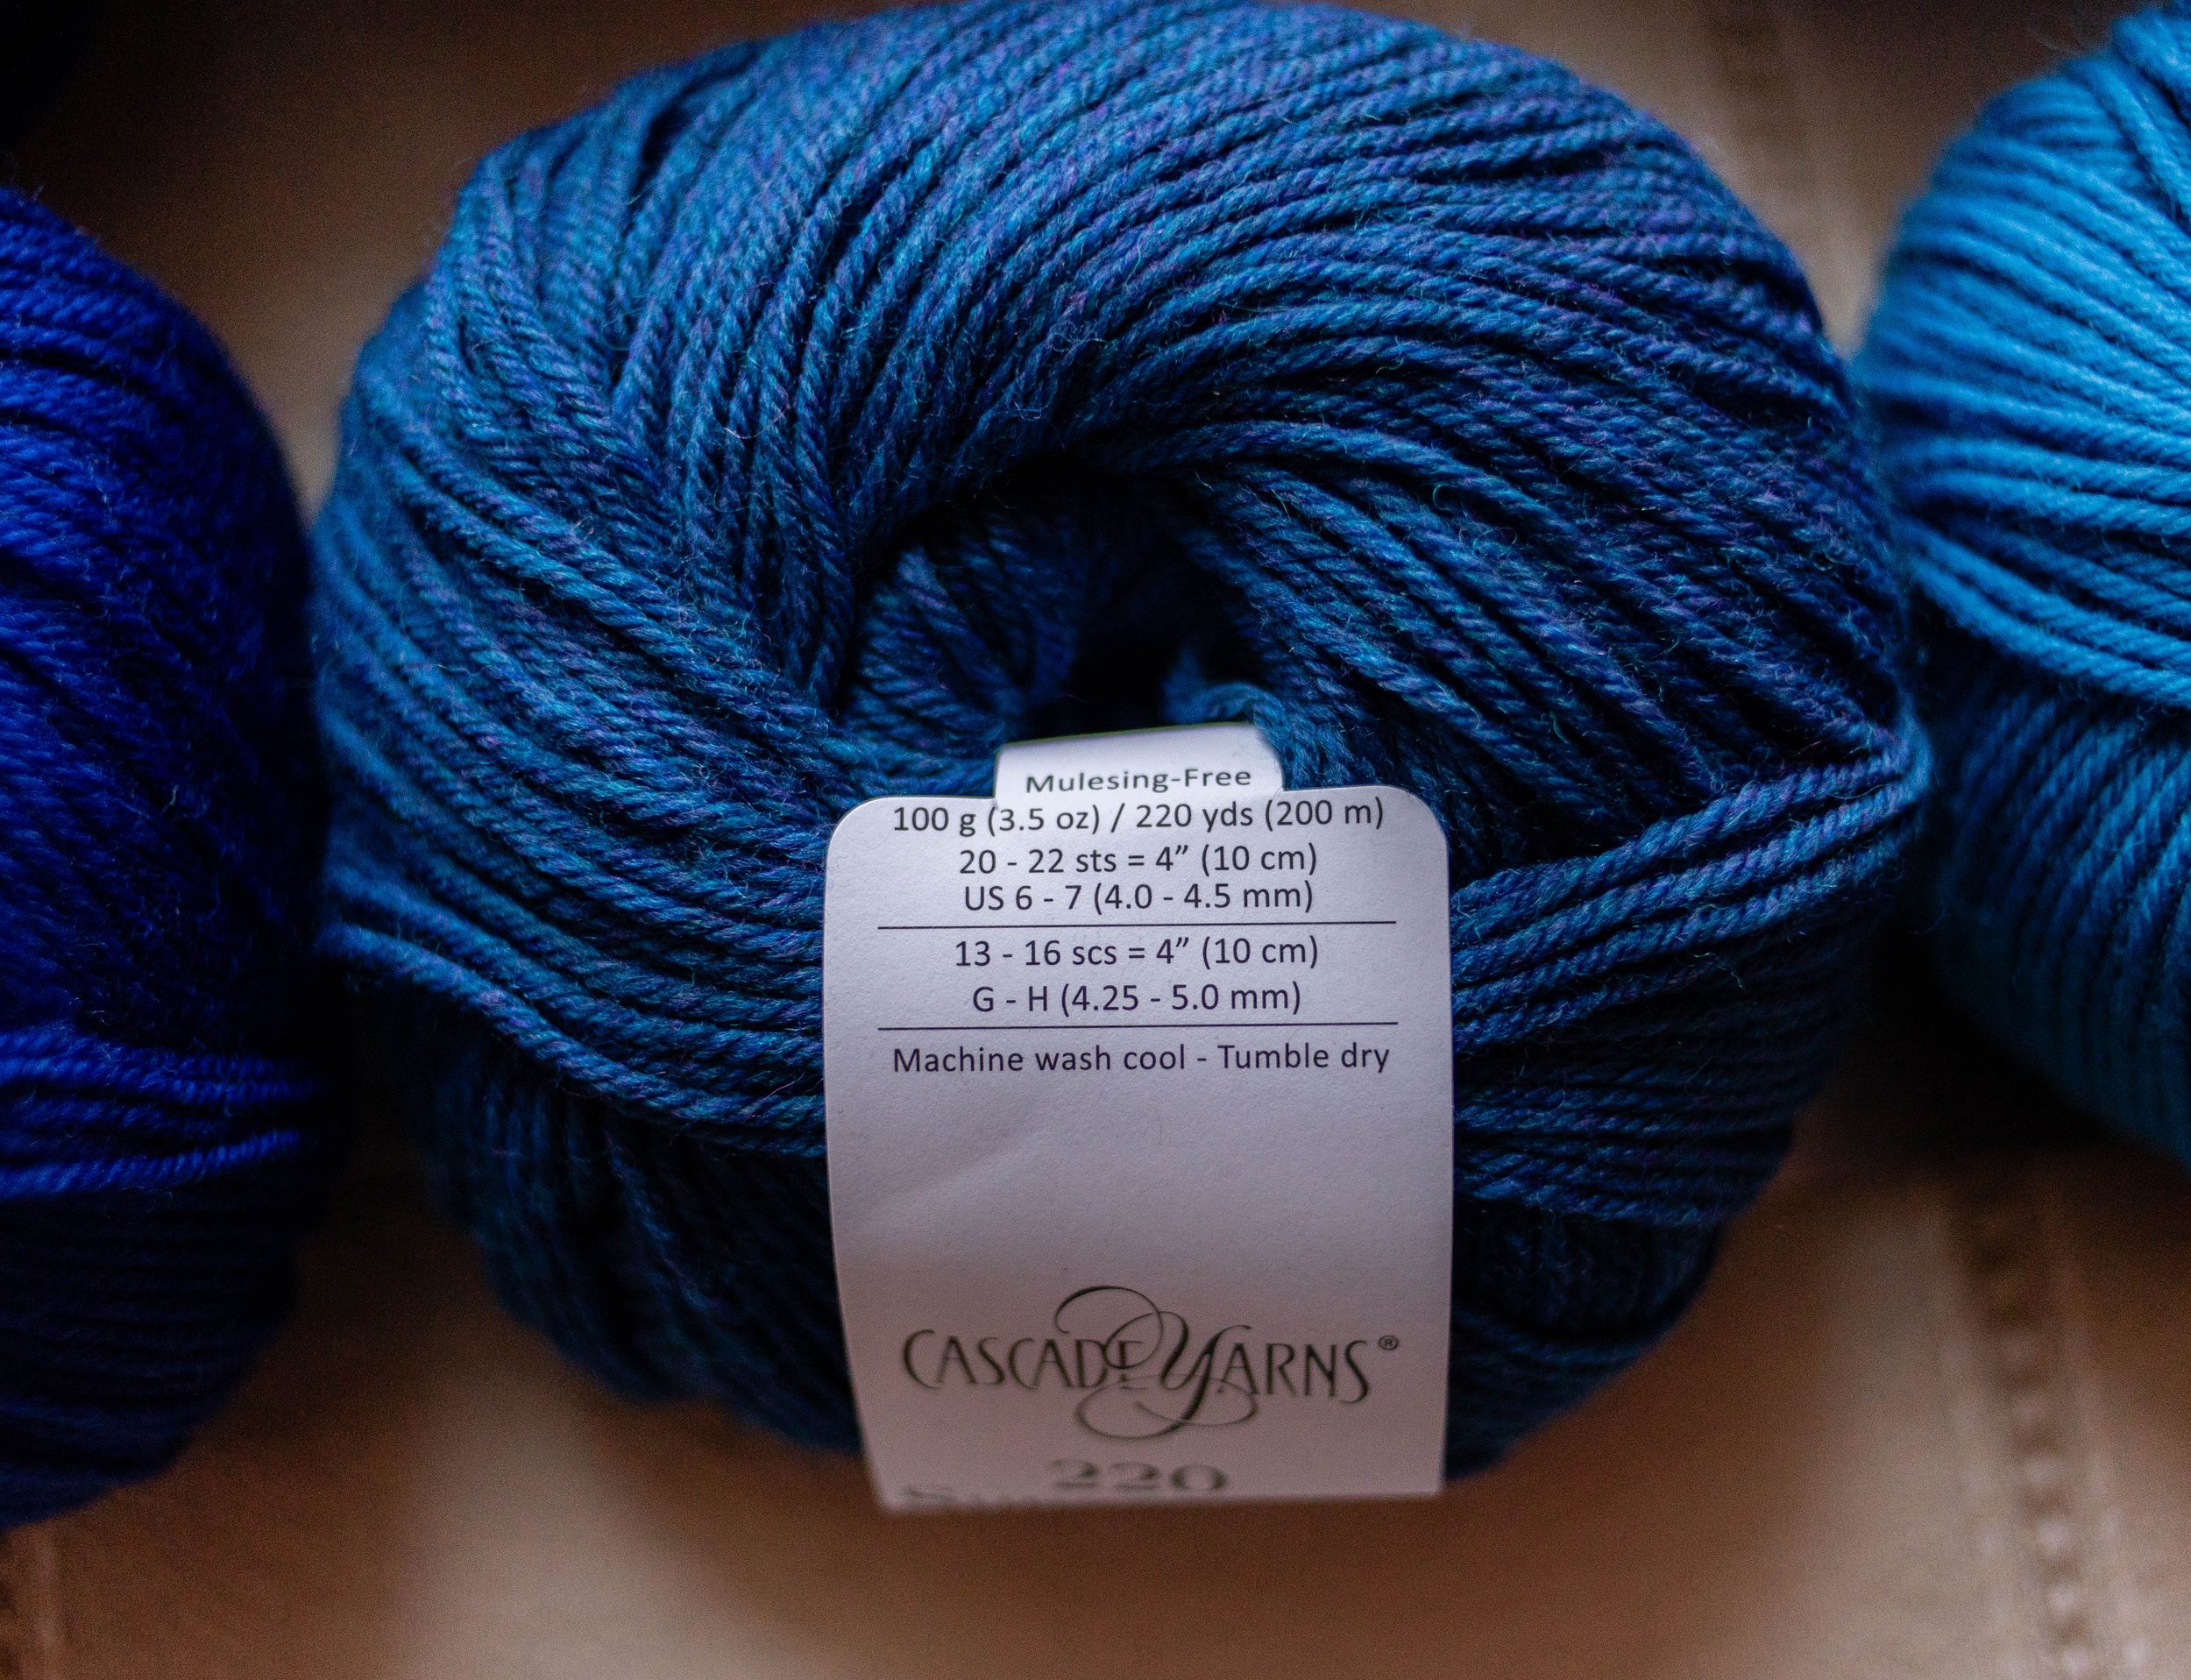
This is what I received. I’m hoping it is enough, but I will update this post if it is either too much or too little!
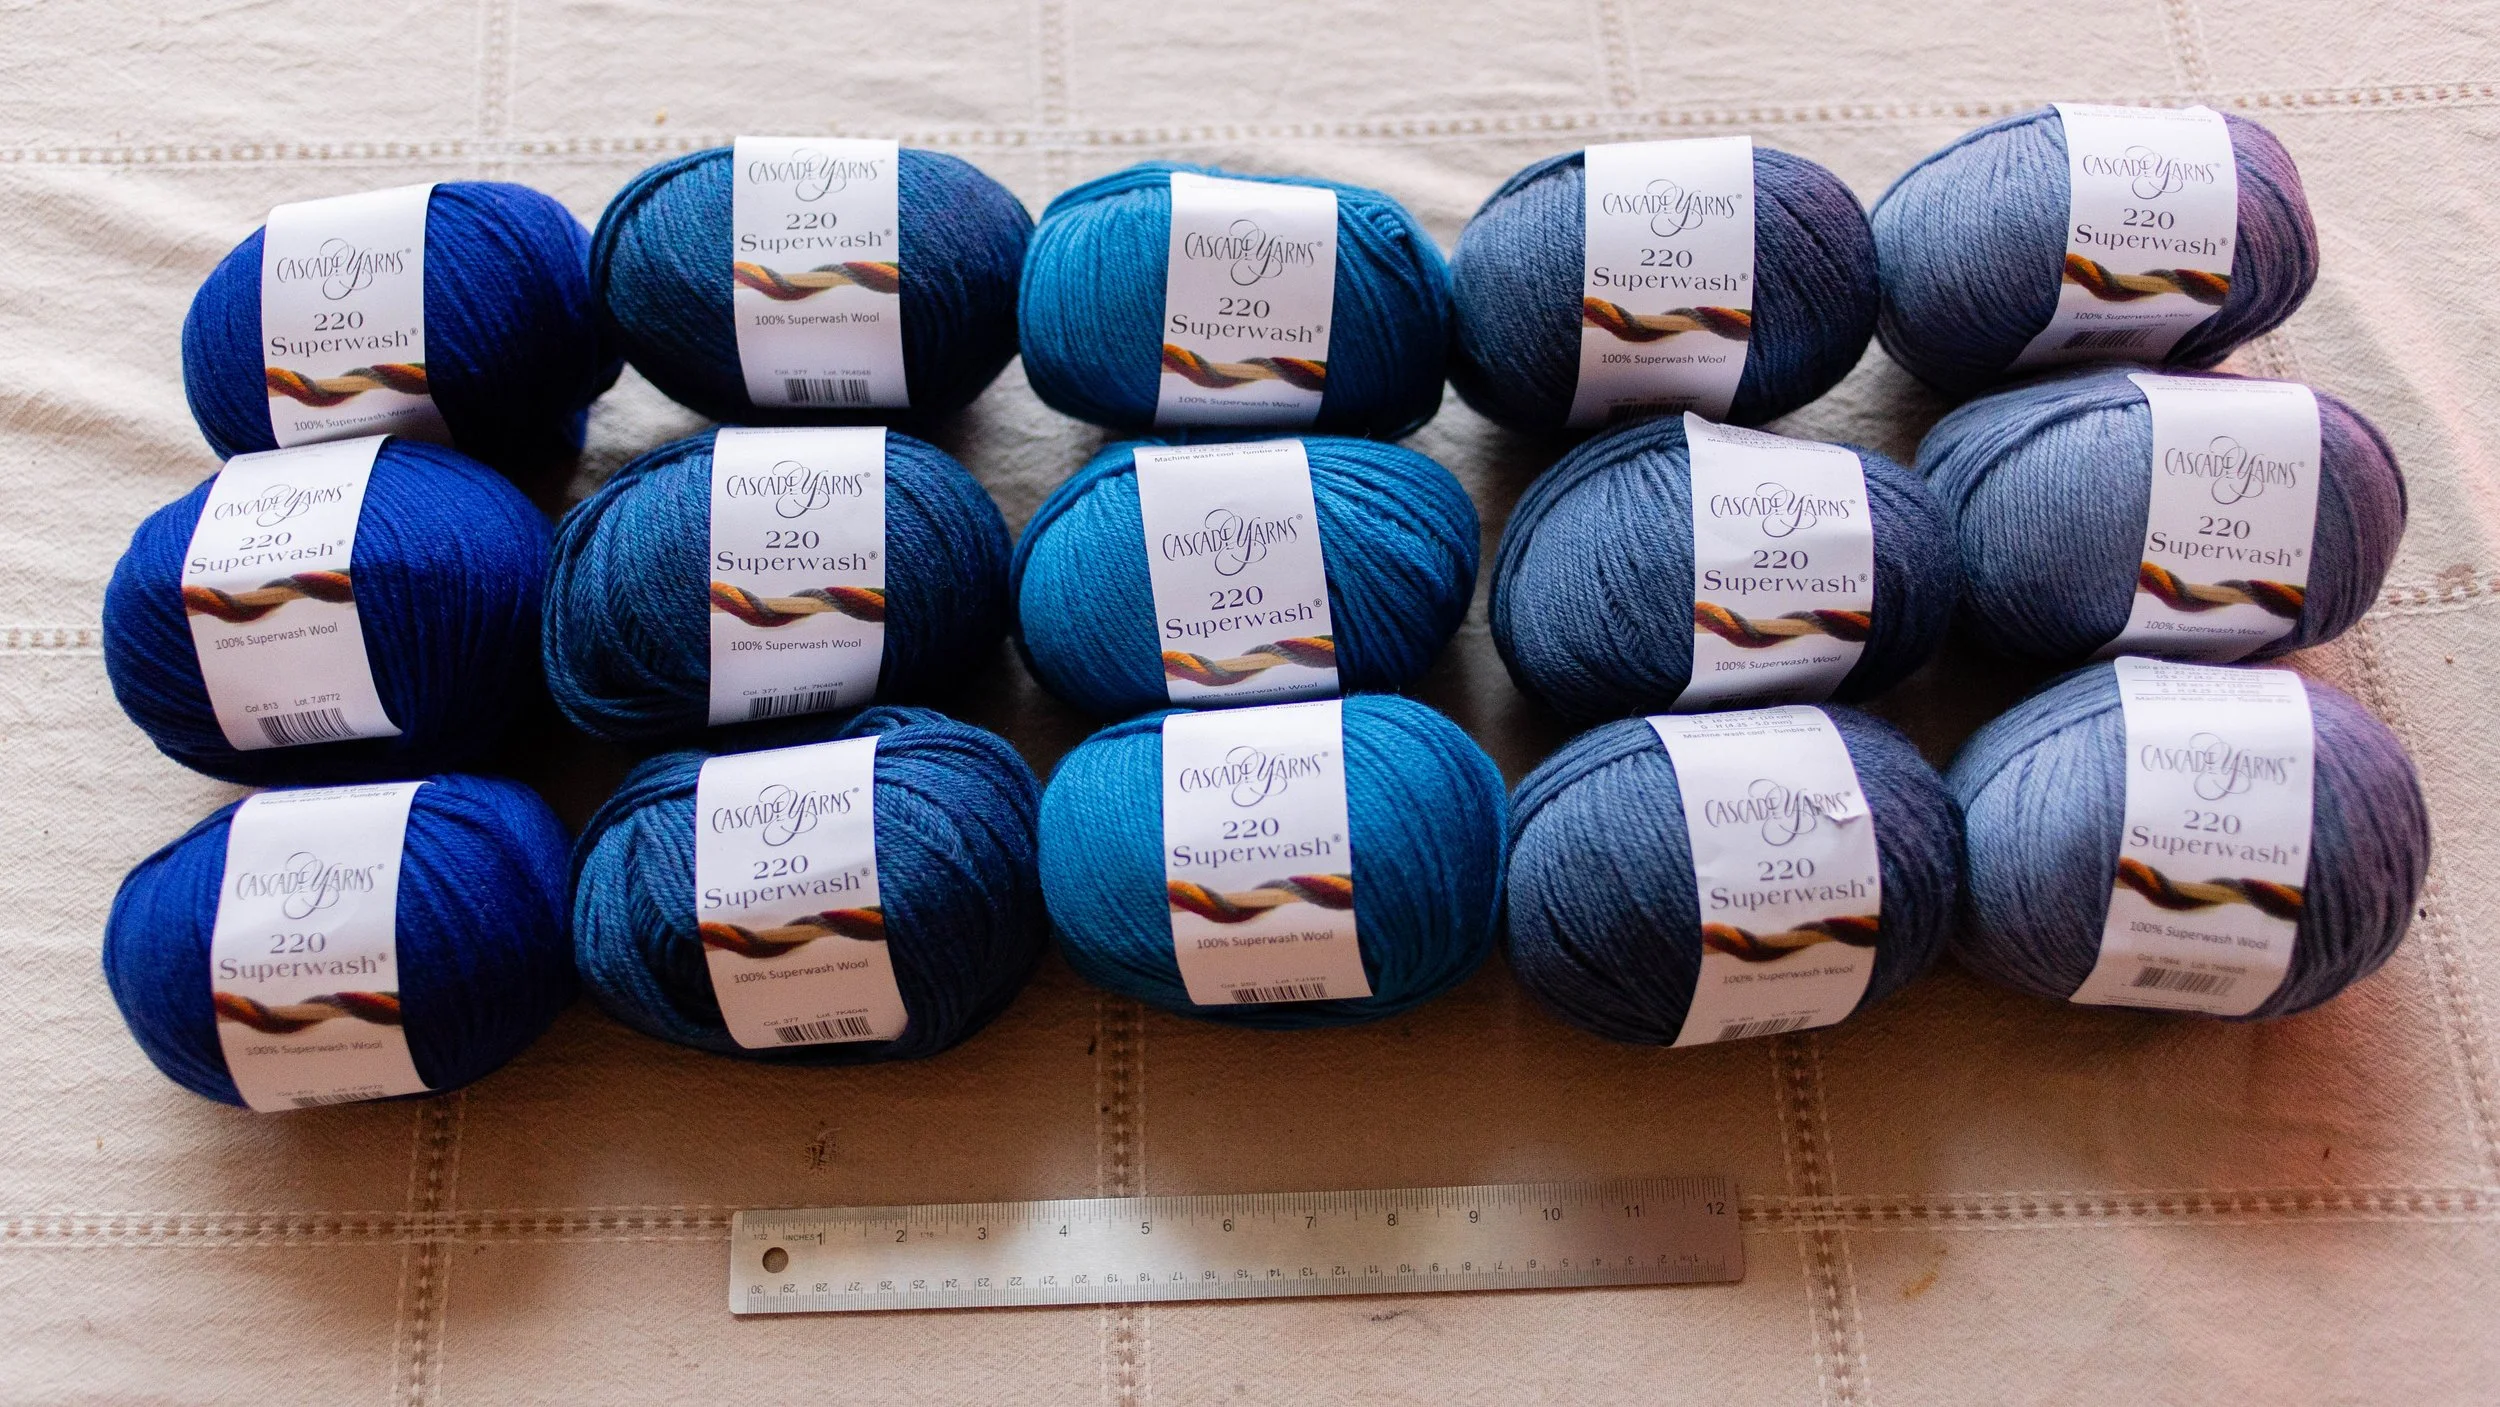
The colors that I ended up getting based on my kid’s input were, from left to right are:
- Color 813: Blue Velvet
- Color 377: Lapis Heather
- Color 252: Celestial
- Color 904: Colonial Blue Heather
- Color 1944: Westpoint Blue Heather
STEP 2: FINDING THE COLOR PATTERN
The idea behind a temperature blanket is that the color of each row is based on the temperature of a specific day at a certain location. Since my plan is to make one of these blankets for each of my kids, the temperature I am going to use is the daily high on each day of their first year of life in our hometown. (I figure the high will give me more of a swing than the average.) Now, you COULD just download the historical temperature data using a website such as Climate Data Online Search, make your own legend matching each of your colors to a certain temperature range, and then figure out the color each row should be. If you decide to go this route, you’ll want to select Daily Summaries for your Weather Observation Type/Dataset, choose your date range, and enter your zip code.
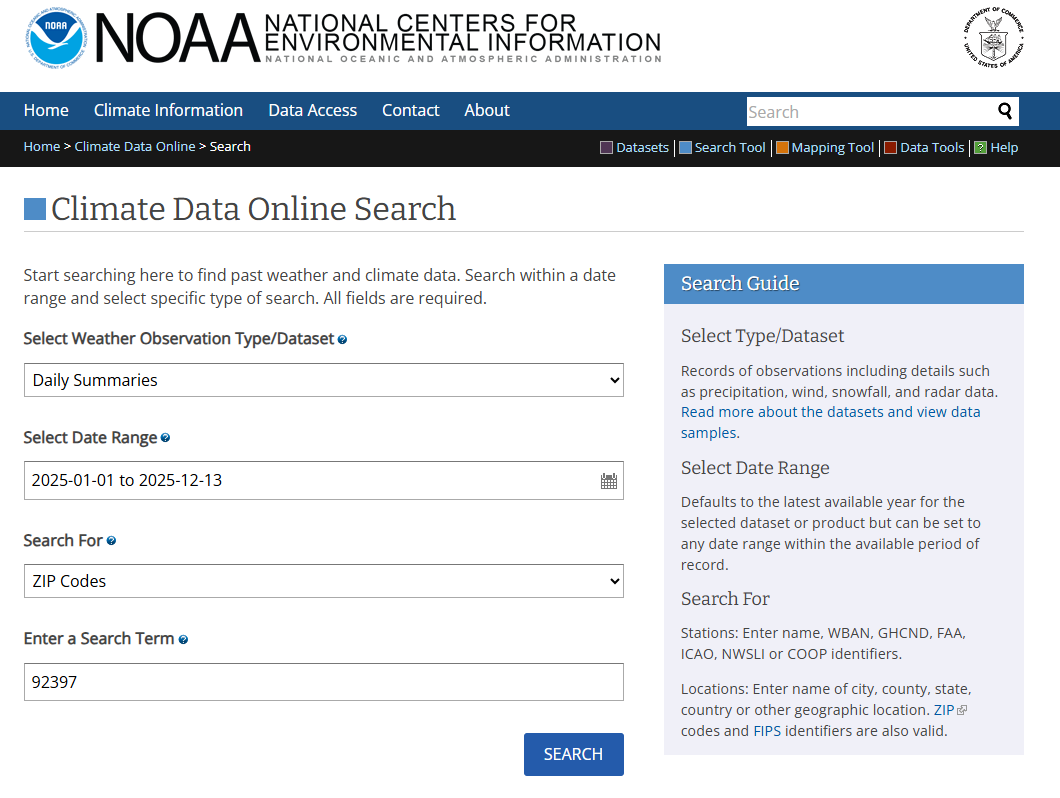
If you go this route, you will have to add your requested dataset to the cart and “purchase” it, but it’s free. You should receive an email within a few minutes containing the data you want.
I started on this path, then realized that there is a really handy website that will handle all the data and let you visualize your blanket at the same time! It’s called https://temperature-blanket.com/. To use this website, you simply add in your location and the starting date for your one-year time period. I did not use my kid’s actual birthday in the image below to respect his privacy.
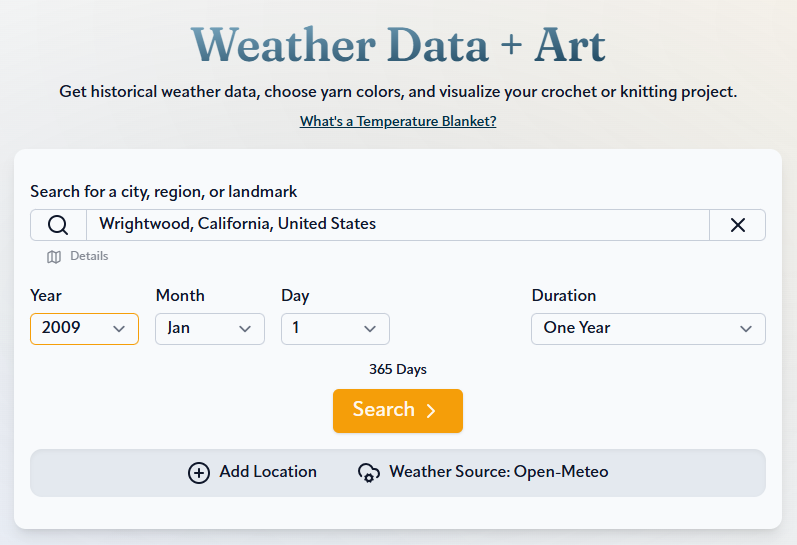
When you hit search, a graph of all the specific temperature data will appear. This exact information is not super important, but it might be interesting to note the highest temperature and lowest temperature reported in your window. Make sure it seems reasonable just as a sanity check! Next, hit the tab “Colors” at the bottom of the screen.

The first thing I did on the colors tab was reduce the number of colors from 10 to 5. I’m sure the blanket would look fantastic with 10 colors, but I like to keep things simple.
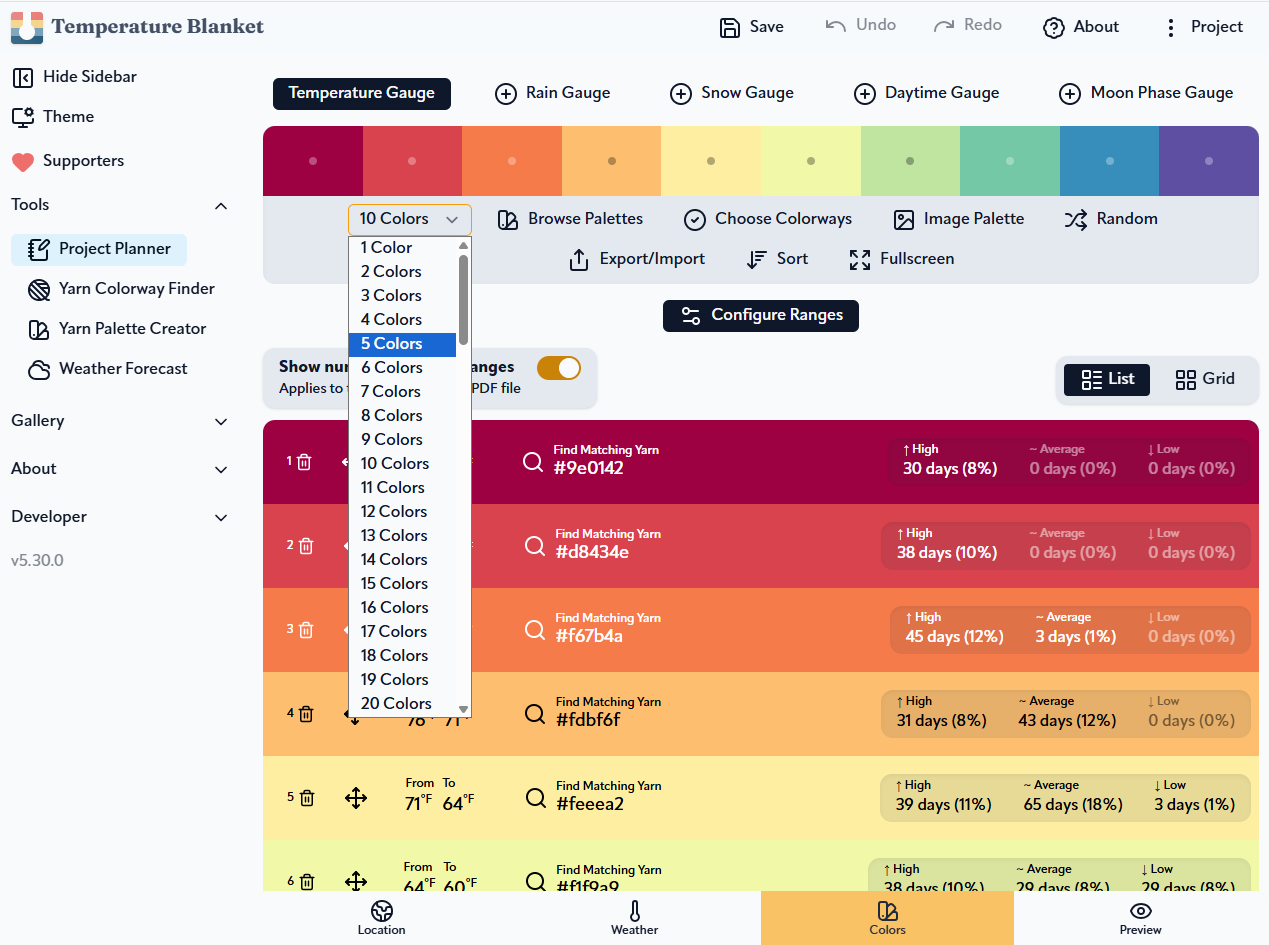
Next, you’ll want to click on “Find the Matching Yarn” for each of your colors and choose the exact yarn colors you want to use based on the yarn you purchased (or are thinking about purchasing). The first color will correspond to the “hottest” color.
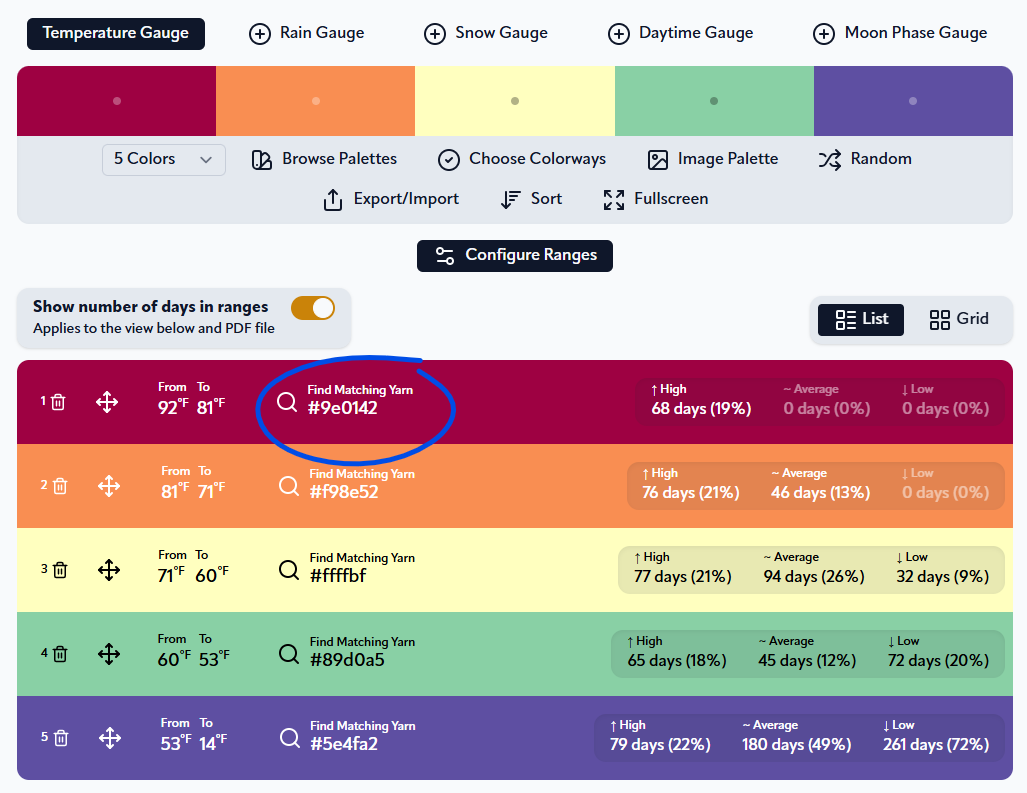
My son and I had a minor disagreement in that I thought the darkest color should naturally be the hottest and he thought it should be the coldest. It’s his blanket, so we went with his preference! They have SO many yarns on this website, that it’s very likely you’ll find the exact yarn you want to purchase.
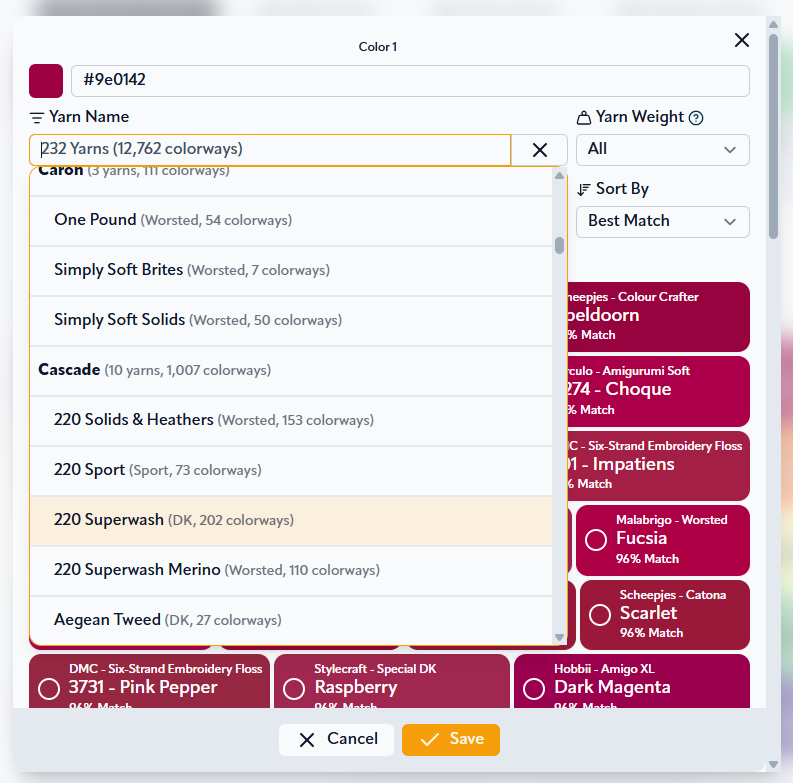
Since all of my yarn is Cascade 220 Superwash, I set it as my default yarn. I was able to find all 5 of the yarn colors that I purchased. I did need to use the yarn name and not the Color number listed on each skein. You can find the name of the color on either your receipt or on the Love Crafts website.
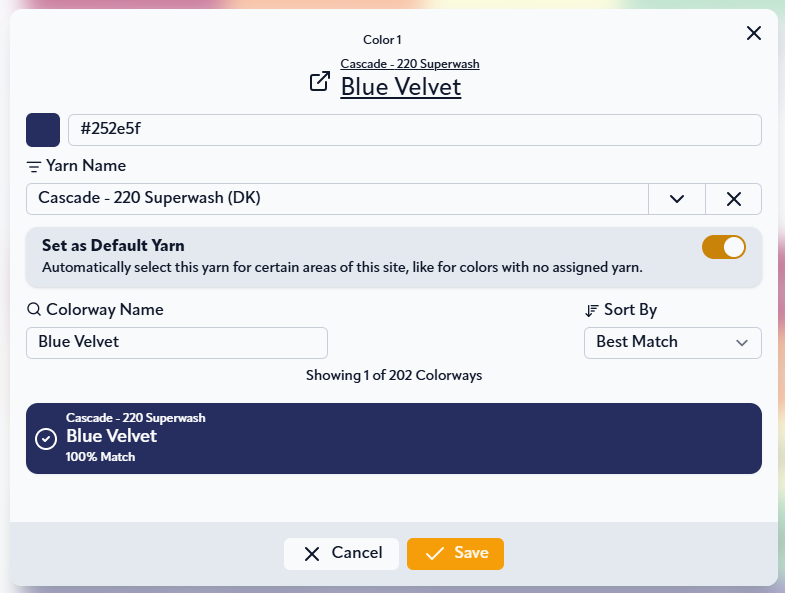
Unfortunately, one of my 5 colors (Color 904: Colonial Blue Heather) was way darker on the website than it actually is, so I chose a different blue that I felt better matched the actual yarn I received. Clearly their site is not perfect, but this is still an extremely valuable tool!
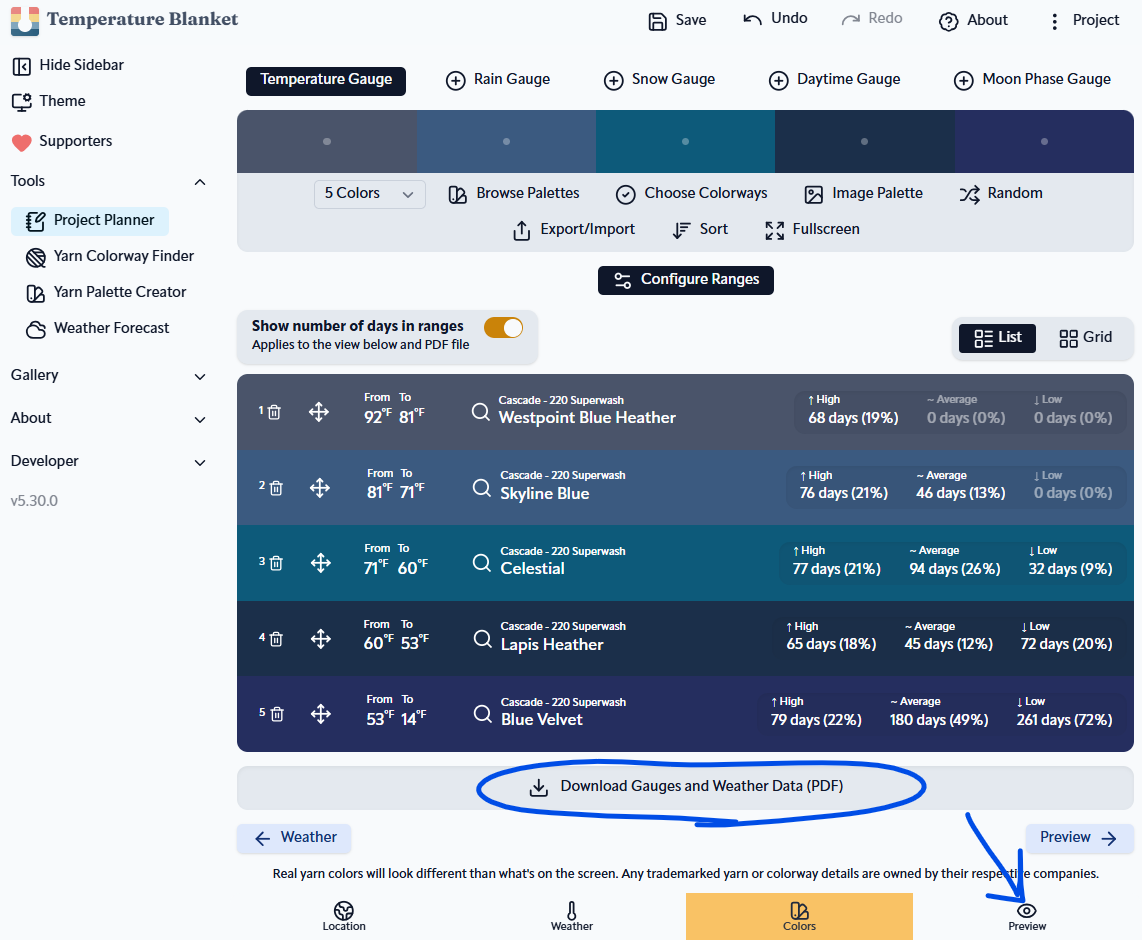
This is the final color scheme I ended up with. If you click the Download Gauges and Weather Data button, you will have exactly what you need to make your blanket.
I also recommend hitting the Preview button at the bottom to get a sense what your final blanket will look like. You can play around with different designs if you want. I briefly considered zig-zags, but ultimately decided I personally prefer the straight lines.
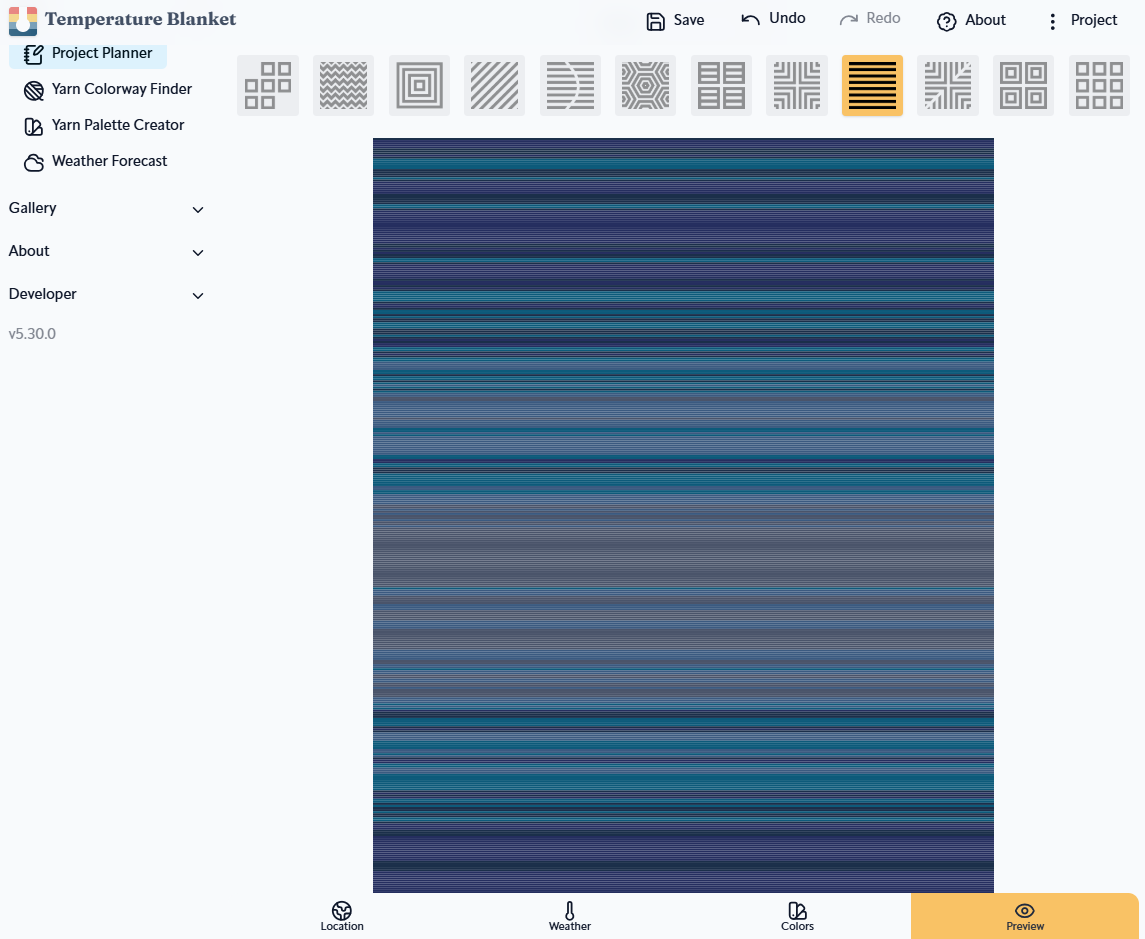
To make your blanket, you will want to print out your downloaded data and look at the color data for each row. I decided to go with the days high, but you can really choose any of the columns. Underneath the preview of the blanket are settings where you can switch to other options besides high. Personally, I chose to use the column with the hottest temperature, but it was a fairly arbitrary choice.

STEP 3: DECIDING ON THE STITCH
Once I decided on what yarn I was using and figured out what color each row should be, I just needed to finalize the details of the pattern, like what size crochet hook, what stitch to use, and how many stitches per row. I thought about doing a single crochet, but after some research, decided the moss stitch (also known as the linen or granite stitch) is probably better for this project. It will make the final blanket a little thicker and since you are crocheting into the previous row, I think it will minimize the risk that the blanket will get unreasonably long.
On the yarn itself, it says to use a size G or H crochet hook. I believe the G hook actually comes in two variation G/6 and G/7. Personally, I own a G/6 (4.25 mm) hook and a H/8 (5 mm) hook. I made a swatch of 15 single crochets using both hooks to help me decide which to use.
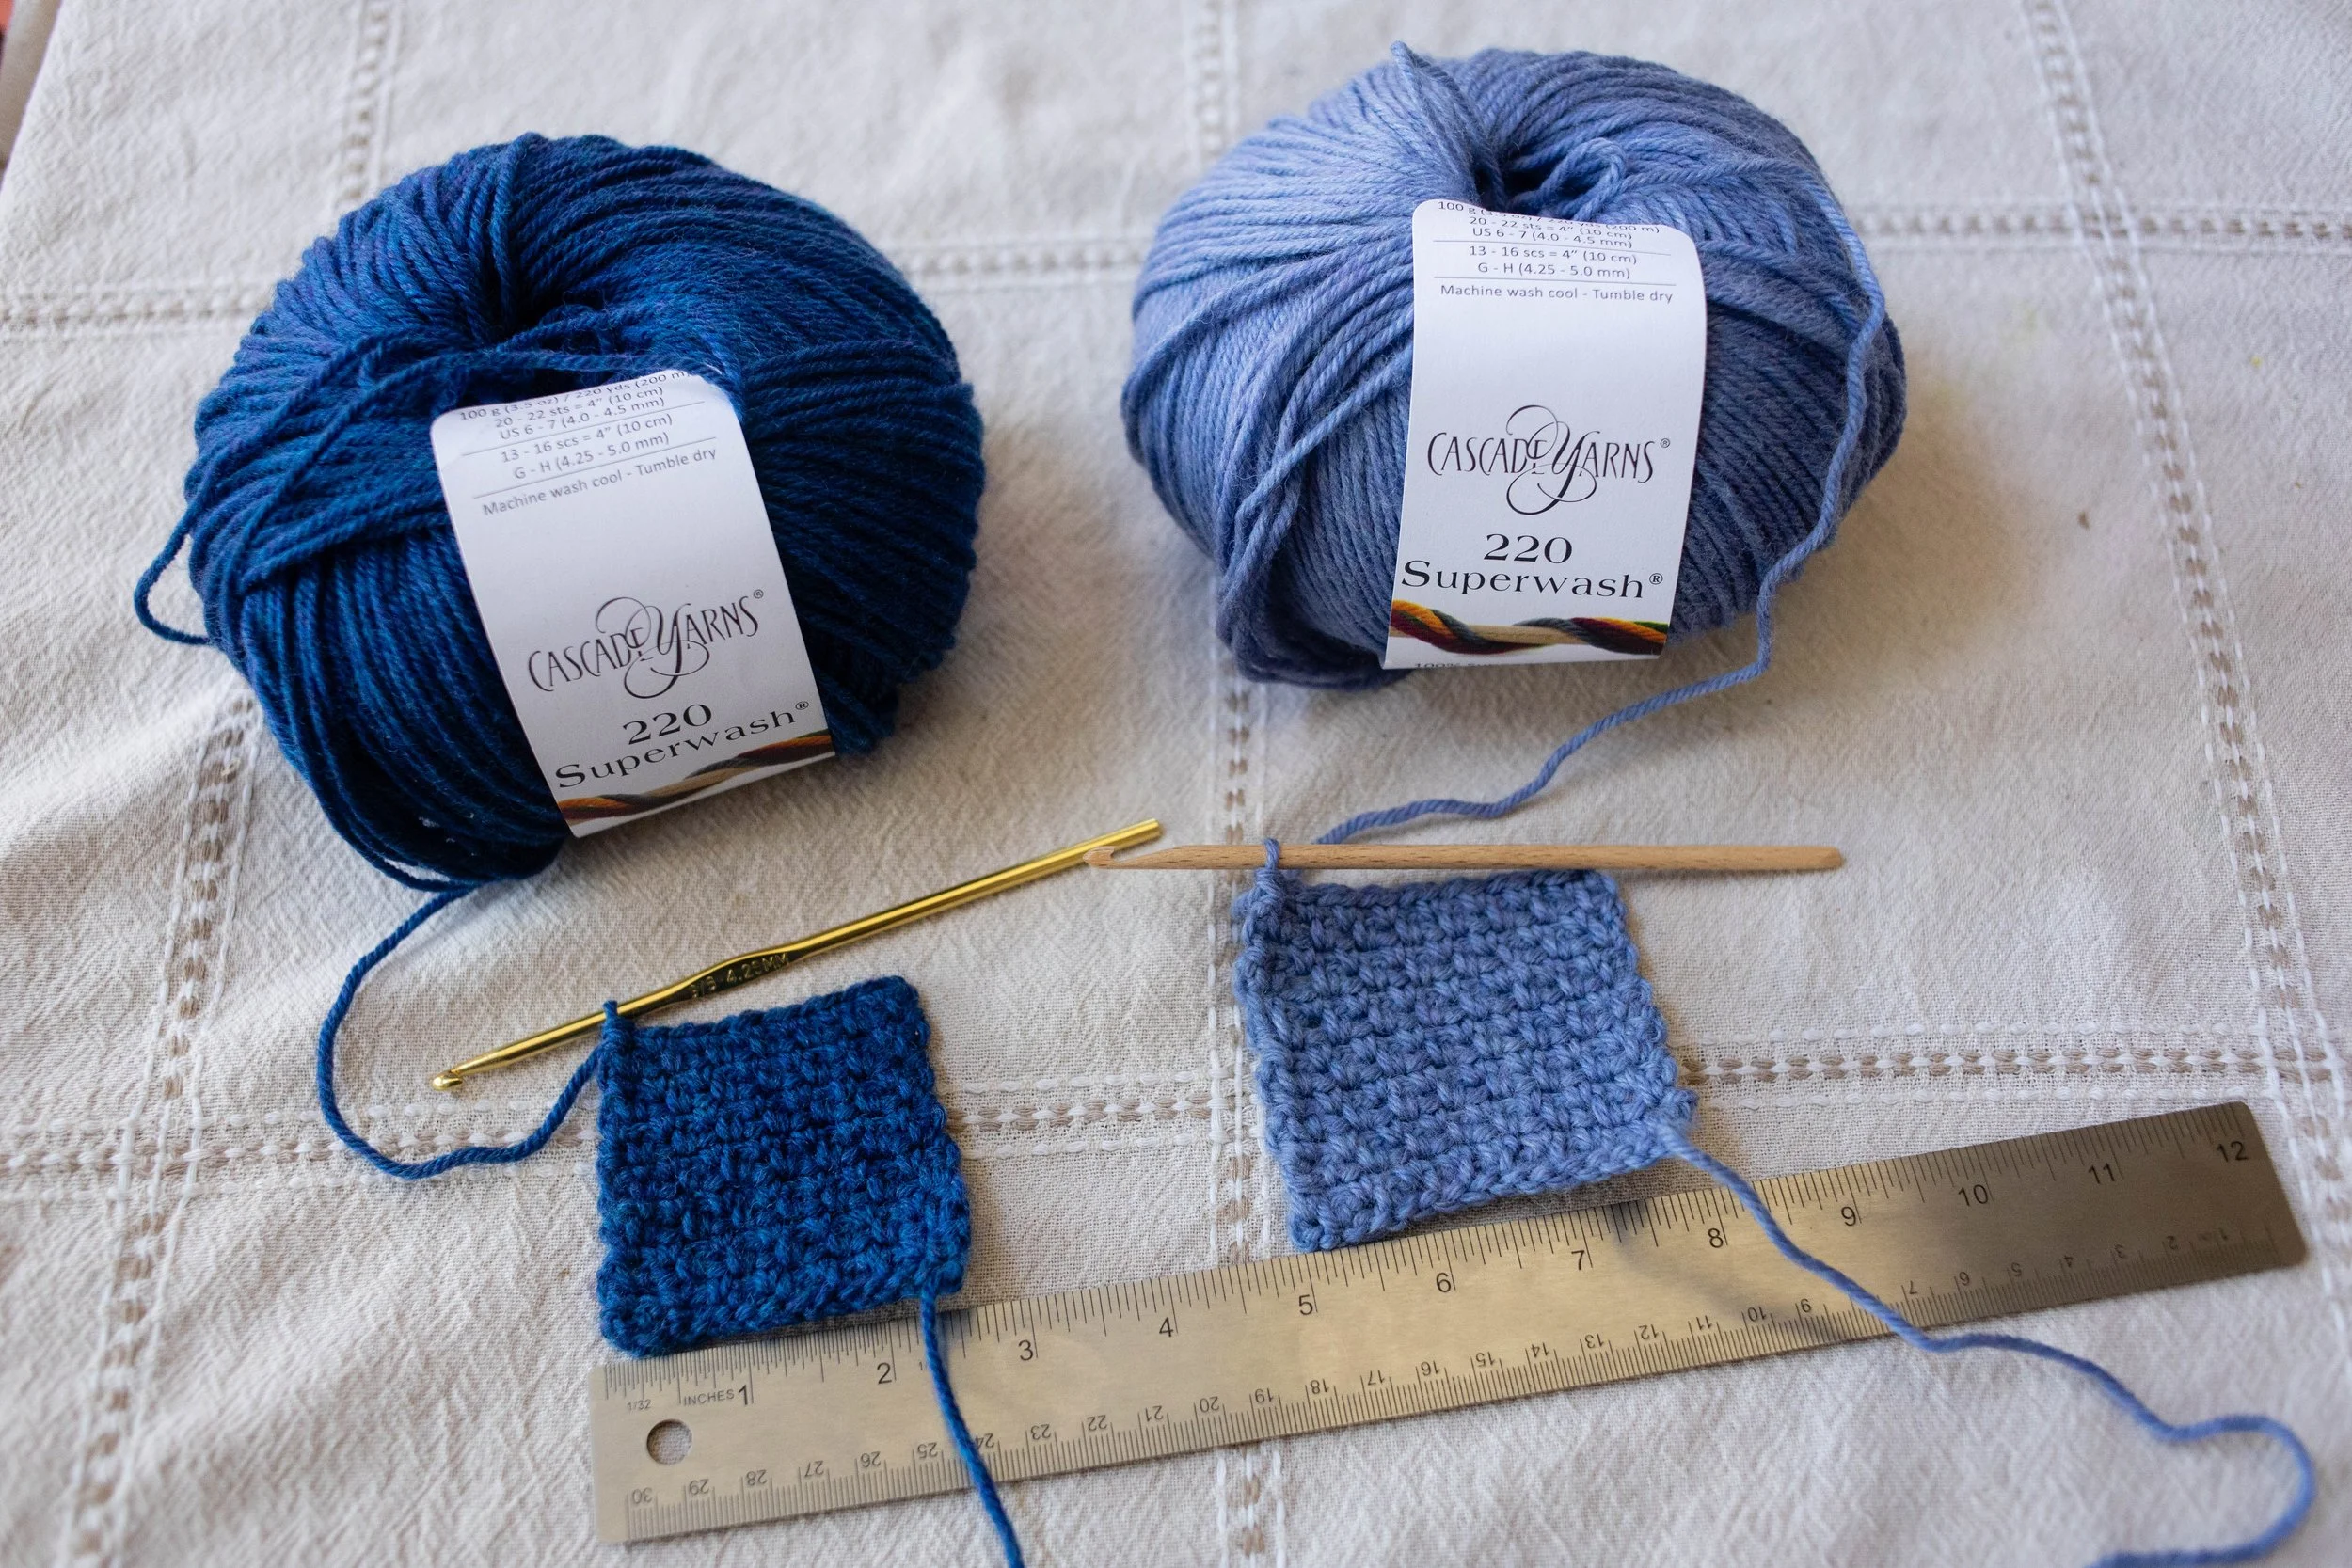
The G hook produced a roughly 2.5 inch square while the H hook produced a 2.75 inch square. I had thought initially I would want to use the smaller hook, but after doing my swatches, I liked the larger needle better. My estimate for blanket length with the larger 5 mm hook is 60” or 5 feet which seems like a good length. I actually would not mind it being even longer than that, so maybe next time I will try a bigger yarn weight.
Next, I tried two different methods of doing the moss stitch with the bigger H (5 mm) hook. This tutorial by Daisy Craft Farms provides a very simple, widely accepted explanation of a crochet moss stitch. It starts with an even number of stitches and the number of stitches per row is the number in your chain row minus two. You start the moss stitch right away. However, when I was watching tutorials, I stumbled across this one by Ginger Knots that uses a single crochet foundation row and does two single crochets at the end of each row. I decided to try both. The Daisy Farms tutorial is on the left below and the Ginger Knots one is on the right.
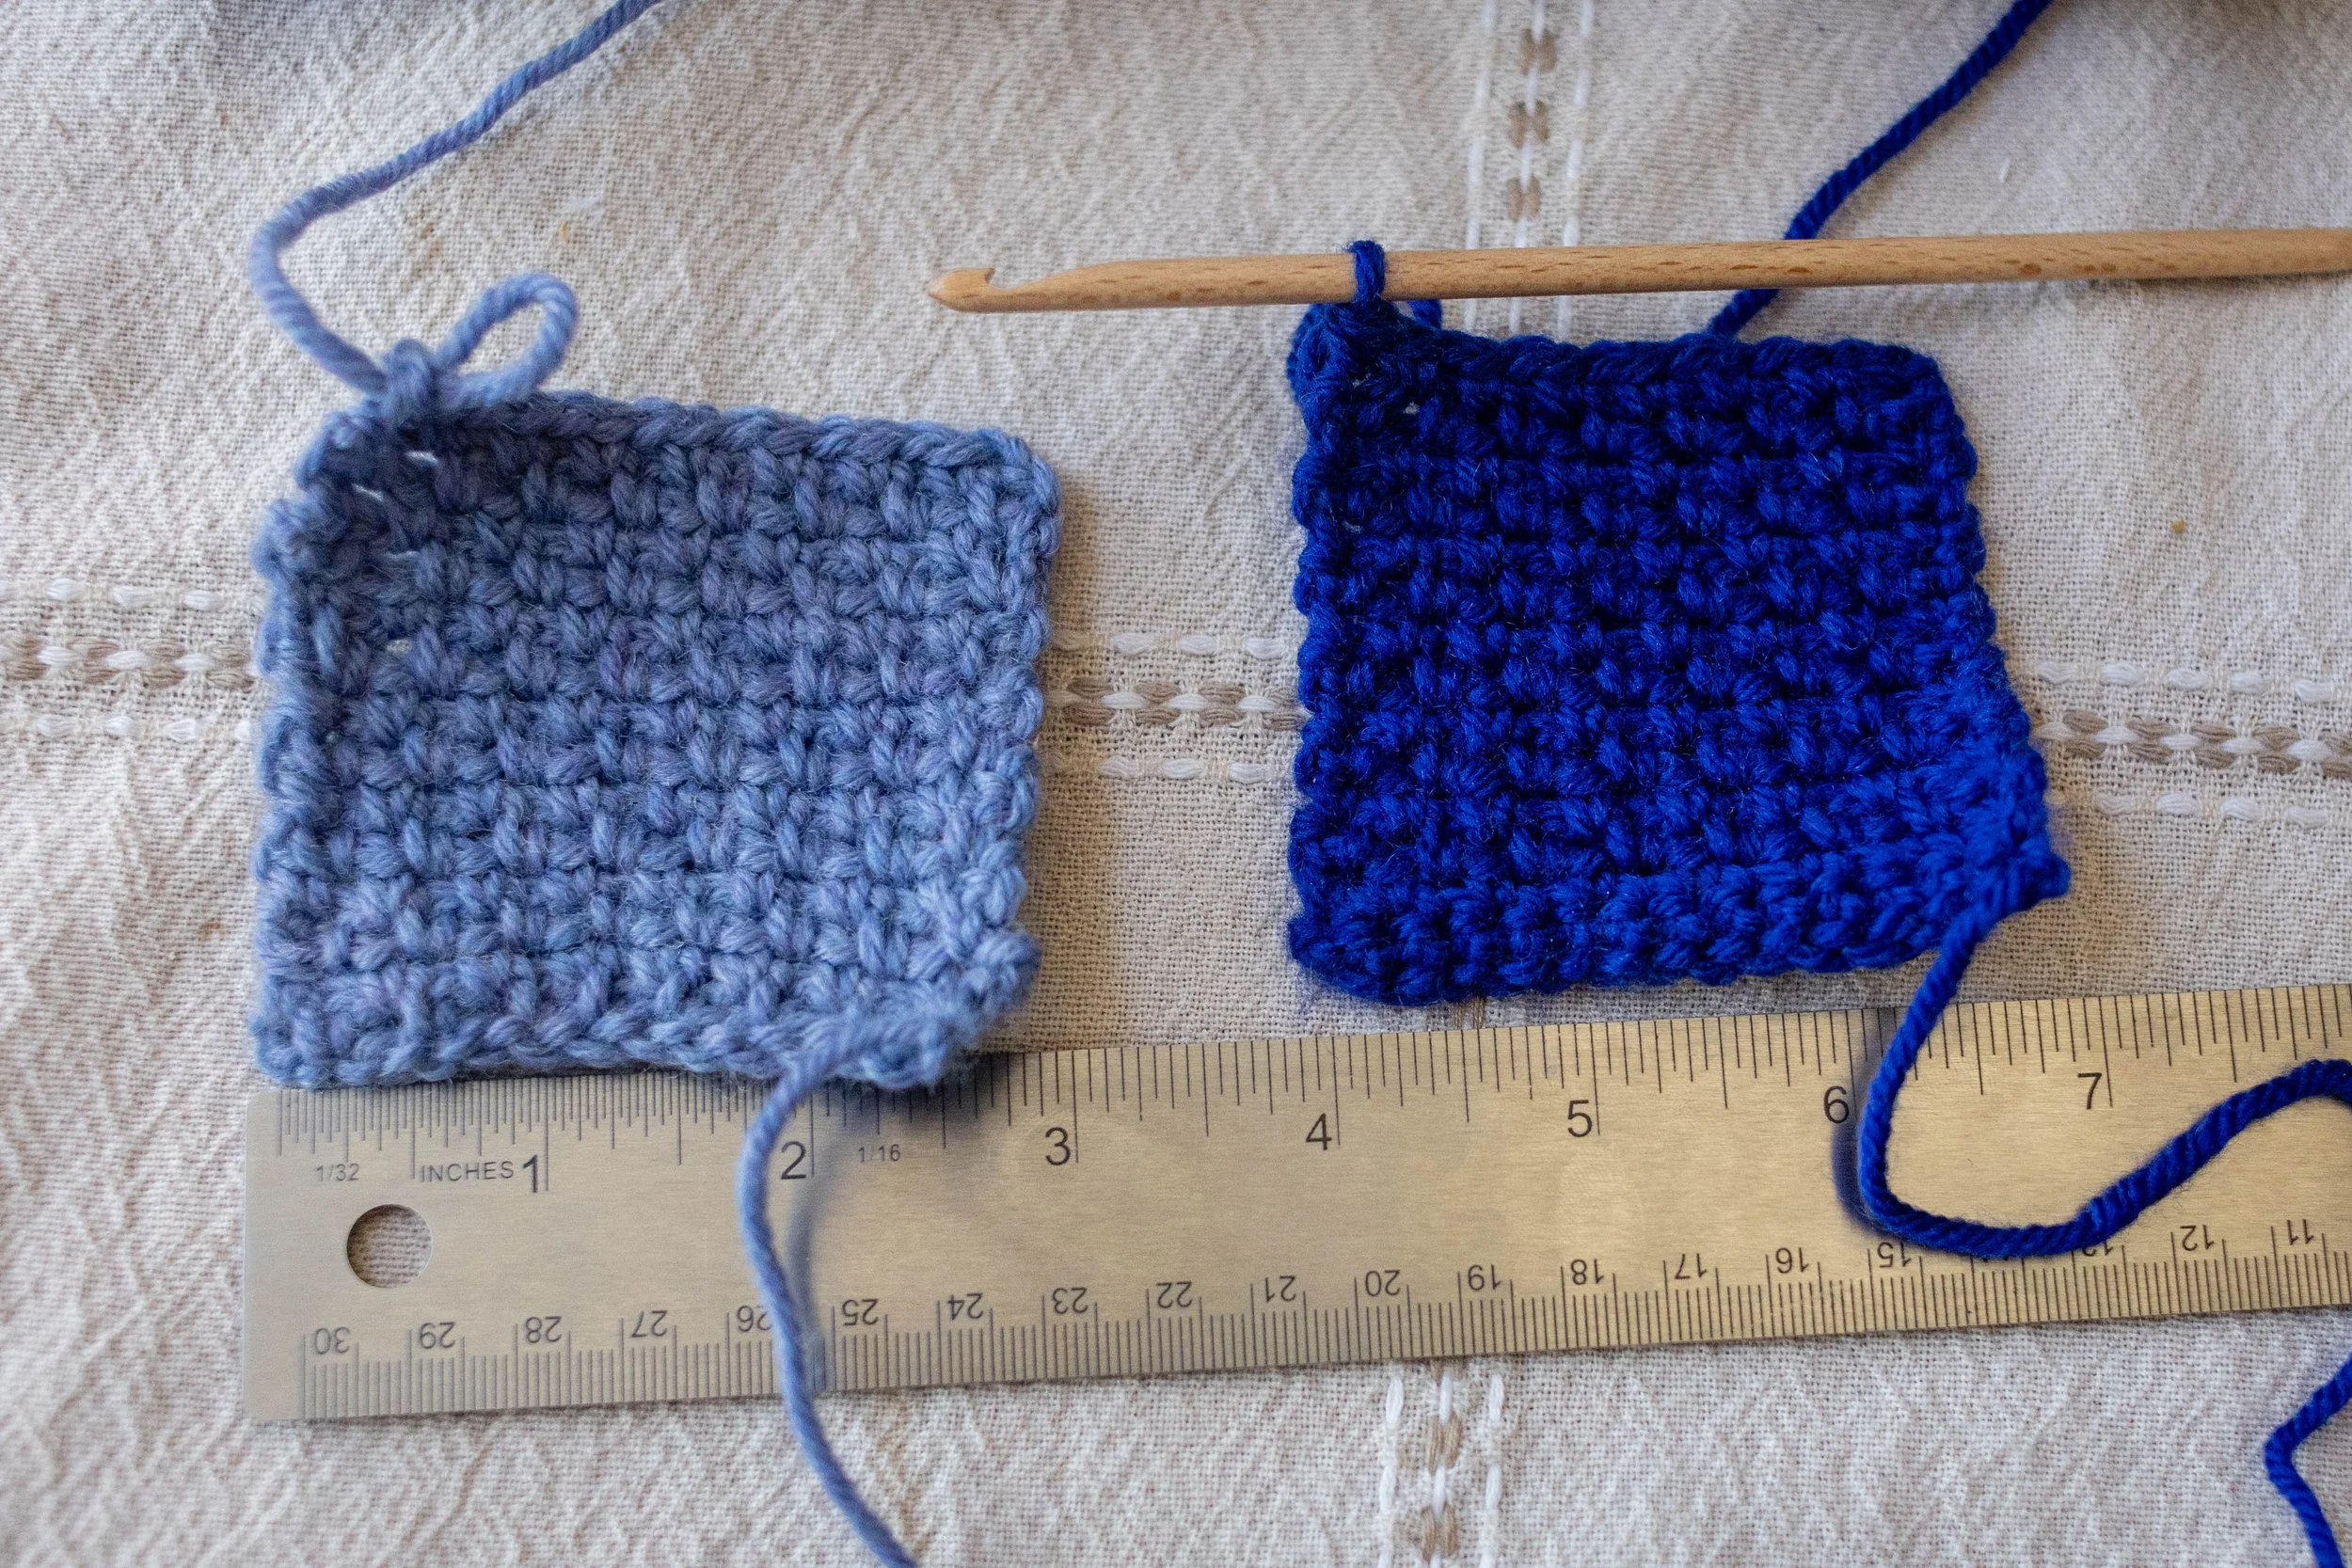
They ended up very similar, but I decided that personally, I liked the edges better in the Ginger Knots version on the right. In case these tutorials go away at some point in the future, what makes this tutorial different from traditional moss stitch is that the number of stitches per row is equal to the number of stitches in the chain row minus one. You single crochet in each stitch of the first row (skipping the first stitch, hence the minus one). At the end of each row, you chain one, turn, single crochet into the first stitch, chain one, and repeat the single crochet + chain until the very last stitch. Since you have an even number of stitches, the last stitch should be a chain, but instead you will single crochet into it, so you have two single crochets in a row. This gives the borders a little more structure.
The only problem with this is that I felt like the base single crochet row was a little too long. I decided to do an experiment where I used the G hook for my chain and foundation single crochet and then switched to H when I started the moss stitch on row 2. As a side note, I kind of like that the foundation row, which represents my child’s date of birth, is a little different in that it is all single crochets. I think I am going to actually do 366 rows and then single crochet the last row corresponding to my child’s first birthday. It’s the little things that no one will ever even care about but me, right? 😜 Anyway, this is how my experiment switching hooks turned out.
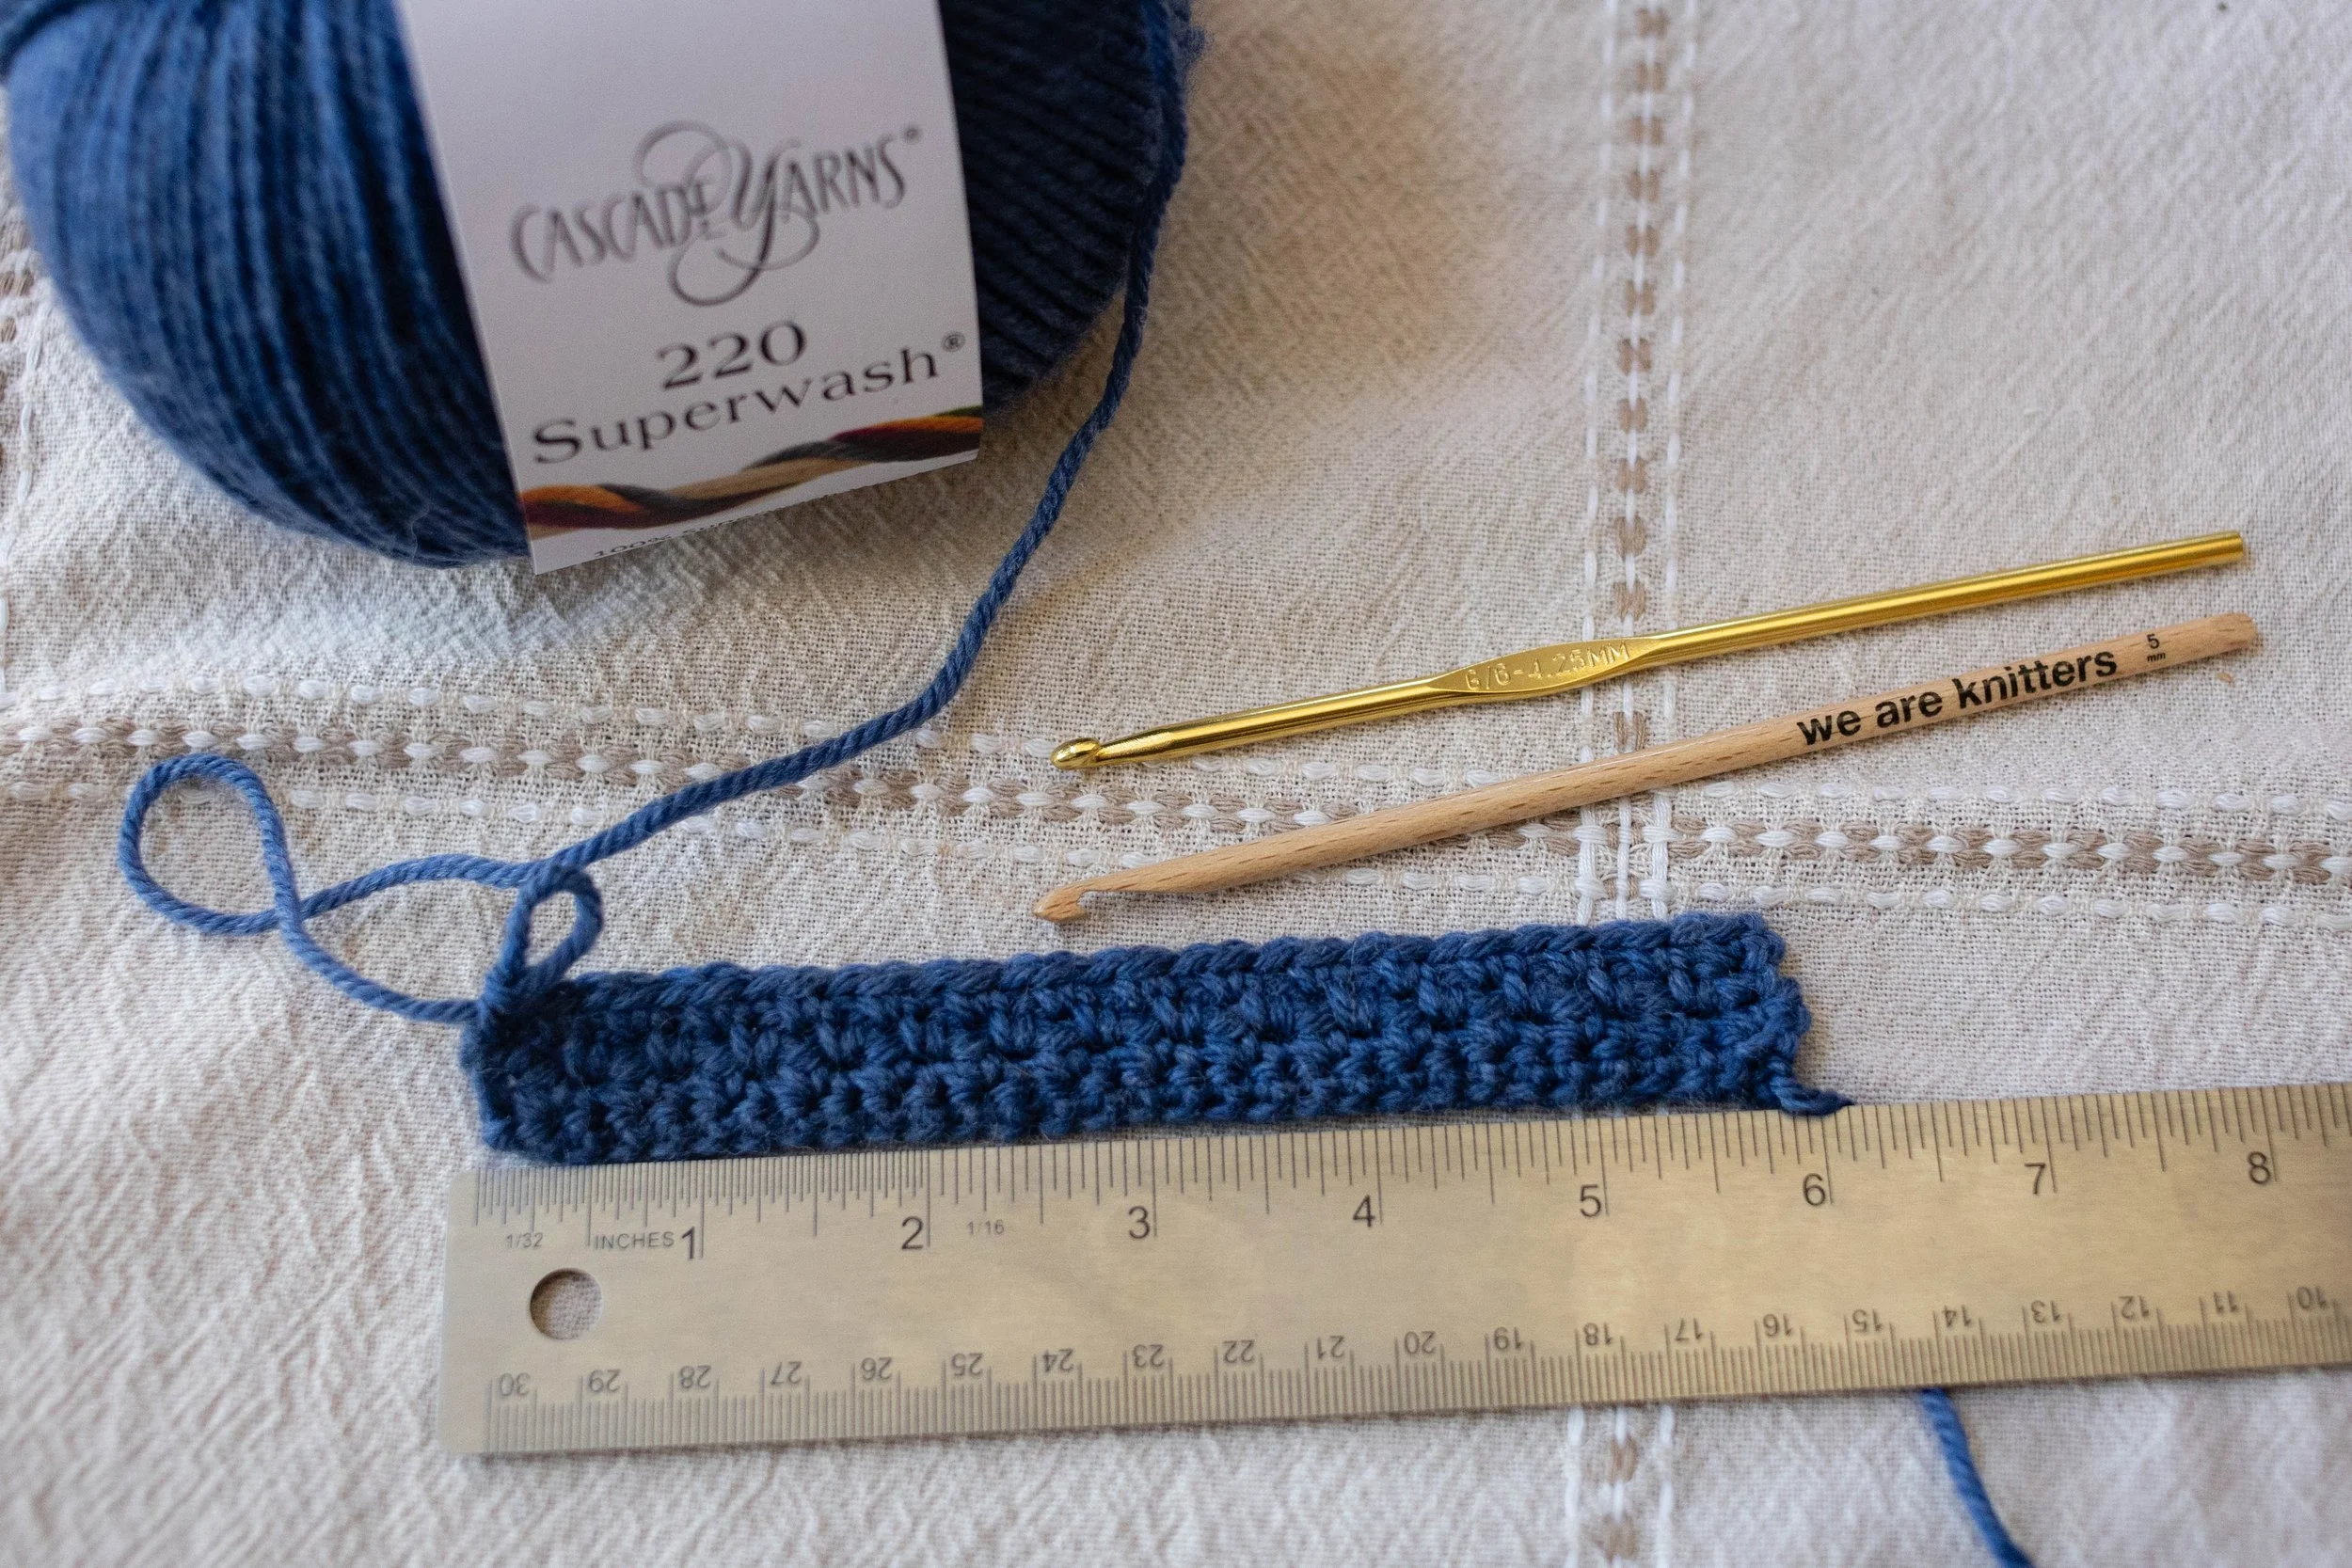
Since I was happy with it looking rectangular, this is the method I decided to use in my final blanket—G/6 (4.25 mm) hook for chain and single crochet foundation row, H/8 (5 mm) hook for moss stitch in remaining rows. I will likely switch back to the G hook for the final single crochet row. Based on the length of my swatches and my tendency to make my blankets a little too narrow, I ultimately decided on a row length of 268 stitches, which meant that I had to chain 269 since you lose one when you start single crocheting into the second stitch. This gave me a blanket that is just a tad under 51” wide. I feel like I might regret not making it just a bit narrower, because I may end up having to buy more yarn. 253 stitches would have made a blanket that is 48 inches wide (with my tension).
When I started the blanket, I estimated that it would end up about 60 inches in length and 51 inches in width. Currently, based on about the foot that I have crocheted so far, the final blanket is on track to be about 58 inches in length and 48 inches in width. This means I’m crocheting a little tighter than I thought based on my swatches, but overall pretty close. It’s likely I can also stretch it to the original planned dimensions if I want when I’m done.
My goal is to have it finished early 2027. I will update this post once it’s complete! For now, I am enjoying having a project to pull out while watching movies with my kids and to keep my hands busy on trips.




 Michelle has a PhD in Engineering from Stanford University and a Bachelor's Degree from the California Institute of Technology.

Leave a Reply