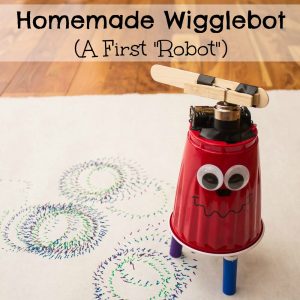
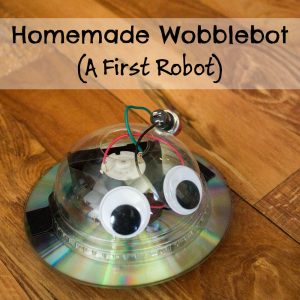
As with our wigglebot, this homemade wobblebot is not technically a robot since it doesn’t have any sort of decision making capabilities. However, it is still a lot of fun to make and a great first “robotics” project for young robot enthusiasts.
Like the wigglebot, the inspiration for this project came from the book, Robotics: Discover the Science and Technology of the Future. However, in that book, the power source was supposed to be a cheap solar panel. Well, we took the solar panel out of a solar lawn light from the 99 cent store, but when we were putting together our bot, we found that it wasn’t powerful enough to power the motor even in bright sunshine. Not wanting to disappoint my 5 year old, we re-used the battery pack from his wigglebot instead.
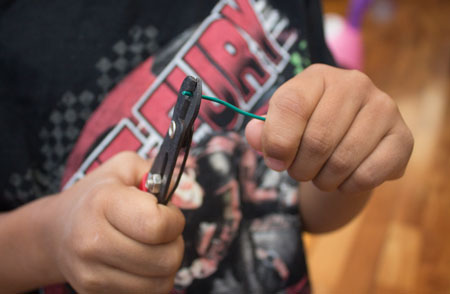
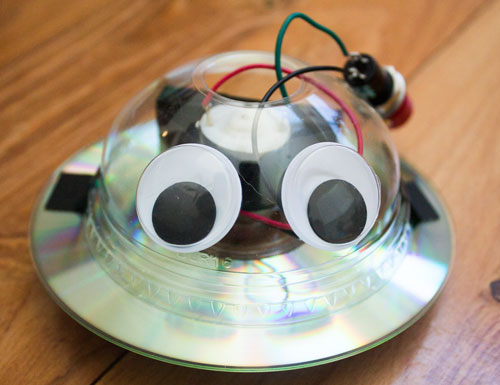
To make this project a little more advanced than the last one however, this time we added a switch into the circuit, since removing the battery from within the Slurpie lid would have been basically impossible. To add the switch, my son got to use wire cutters and wire strippers to make a wire to connect the switch to the motor. When we were finished, my kids ended up liking this project just as much, if not more than their wigglebot. It’s movement is a little quicker and more unpredictable, which was exciting.
Check out this YouTube video to see the wobblebot in action.
Since we didn’t get to use our solar panel this time, for our next project, we will likely connect a few solar panels together until we have enough current to power our inexpensive motor. If you’d like to be notified when that tutorial is available, please consider subscribing to our newsletter.
Recommended Age Range: Kindergarten, Elementary, Middle School (younger kids will need adult supervision and assistance since this project uses hot glue)
Time Required: ~30 minutes
Difficulty: Easy
Cost: Less than $10 in used supplies (or much cheaper if you buy supplies in bulk. Buying individually, the motor was $3.50, the battery holder was $1.50, and the switch was $2.50 at Radio Shack (our local electronics store). We actually reused the motor and battery pack from our Wigglebot.)
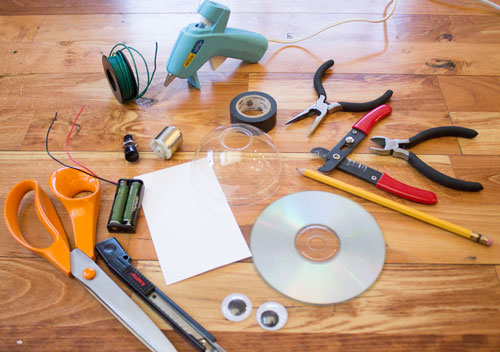
Materials:
- Blank or unwanted CD or dvd
- Dome-shaped lid from Slurpie or similar drink
- 2 “AAA” battery holder (affiliate link)
- 2 “AAA” batteries
- 1.5-3 V DC Motor (affiliate link)
- SPST (single pole single throw) switch (affiliate link, be sure it’s labeled push-on/push-off, not momentary)
- Short piece of wire (I used 22 gauge, but it’s not really important)
- Pencil with eraser
- 2 Googly eyes (optional)
Supplies & Tools:
- Wire cutters
- Wire strippers
- Needle nose pliers
- Hot glue gun
- Tape (I used electrical, but any kind will work)
- X-acto knife or other cutting tool
- index card or other safe surface for using X-acto knife
- Scissors for cutting tape if needed
Instructions:
-
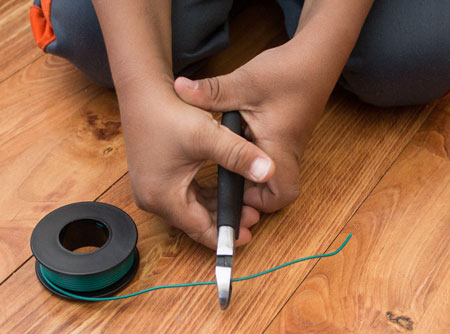
- Cut a short piece of wire (only a couple inches long is fine).
-
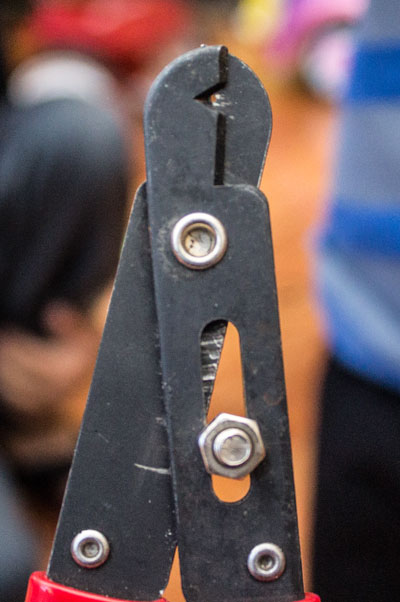
- Next, adjust the screw and nut on your wire strippers so that the hole is about the size of the metal core within your wire.
-
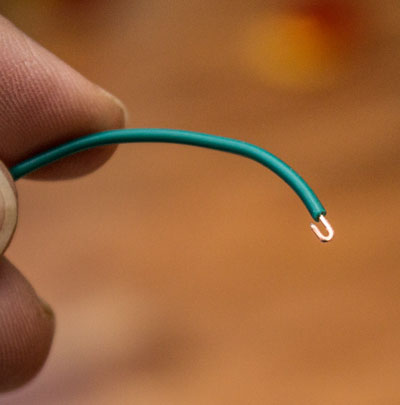
- Use the wire strippers to pull the outer layer off the wire.
It should look about like this.
-
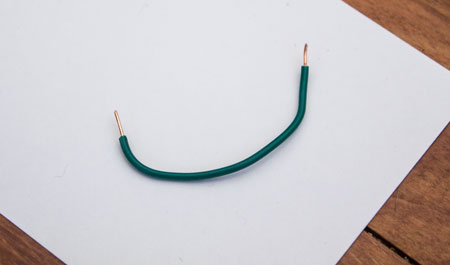
- Use the needle nose pliers to bend the ends of short wire to make it easier to attach the wire to the motor and switch.
-
- Use the needle nose pliers to bend one end of the wire around one of the motor’s 2 lead and the other end of the wire around one of the switches leads.

-
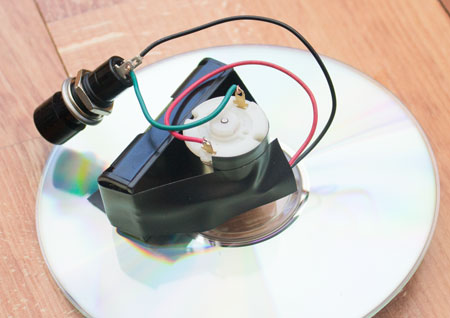
- Next use the same technique to connect one of the wires coming from the battery pack to the motor’s free lead and the other wire coming from the battery pack to the switches free lead. You should end up with your 3 components (motor, switch, battery pack) in a big circle. It doesn’t matter which order or orientation the pieces are in.
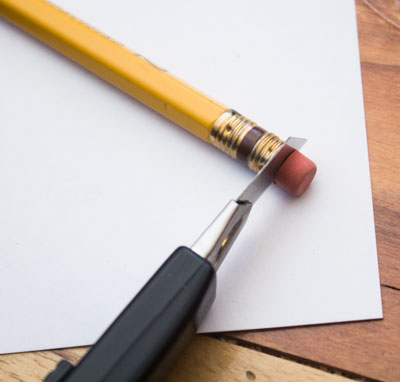
- Next cut the eraser off of the pencil.
-
- Push the eraser into the motor.
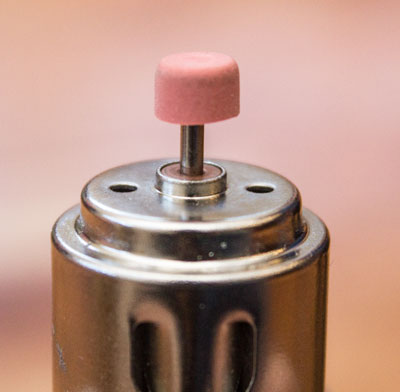
-
- Hot glue the motor onto the cd with the eraser sticking through the hole. It doesn’t matter which side of the CD faces up.
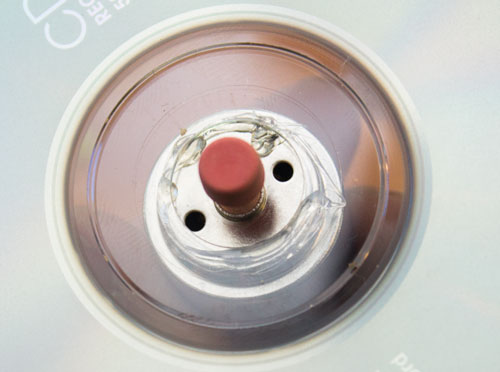
-
- Next, tape the battery pack to the motor and CD
-
- Tape the dome lid over the motor and battery pack with the switch sticking through the hole in the top. (Note: At this point, if you’re paying attention, you’ll realize that our switch has magically changed from black to red. That’s because in my carelessness, I accidentally bought a “momentary” switch instead of a push-on/push-off switch, so the wigglebot only worked when we held down the button. We had to make another trip to the electronics store to remedy the situation.)
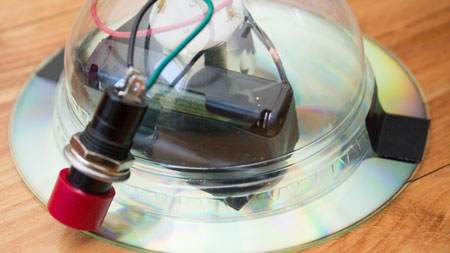
-
- Glue on some googly eyes.
Click here for more Robotics activities for kids.

Popular Posts


Related Links
Technology and Engineering Activities for Kids
Science Activities for Kids
Math Activities for Kids

Michelle, you come up with the coolest stuff! And I’m seriously impressed with how inexpensive this is to make.
I didn’t really come up with it on my own, but thanks for the compliment! We’re super frugal, so I plan to keep making my son take apart his robots to make new ones so we can re-use the components, but you’re right, $10 really isn’t that much.
Hi Michelle,
Do you think for the wobble bot I can use a AA battery pack vs the AAA? I happen to have one already.
Jackie
Absolutely. It might wobble a little differently since the pack will be heavier, but it should still work!
Very cool project!
Thanks! :)
He looks fantastic Michelle – can’t wait to have a go. Think we might have to skip the solar power aspect as well for the moment – just a bit too grey and cold in London at the moment :-(
That’s too bad. Thankfully battery packs make great substitutes. Hope it brightens up soon!
Going to do this today and have a quick question- can you explain the pencil eraser part? I’m not getting the purpose of that?
Sorry for the slow reply! You just slice the eraser off a pencil and then jam the motor shaft into it. It serves a couple purposes. One is that it just protects whatever surface you’re operating the wobblebot on. The second is that it makes it wobble more than if you just let the motor shaft touch the ground. I think it would still “work” without the eraser, the motion just might not look as cool. Good luck!
Ahhh- got it. THANKS!
I love those big wiggly eyes on it! This is something I need to try with my kids this year of homeschool.
I hope you have fun! Let me know if you have any questions. :)
I love this idea! I tried it with my 5 year old and is playing with it nonstop! Thanks for the awesome idea.😀
I’m so glad your 5 year old is having fun! :)
Wow thats a cool robot! I have to get that book. Do you think it would still work with a solar panel if I used a bigger one?
I’m not sure! It would probably work with a bigger solar panel. I was thinking it would also probably work if I used 2 or 3 of my garden light solar panels in series, but that wouldn’t fit well on this body design. The solar panels would probably work better on something like my propeller car, since it has more surface area to attach solar panels.
Thanks a lot. I will look into it and see if I can get some solar panels that size.
Just so you are aware. Your link for switches takes you to a switch that is a momentary one. We accidentally bought the wrong thing.
Oh no! I am SO sorry! That’s the same problem I had when I wrote this post. Looking at the comment I wrote next to that item, I remember that the link used to go to a product page that had both types of switches, but it has since changed to only momentary switches. I just updated the link. Thank you so much for letting me know. I hope everything else goes smoothly!
Hey! I’ve bought the parts to make these in my classroom but i’m finding that the battery box is getting very hot. We’ve made sure none of the wires are crossed. Did you have any of these issues??? I’m panicking a bit because this was our big end of year project…eekk
How long are you running them for? They should definitely get warm, but I wouldn’t think they would get hot enough to burn anyone or melt anything. If the batteries are shorted (i.e. if you did not connect the motor in the circuit and just connected the battery leads together), then they would definitely get hot enough to melt plastic after a few minutes. I know, because my daughter tried this! I’ve never noticed the battery pack or motors getting hot with our bots though, but then again, we’ve never really run them for more than a minute or two at a time. I’m sorry I can’t be of more help. I hope it all works out!
We figured it out. When you buy the motor kits on Amazon they have a warning page telling you that you have to do the wiring a specific way. Once we figured this out we were good to go. It was a huge hit! My class was even featured in our town paper. Thanks for the amazing idea!
That’s awesome! Congratulations, Kristen!
Thank you for this post! We just finished a week of Girl Scout day camp, and we made 150 of these. We followed the links for parts and ordered most of them from Amazon, then picked up the milkshake lids at Chick fil a. Our camp provides leadership opportunities for middle school girls, so I wrote out a lesson plan and included your instructions. Three 8th grade girls were able to lead all of the younger scouts through this project. What a cool experience for all of them! Our campsite had a long hallway with a stone floor, perfect for the wobble bots. Thanks for posting!
That is so amazing to hear, Jennifer! I’m glad you guys found my tutorial helpful! Thank you for taking the time to tell me about the experience (and for using my Amazon links)! Have a wonderful weekend!
I already have 1.5 v motors but they have a gear on the shaft. Will they still work?
That’s a good question! I’m all for using what you already have. The problem with the gear shaft is that you won’t be able to attach the eraser tip to the end of the motor. The eraser serves the dual purpose of 1) causing the bot to wobble and 2) protecting your floor. The motor with the gear shaft should wobble on it’s own without the eraser, but it doesn’t have the soft tip that would protect your floor. I probably wouldn’t use it on a wood floor, but it should be fine on low carpet. Concrete or cement might damage the gears.
Does it work with a AA battery holder?
It should absolutely work with AA batteries rather than AAA, but it will be a little heavier, so it might not “wiggle” as much.
You forgot to actually explain, how the kids to put the wires together, which really is the most important part. My child was more than disappointed.
Hi! I’m sorry it was unclear! I only showed a picture for bending the wire and attaching one of the leads using the needlenose pliers, but as I explained in the text, you simply repeat this process to connect the three components (switch, motor, and battery) into a circle. The order doesn’t matter. The next time I do this activity with my kids, I will take a few extra pictures of that process to makes sure it is clear. Thanks for the suggestion!
Hello i bought 22 gauge wire but its two colors is it 2 wires or can be used just as one wire?
If it’s two wires, you will probably be able to tell when you open it. Often, you can just rip the two colors apart to make 2 separate wires. If it’s one wire and just has outer insulation that is two colors, that’s totally fine and you can use it as a single wire. Good luck!
Hi i really like your idea of making bot at home with reusable things. .my kid n me tried the stuff n its wrks nice. Instead of popscile i used a fan. Sometimes my kid makes faces with that artbot. Thanks and pls share some more tech ideas if u have.
Thanks! I have some more simple robots I’ve been wanting to do, I just need to make some time to put them together and take pictures! If not soon, then this summer for sure. Thanks for taking the time to leave a comment. :)