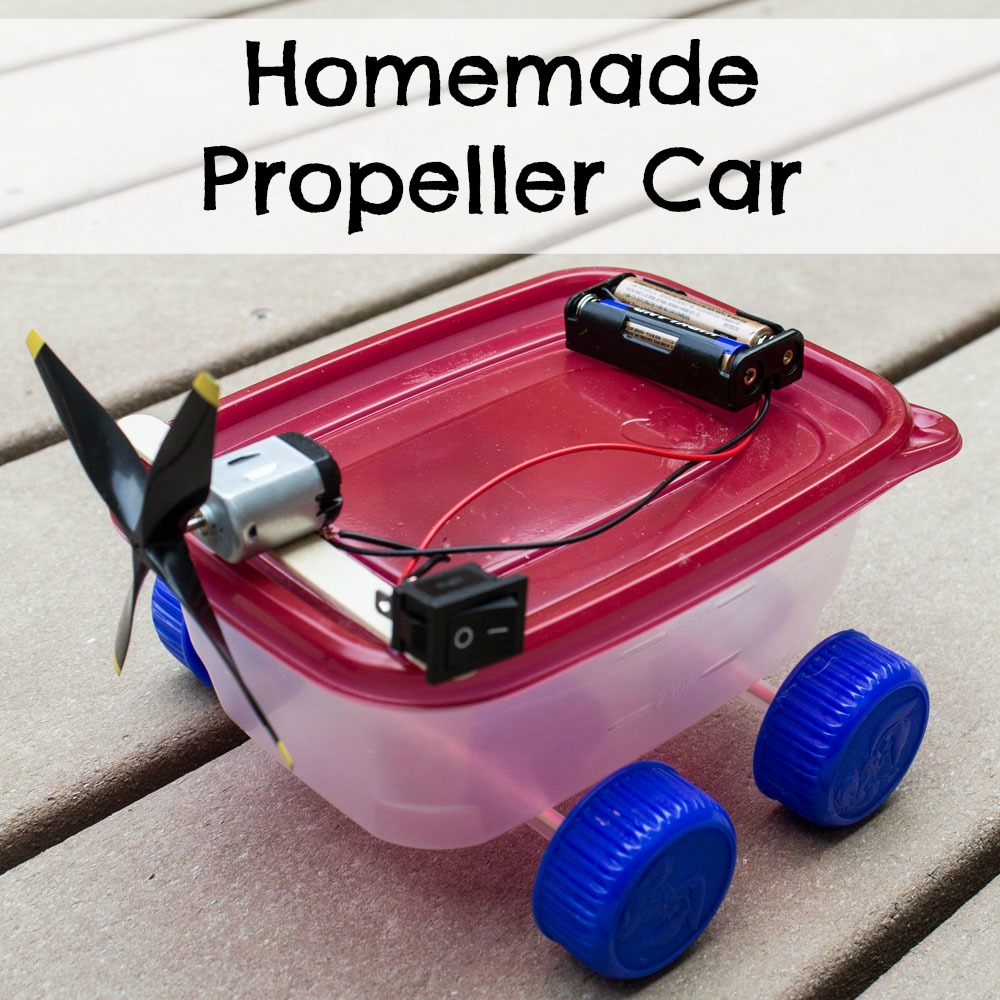
My kids love when we make little homemade “robots” that move and wiggle around. I’ve been wanting to make something more car or rover-like with wheels for awhile, but I wasn’t exactly sure how to connect the motor to the wheels. This little propeller car kind of feels like cheating, since the spinning of the motor is not directly connected to the spinning wheels, but it still works. Most important, my kids thought it was cool.
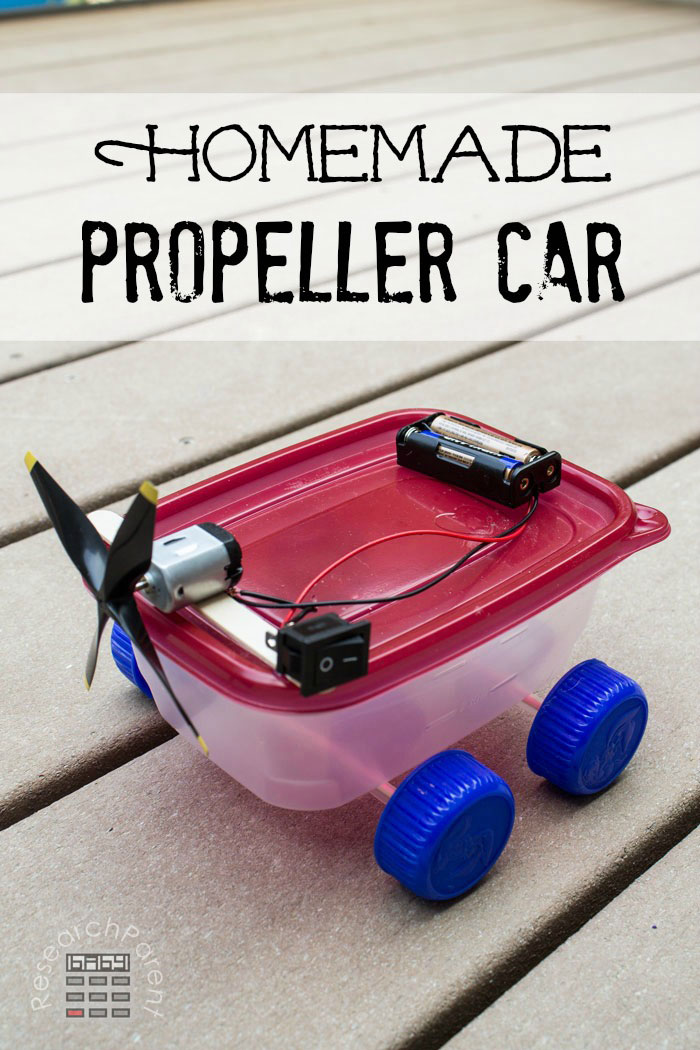
This little car makes a great first electronics project for kids since they get to put together a simple circuit. Fortunately, it’s not very expensive, since we mostly used free, recycled parts like our deli meat container and bottle caps. Next I want to try to make something powered by solar panels from the 99 cent store instead of batteries. (Sign up for my newsletter to stay up to date.)
You can watch a video of our car in action below. Note that the way I hooked up the circuit, the fan pulled the car instead of pushed it. To get the car to move the opposite direction, you would just need to switch the leads on the motor. (Or you could make the car even more awesome by using a DPDT (double pole double throw) switch instead of the simple ON/OFF switch that we used. That would allow you to toggle the direction the car moved depending on which way you flipped the switch.)
Recommended Age Range: Kindergarten, Elementary, Middle School (younger kids will need adult supervision and assistance since this project uses hot glue)Time Required: ~30 minutes
Difficulty: Easy
Cost: Around $10 in used supplies (The propeller is the most expensive component. I bought 4 of the one listed below for $16 total though the price fluctuates. It was $3.10 per propeller plus around $3 shipping and handling for all 4, so there is definitely a benefit to buying in bulk. A different, less expensive propeller could be used as long as it has a 2 mm shaft hole diameter.)
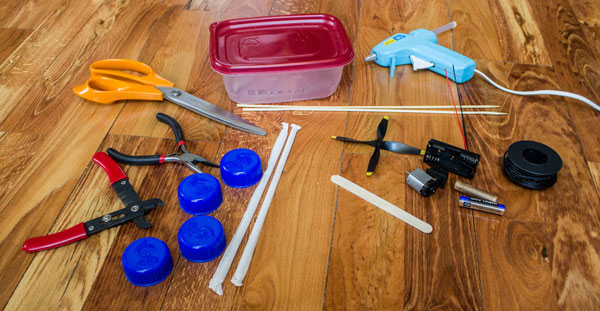
Materials:
- Lightweight car body (we used a deli meat container, but you could also use a block of foam)
- 4 bottle lids for wheels
- 2 straws
- 2 skewers
- 1 popsicle stick (for mounting motor, not needed if you used a block of foam or something flat)
- propeller
- 2 AAA battery holder
- 2 AAA batteries
- 1.5-3 V DC Motor
- switch
- Short piece of wire (I used 22 gauge, but it’s not really important)
(If the one I used is out of stock, these should work as well.)
Supplies & Tools:
- Scissors
- Wire cutters
- Wire strippers
- Needle nose pliers
- Hot glue gun
Instructions:
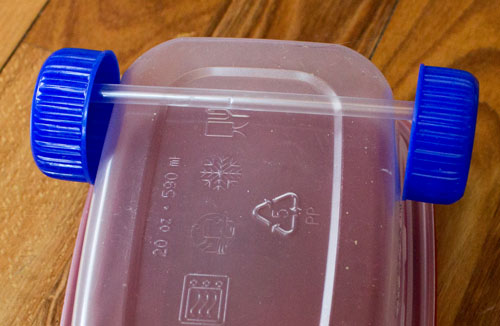
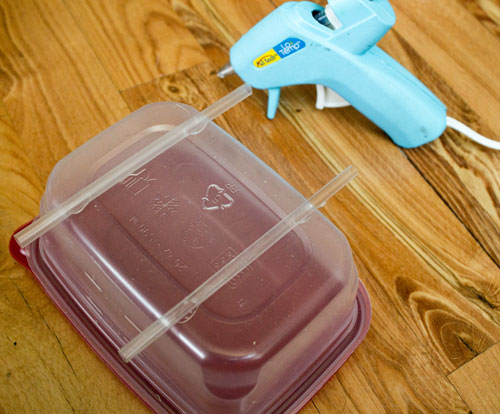
- First, cut the two straws so that you can attach the wheels to the bottom of the container. The length should be a little bit more than the length of the bottom of the container plus the width of the 2 wheels as shown. If you cut the straws too short, then the wheels might hit the container, which is not a major problem.
- Hot glue the straws onto the bottom of the container.
- Cut the skewers so that that they are slightly longer than the straws.
- Hot glue a “wheel” onto one end of each skewer.
- Thread the wheel plus skewer through the straws.
- Hot glue the other wheel onto each skewer.
- If needed, glue a popsicle stick or something flat onto the lid of the container to create a flat surface on which to mount the motor.
- Next attach a lead from the battery pack to the switch. Ideally, the lead would be soldered to make a more permanent connection, but since I don’t want my kids around soldering irons at the moment, we just used needle-nosed pliers to wrap the wire around the post on the switch.
- Attach the other lead from the battery pack to the motor.
- Next, you need to make a little jumper wire to connect the switch to the motor and complete the circuit. Cut a piece of wire from your spool and strip off the ends using the wire strippers as shown. Depending on what type of wire strippers you have, you might need to adjust the screw on your wire strippers so that when they are closed, the hole is about the size of the internal wire.
- Connect the short wire to the motor and switch making a triangle with your 3 components (battery, switch, motor).
- Next push the propeller onto the motor shaft. Mine press fit snugly together, but if not, you can add a little hot glue. Just make sure not to get glue near where the shaft connect to the motor.
- Glue the motor onto the top of the car, making sure not to cover any vents on the motor. You can also glue the switch and battery pack down, but it’s not really necessary.
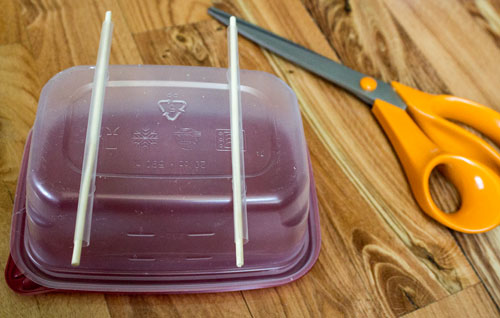
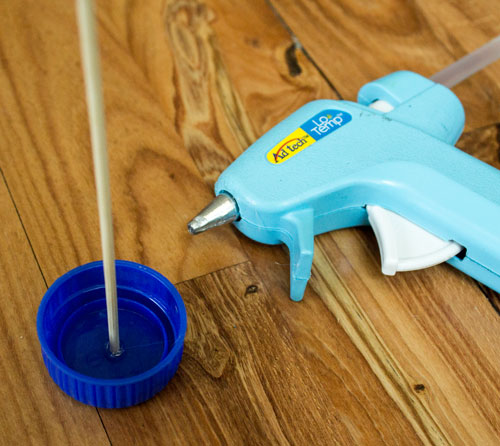
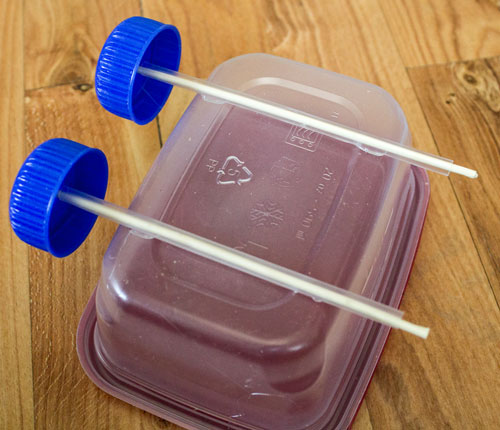
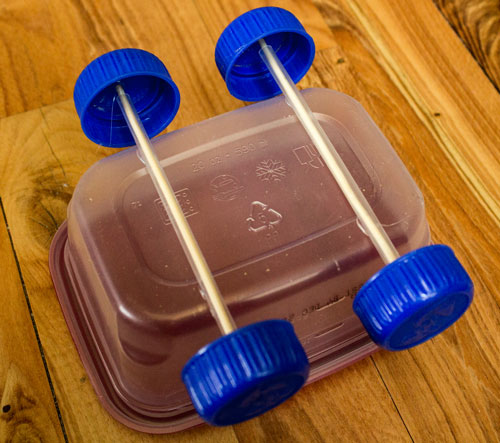
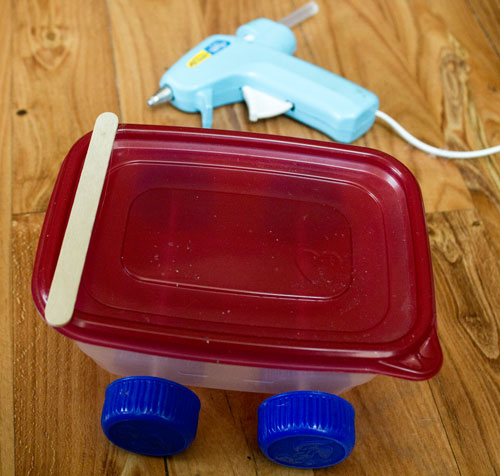
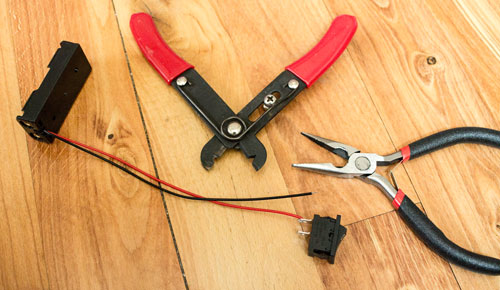
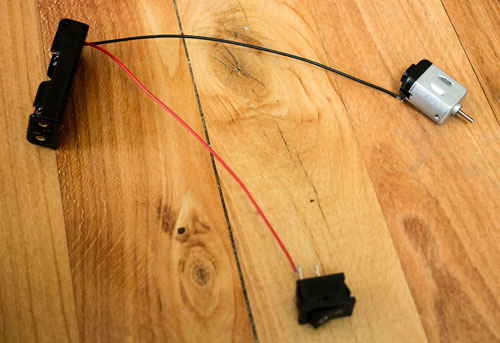
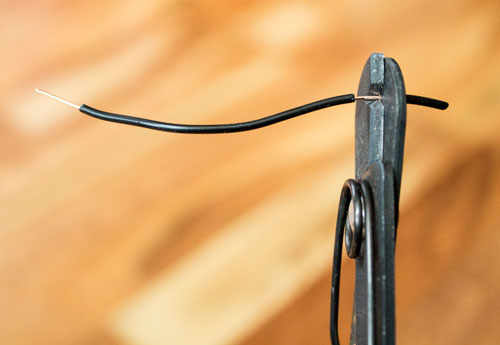
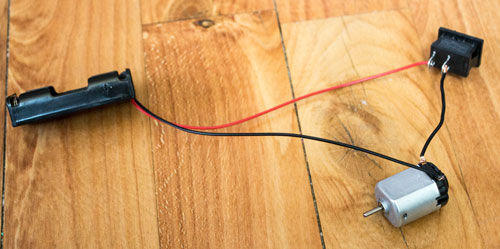
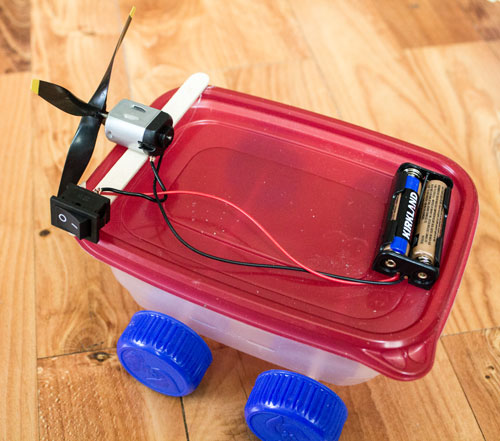
Now all you have to do is insert batteries if you haven’t already and flip the switch to start the car. Note that if you used a toggle switch, you’ll be able to get the car to move forwards and backwards. If you didn’t use a toggle switch, which direction the car moves will depend on what direction the motor is spinning. My car moves toward the propeller. If I wanted it to move in the other direction instead, I would just need to switch the battery pack leads. However, I’m lazy and my kids didn’t seem to mind, so we left it as is.
Click here for more Electrical Engineering activities for kids.
Related Links
Robotics Activities for Kids
Science Activities for Kids
Math Activities for Kids


Would the propeller have to be four blades or would three or two work?
And would the blade have to be a certain length?
The blades do not have to be a certain length. However if they are too tall (long), you might need to put a foam block or something on top of the container to lift it up so it doesn’t hit the ground. If they are way too small, they might not produce enough force to push the car very fast or at all. Also, the propeller does not have to have 4 blades. 3 or 2 should also work. You just might have the same problem of the car not going very fast or not being able to overcome static friction (in which case, try just giving it a little boost to get started).
Can I use a lego car in stead of plastic box?
You should definitely try it. The only difference I can think of is that the heavier it is, the slower your car will go. If the LEGO car is too heavy, it might not be able to start moving on it’s own from rest due to static friction, but if you give it a nudge, my guess is that it would keep going (slowly). Give it a try!
So I made this car for an engineering project but it just won’t move when the propeller is turned on, and the tires are fine. What are your suggestions?
Hmmm…did you use all the same materials? Any extra weight or a different size propeller might not work as well. Also, you can tell from my video that my wheels are a little wobbly, but lining the wheels up just right will help. The less wobbly they are, the better. The only other thing I can think of is that maybe it’s just having trouble overcoming static friction. Give it a little nudge to get started and I bet it will accelerate. Sorry you’re having trouble! Good luck!
I know this is a lot late but do you think adding more propellers would help if its too heavy?
I’m not really sure! Propellers are kind of expensive. If you already have one, it’s definitely worth a shot, but if not, it might make more sense to just try to make it lighter.
i am having the same problem as ashton adn this didnt help much. i tried what you said and didnt work what should i do?
Hi Olivia! Are you using the same fan I used? If your fan is too small, it will not move enough air to push the car. Also, if you make it out of different materials, the weight of the car might be heavier, which would also cause it to not work. One last thought I have is that you could always use long wires to connect the battery pack to the motor, then hold the battery pack in your hands. You will have to move with the car, but I bet that would remove enough weight to allow your car to move regardless of which fan or materials you use. Good luck!
nice project for kids…
though this one has a good advantage for upcoming student.but for the wheels, i think we can also boqe a hole for it and this will make it last long
That would probably work well for kids that are old enough to be around sharp tools. Thanks for stopping by!
Where did you buy the propeller and motor?
You can find links to the motor and propeller in the Materials section of this post. Good luck!
Please can you help me on how to make simple airplane that can fly
Haha, I think that might be beyond my skill level at the moment, but I’ll keep it in mind. The only thing I can think of is a rubberband powered propeller on a glider. They have kits at our local hardware store.
this was a fun project and it made it so i got first at my science fair but can explain how it worked please
Glad you enjoyed it! The way it works is that the motor turns the fan and the fan pushes the air. As stated in Newtons third law, every action has an equal and opposite reaction. The fan pushes on the air, but the air also pushes on the car, which causes the car to move.
this is all very helpful but what if i set it out on a humid windy day would it react diffrently?
The link you provide for the switch says that switch is out of stock and they don’t know when they’ll get it back in. Can you provide another link or help me with the exact type of switch? Do you think Home Depot or True Value would carry something similar/ exact?
Hi, Amy! I put another link in the materials section that will work. I’m 99% sure any hardware or electronics store would have what you need as well. You just need a simple on/off switch. I used a rocker switch, but you could also use a button switch. Just be sure that if it’s a button switch, it’s an on/off and not a momentary switch. Good luck!
Hi! my daughter is going to try this for a school project and we have all the components appart from the propellers. We are in Spain and when we click on your link we get something different in Amazon Spain. Could you tell me the size and features of the propellers you used? We worry that if it is not the right one iit might not work ok! Thanks!
Hi Maria! It’s called a 100 mm x 100 mm 4-blade propeller. Each blade is 5 cm long, so that it is 10 cm tip to tip. Good luck!
What qire did you use? (The black and red one) Is ot already included in the AAA battery holder? I hope you can reply..
I’m sorry. I don’t understand your question!
Can you use AA battery holders and batteries or does it have to be AAA. Just wondering because all the affordable hobby motor sets for bulk purchases seem to have AA with 1.5-3V, and we are looking for savings to do this as a group project with many girls.
Sorry, for the slow reply! Yes, you can use AA, but the car will be heavier, so it will likely move a little slower.
Hi! my question is that i can use your procedure for a documentation about the propeller car is only form my school i am goig to put this site web in the Acknowledgements
As long as you are not selling my work or re-publishing it in any way on the internet, you are allowed to use my procedure for documentation. Thank you for asking.
Hi there! Love your experiment.
If I use a 6V DC motor, then would I need maybe 2 batteries?
You could use 2 battery packs (so 4 AA or 4 AAA batteries total since each are 1.5 V). The only problem is that it would probably be too heavy for the car to move if you mounted the batteries to the car. Provided your motor isn’t too heavy, one option is to just use long wires to connect the motor to the batteries and then leave the batteries off the car.
I am finding it difficult to obtain 2 AAA battery holders in South Africa, if I were to use a 2AA battery holder, that would mean I’d need to use only one battery from the two to power the 3V DC motor?
AA batteries are also 1.5 V each, so you would still need 2 batteries. However, that might be too heavy depending on your propeller. I think your best bet would be to skip the holder altogether and get some copper foil tape, which is conductive. Something like this: https://www.amazon.com/Vasdoo-Conductive-Shielding-Electrical-Grounding/dp/B07RPFRFXK. Then you can duct tape the 2 batteries together and use conductive tape to connect the negative end of one battery to the positive end of the other. Then use the conductive tape to connect the wire leads from the motor directly to the batteries. If you can’t get the conductive tape, you could try duct taping the wire leads to the batteries and using a small piece of wire to connect the two batteries together, but the connection might not be that great. Good luck!
My kid made the car just like yours but it is not moving at all, dont know whats the problem, his fan is small amd tyres are big would it be a problem?? Can we send send you a picture so you could check and help
Hi, Mohid! I am sorry you are having trouble. My guess is that the fan is not big enough for the weight of your car. It needs to move enough air to overcome friction. Since the friction is higher when the car is at rest, you could try giving it a little nudge to see if it will keep moving once started. If that doesn’t work, you will need to either get a bigger fan or find a way to lower the weight of your car. Good luck!
It does NOT work. I did everything there was written in the instructions but all my car does is just it stays still and only the fan works.
Hi Hamza! I am sorry you are having trouble. Were you able to get the exact propeller that I used? One that is smaller will not work. I know because I tried! If you have the same propeller and are still have trouble then there are a few things you can do to try to fix it.
1) Make sure you are using brand new batteries or fully charged rechargeables. You need your motor to receive the maximum power possible.
2) If it is still not working, then you need to make your whole setup lighter. The first thing I would try is removing the lid. Just put the battery pack inside the container and mount the popsicle stick across the open space. You could also instead cut off parts of the lid to remove weight. If you neeeded to, you could also cut off parts of the container. You just need it to be as light as possible so if your container looks significantly different from mine, you may want to try to find something lighter. You could also use a foam block.
3) Make sure your wheels are spinning freely. Check that everything is aligned and on straight and that your skewers are not bent. If you can’t roll it easily by hand, then it will be extra difficult for the propeller.
Good luck!
To make it a double hobby, simply raise the motor a little with a piece of glued foam & gently lower the container with or withour wheels into water & you have a boat. In the 1949s we could run the prop with a rubber band. also my catamaran boat has a boiler run from metho with a small hole for the jet
That’s a great idea! Maybe I’ll try something like that and include it as a separate project, but you’re right that it would be very easy to convert this one. Thanks for the suggestion!
how do you make a break for this car?
That’s a good question! I’ll have to give it some thought!
thank you I’m asking because we are doing a science project in school and we have to figure out how to break these types of cars