I had no idea it was so easy to convert a regular old kid’s bike into a Strider-style, no-pedal balance bike. Forget training wheels! This is really the way to learn to ride a bike. I’m hoping this page will be understandable for those like me who are not familiar with bike terminology. In figuring out how to remove the pedals, I had to wade through a bunch of pages with phrases like “drive-side pedal” and “spindle.” Sadly, although a mechanical engineer, these instructions were not crystal clear to me. I’m hoping to save you some confusion with this DIY tutorial.
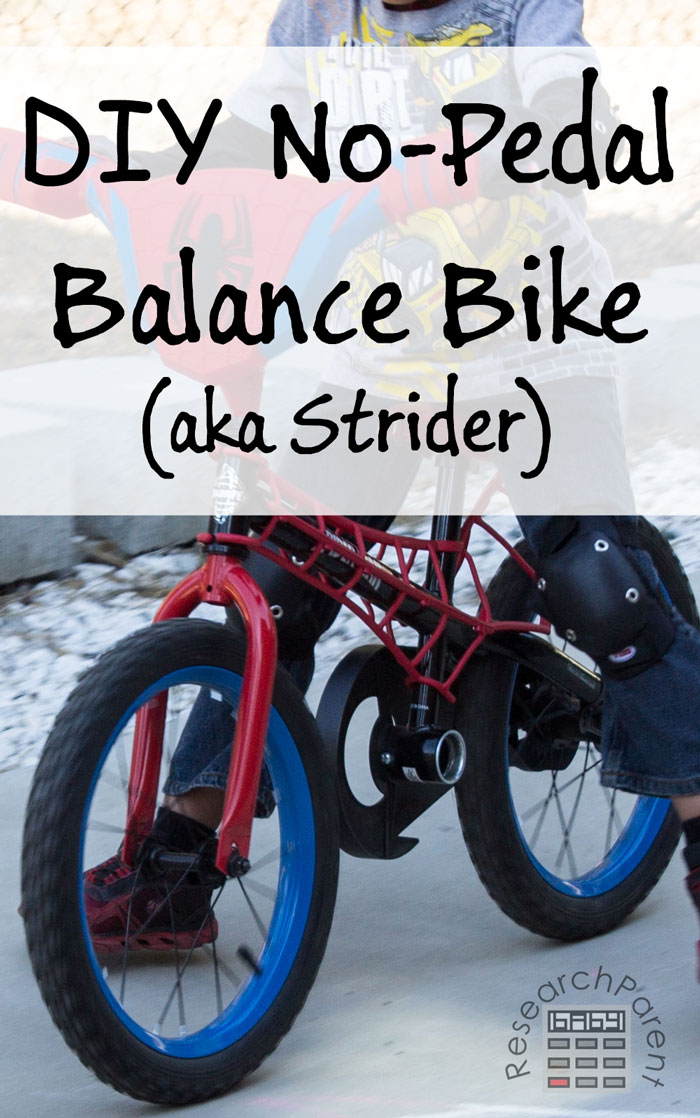
*** ETA: I think this tutorial will still be helpful if your bike is not exactly like mine, but please compare your bike with my bike and read through the comments to see if there might be some unexpected challenges. The main difference seems to be that some bikes have the chain threaded through the frame. One person seems to have been able to zip-tie the chain in place and others seem to have removed the chain. If you end up needing to remove and reattach the chain, you can still turn your bike into a DIY balance bike, but you may need to search YouTube for videos on this step as it’s something I’ve never done! ***
Before you get started, I should let you know that it will take approximately 20 to 30 minutes. Also, you might need to borrow some strength to remove the plastic pedal from the metal shaft it connects to. Apparently there is something called a pedal wrench, but we didn’t have one. Luckily, my husband was still able to get the pedal off using a regular old adjustable crescent wrench once we figured out which way to turn it. (Hint: It’s not the way you’d think.) I’ll even give you instructions for putting the pedals back on, so you should have nothing to worry about.
My son was already pretty good at the regular Strider bike which is quite a bit smaller, when we got him this bike, but he still couldn’t ride his big boy bike without training wheels. Actually, he tipped the bike over even when he had training wheels by trying to start on a slight hill, so he didn’t want to ride at all. Training wheels were getting us nowhere and we knew he loved using the Strider.
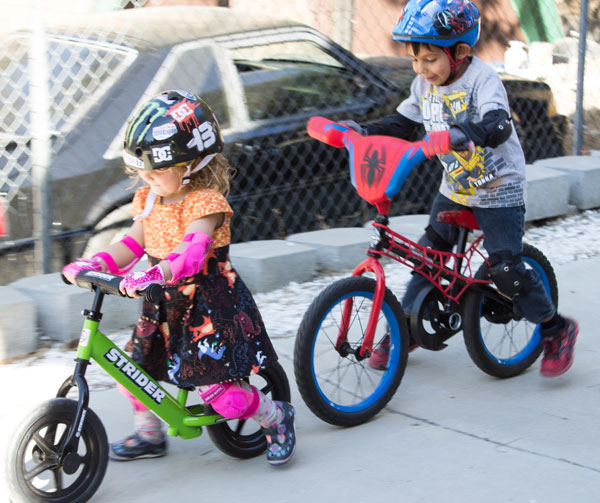
About a month ago, we removed the pedals from his regular kid’s bike using the tutorial outlined below. He was great at balancing within just a couple days. We probably could have put the pedals back on after just a week, but we ended up waiting 3 weeks total, so he got lots of practice and confidence without pedals. A week ago we put his pedals back on and within minutes he was zooming around as if he’d been riding a bike his whole life. I’m now convinced training wheels are completely unnecessary. A no-pedal balance bike is definitely the way to go.
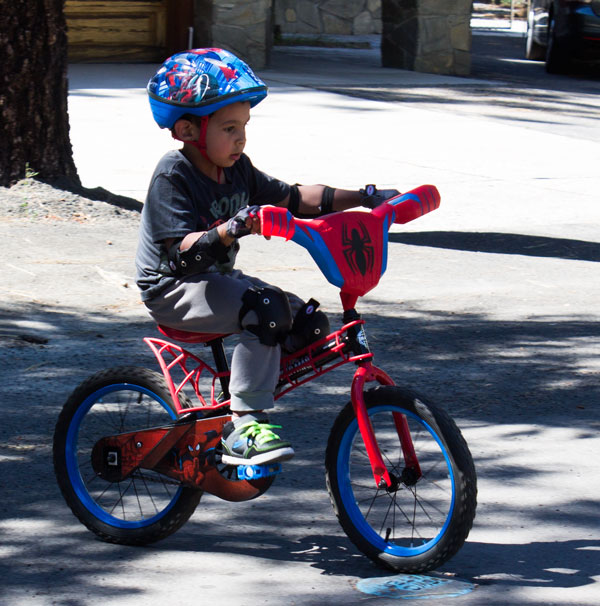
Recommended Age Range: Preschool, Kindergarten, Elementary
Time Required: ~20-30 minutes
Difficultly: Easy (though one step did require some brute strength)
Cost: The cost of a kids’ bike
Materials:
- A kids’ bike
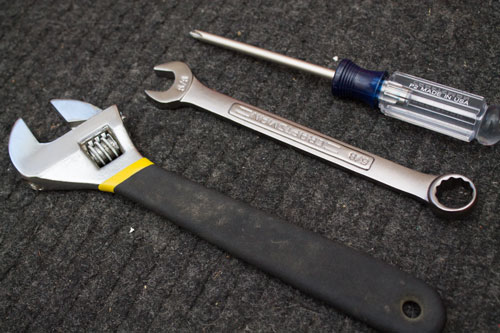
Supplies & Tools:
- An adjustable crescent wrench
- A phillips screwdriver
- A 5/8″ socket wrench (optional: the crescent wrench would likely work too, but we had the right size, so we used it.)
Instructions for Removing Pedals:
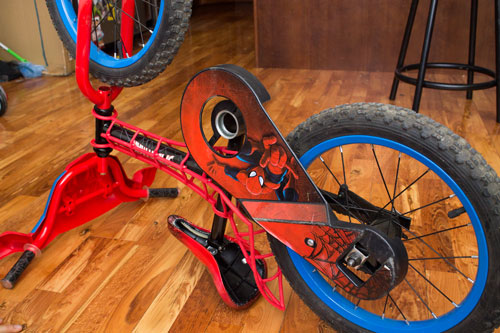
- First, turn the bike upside down.
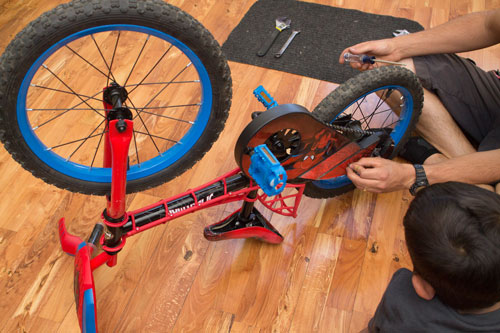
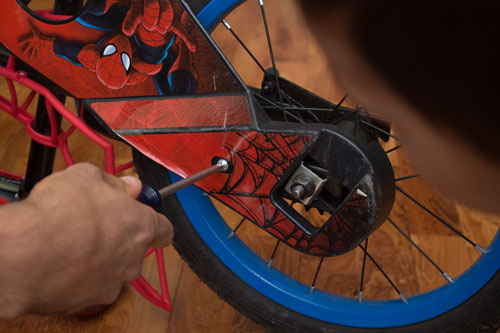
2. Then, remove the chain guard (the plastic piece that covers up the chain). Ours was held on by two screws which could be removed with a phillips screwdriver.
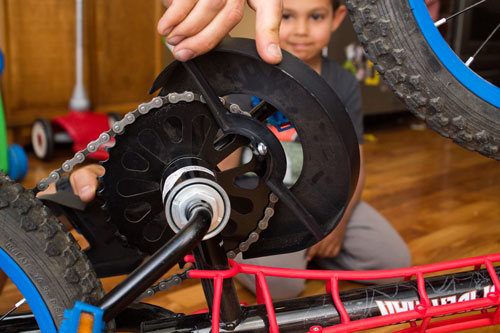
Here is a picture with the chain guard removed.
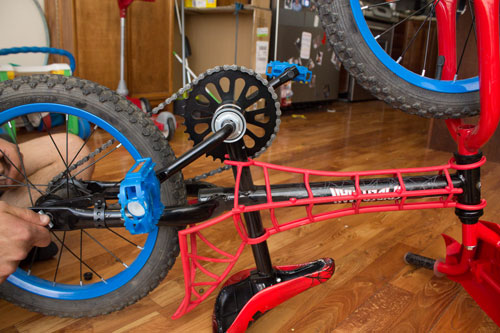
3. Next you need to remove the foot pedal from the metal shaft that holds the foot pedal. (I think it’s really called the crank shaft.) You want to remove the foot pedal that is NOT on the same side as the chain and gear. I assume it’s the same on all bikes, but for us that was the right pedal if you were standing at the back of the upside-down bike). This was definitely the only slightly difficult part of this whole process as the pedal was screwed in pretty tightly and it’s a little awkward to get leverage. However, we initially were turning the wrench the wrong way, so I’m sure that didn’t help. Nearly everything that you come across will follow the “righty-tighty, lefty-loosey” rule. This pedal is one of the few exceptions. You want to turn it CLOCKWISE (or right) to loosen it. Find someone strong and use this “squeezing” trick as shown in the picture. You can do it!
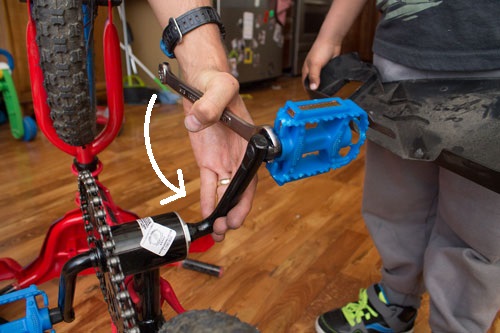
(Note: Now that we’ve already put the bike back together, I’ve noticed that my pictures are a little bit confusing. The arrows appear to be counter-clockwise/turning left, but that is because I am photographing from the wrong side of the bike. Trust the direction of the arrows in the picture and pretend you are standing on the other side of the bike. Sorry!)
4. Now that the pedal is off, there is a nut that you will have to remove at the base of the shaft to get the bearing out. This is also reverse-threaded, meaning that you have to turn it the “wrong” (clockwise) direction to loosen it, as shown in the picture.
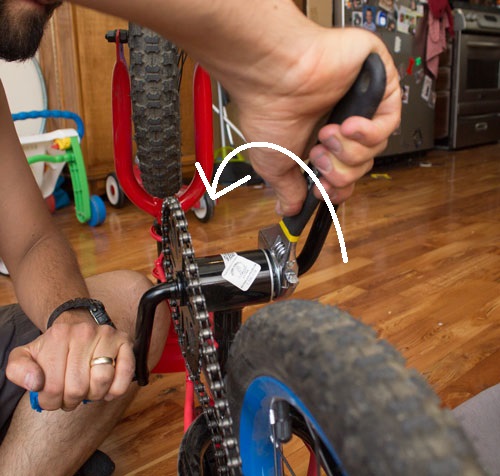
5. Once you get the nut off, there is a washer and a bearing to remove. These should not be hard to take off, but you may need to pry gently.
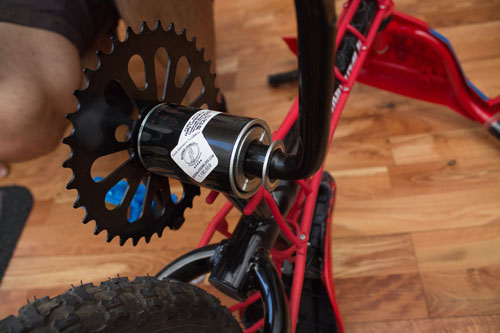
6. Now you can carefully start to pull out the shaft that holds the pedals.
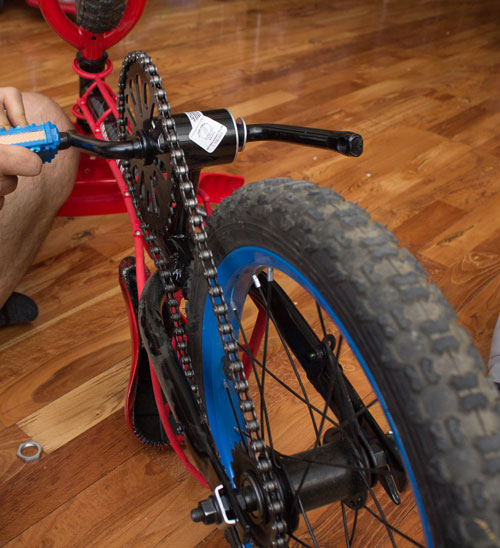
7. As you pull it out, take the chain off the gear attached to the shaft so that you can remove the shaft completely.
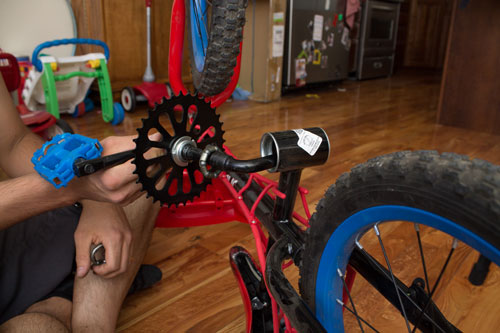
8. Put the bearing, washer, and nut back on the shaft for safe-keeping and so that you remember what order they go on.
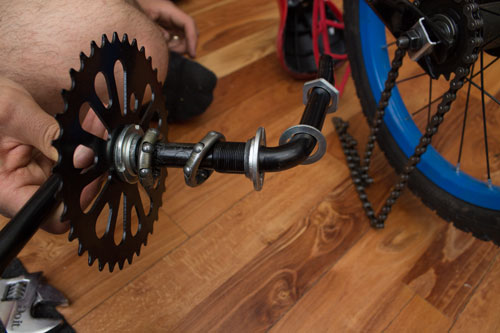
9. All that’s left is to remove the chain completely. To do this you have to detach the back wheel for just a minute. Loosen the nuts on the back wheel. These have normal, righty-tighty, lefty-loosey threads, so turn all the nuts counter clockwise to loosen them.
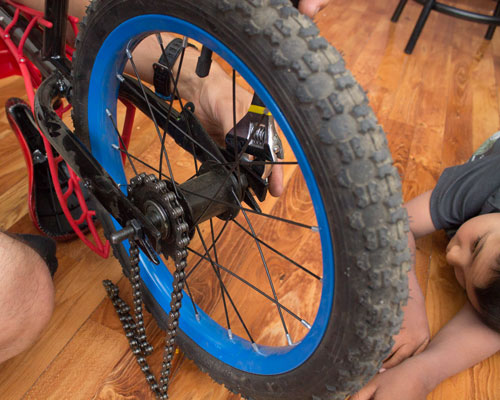
Be sure to loosen the nuts on both sides.
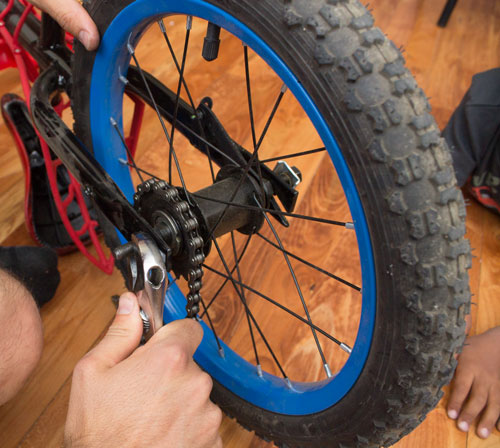
10. Slide the back wheel off just enough to guide the chain through and remove it.
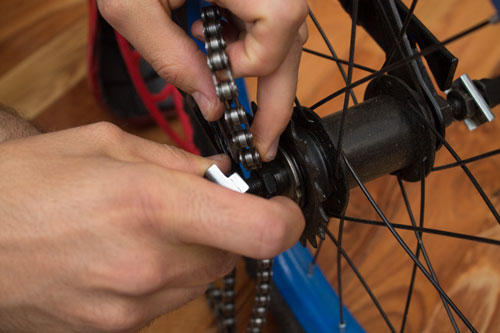
11. Slide the back wheel back on.
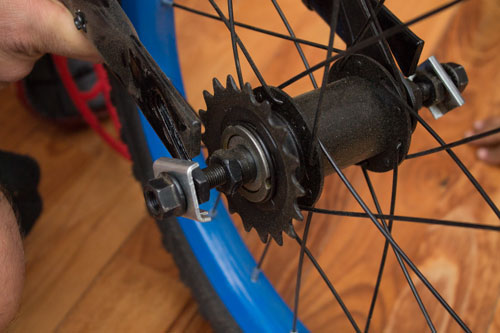
12. Tighten the nuts (the normal clockwise, righty-tighty way). You may have some extra pieces to hold training wheels on that you can leave on or remove.
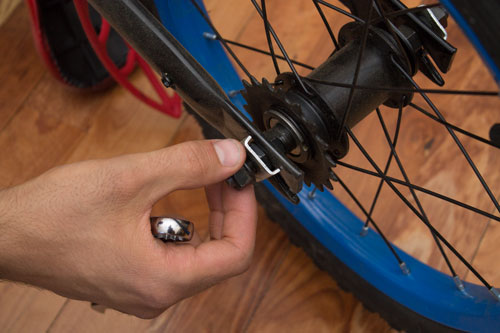
13. Put the chain guard back on.
14. Now your do-it-yourself no-pedal balance bike is ready!
Instructions for Putting Pedals Back On:
- Start with the bike upside down as shown above.
- Remove the chain guard again.
- Loosen the nuts on the back wheel and slide it down, so that you can slip the chain guard back through and let it hang off the back gear.
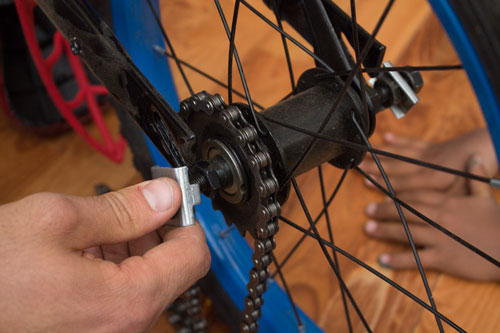
4. Slide the wheel back on and re-tighten the nuts (only finger tight, because you may need to adjust it in a minute).
5. Next, remove the extra pieces from the shaft except for one bearing and stick it back through the hole.

6. Add the other bearing, then the washer, then the nut back to the other side, then tighten. Remember, this nut is reverse threaded meaning you want to turn it the counter-intuitive, counter-clockwise, left way to tighten it (if you were standing on the same side of the bike as the pedal), as shown in the picture.
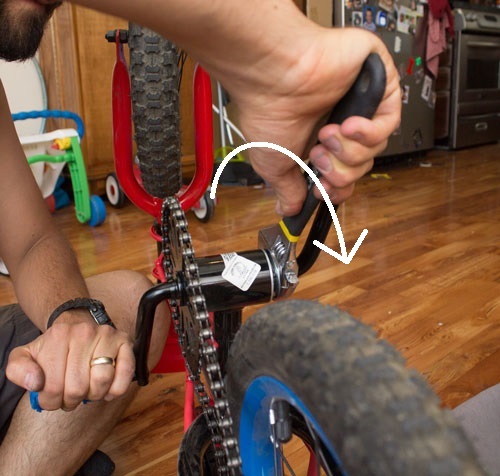
7. To get the chain back on, you should first loosen the nuts holding the back wheel, then put the chain in place over both gears. This will be easiest if you move the back wheel as close to the handle bars as possible. Next, you need to pull the back wheel backwards so that there is a little tension in the chain. Once you have the back wheel where you want it, tighten it in place.
8. To put the foot pedal back on, remember that it also needs to be turned counter-clockwise as shown in the picture.
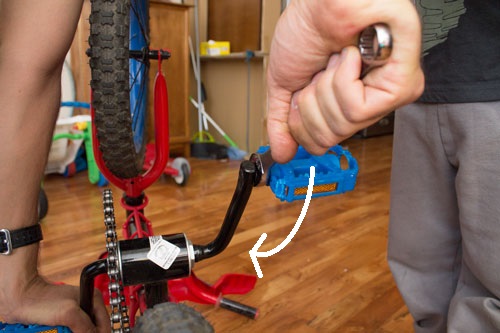
9. Put the chain guard back on.
Popular Posts
Related Links
Play Ideas for Kids
Learning Activities for Kids
Best Gifts for Kids




Great tutorial for this hack! That’s a fun bike, too!
Thanks! He really likes his Spiderman bike. If I had known how easy it was to take the pedals off of that one, we wouldn’t have gotten the Strider too. Bikes are expensive!
This is one of those “why didn’t I think of that” hacks! I’m glad to hear it is such a success with your son. I wish I’d thought of it when my daughter was learning, too!
Thanks! I never would have thought of it on my own, but so many kids in our neighborhood had Strider bikes and they just seemed so great for learning!
Michelle, I love this hack. My oldest has always struggled with learning to ride his bike. We have thought about getting him a pedal free bike, but he is really tall for his age (90th percentile) and I was afraid he would be to tall or not get much us out of it. I love how you are not buying something else. You are going to be featured this Tuesday on the Laugh and Learn Linkup! #LaughLearnLinkup.
Thanks for Linking up,
Haley
Thank you so much for featuring my bike tutorial, Haley! I hope it works for your son if you decide to try it!
What a smart idea! My son is using training wheels right now, but we are debating about taking them off soon. Thanks for sharing your cool DIY!!
Thanks, Janine! I hope my post is helpful if you decide to try taking the pedals off too. Good luck to your son!
A few differences with my daughter’s bike:
Step 5 – I tried prying the washer/bearing out….but it was threaded. But I think the prying was necessary;y just to get a grip on the washer.
And the chain on this bike was somehow installed through the frame so it can’t be removed. I zip-tied it in place.
Good to know! We’ll be doing this again this summer so my second oldest can learn to ride a bike. I’ll have to update it soon!
Yeah, on our daughter’s bike, the chain is threaded through the frame. Going to try a chain cutting tool and master link to reattach. You are lucky that your son’s bike was designed, such that you didn’t have to worry about this part.
That’s too bad some bikes are designed making it next to impossible to remove the chain. I am definitely grateful ours was easy to remove!
Yep. You will need to ‘break’ the chain with a chain breaker tool available at LBS or take apart master link if your bike has one
Hi, thanks for this. How did your husband remove the rear wheel, is there not a brake in the back on your bike? On mine the rear brake and pads stop the tyre from sliding out even after Ive removed bolts. Hhmm..
Hi, Chris. I went out and looked at my kid’s bike and, no, there doesn’t appear to be a rear brake. His is the type that brakes by reversing the pedals, which seems to work by stopping the chain rather than applying a brake pad. Sorry, I don’t really know much about bikes. I don’t even own one for myself!
Lol…deflate the tire. It will then slip between the brake pads without having to remove them.
Haha, great idea! :)
I did this to two identical bikes (the joy of tiwns)
This page was useful but I had some unexpected challenges:
– One of the chain guard screws was on so tight I stripped the screw. After doing the other bike, I got lucky and figured out how to get around this by bending the guard enough to pull out the shaft.
– There was an additional washer-looking nut that I couldn’t pull out. It had a groove cut across the surface. Eventually I figured out it was a nut and not a washer; I could unscrew it by just pushing it with the tip of a screwdriver along the groove
– And the worst: The chain actually went through the frame. I couldn’t take the chain off without breaking it. I tried knocking a pin out of the chain to open it, no luck. Eventually I put the chain guard back on and duct-taped the chain to the guard to hold it in place. Looks ugly, but it works.
Thanks for letting me know! I wish all bikes were similar enough that my pictures would work for everybody. That really stinks about the chain! We’ll have to pay attention to that when we get a bike for our daughter soon…we’ll be repeating this procedure before summer for our second child. ;)
This was a great tutorial, took less than 20 minutes. Son (2) wasn’t quite mastering pedals yet, but wants to ride with his big sis. Did this with a bike we found at a yardsale and kept his new bike intact. Thanks for the quick and concise directions.
You are very welcome! I’m glad everything worked smoothly.
Sadly, the nut attaching the pedals wouldn’t budge for us. (We were attempting this hack with a Nickelodeon bike from wal-mart). We ended up rounding the nut, unfortunately. :( i was really hoping we could make this work for us.
Awww, I’m so sorry Elissa! That really stinks! :(
Thank you for posting this!! Balance bikes can be expensive, so I wanted to just convert a normal tot bike. This bike has the same chain problem that previous commenters mentioned, so I’m using zip ties as well. It’ll function well enough, even if it’s not pretty. Thanks again!
You are so welcome! I’m glad my pictures helped and you were able to find a work-around for the chain. I guess we just got lucky we didn’t run into that problem!
Very helpful! I will say yours was a brand new bike which makes a huge difference. All of the “needs a little strength” or “comes off easily” parts required WD40 and the jaws of life after 3 years of trying to teach this kid to ride with training wheels
Haha, I could see how that would be the case! In a year or so we’ll be pulling the pedals off this same bike again for my now 4 year old son. We’ll probably need the jaws of life as well!
I wish I’d known about this long ago (balance bikes, that is). My son had a lot of trouble learning to ride a bike, and obviously (well it’s obvious now, anyway) riding around with training wheels doesn’t really help much with that. My daughter picked it up so easily that having her use a balance bike would’ve been a waste of time, but I think it may have saved my son a lot of tears and frustration while he was trying to learn.
We actually put the pedals back on my daughters bike today and she was successfully riding around for the first time. I suppose all kids learn eventually, but you’re right…it’s so much nicer when they learn without tears and frustration!
Thank you so much for this tutorial. My 7 year old is afraid to ride without his training wheels and balance bikes just make so much more sense. So far as I can tell, there are only two balance bikes on the market for “big” kids, and they’re close to $200!! I really can’t justify that just to enable my kid to ride his $35 Huffy lol. Can’t wait to try this later this week.
I know, right?! Good luck! I know a couple people have had bikes that were designed a little differently than my son’s, so they couldn’t remove the chain completely. I hope it works well for you! We get our bikes pretty inexpensively too, so hopefully they are similar!
This helped a ton. Thanks!
I’m so glad! :)
Thanks for posting this. I was thinking of doing this myself and am glad to see it’s worked for someone else.
Another earlier commenter noted that the chain on their bike was installed through the frame.” This is in fact the norm and if your own bike wasn’t built that way it’s an exceptional case. I’d recommend you update this post to flag this additional step that in most cases will be required. Removing a chain can be quite difficult and in most cases requires special tools (in other cases it requires some know-how). Plenty of videos available though on how to use a “chain tool.” On the plus side, for bikes built this way there’s no need to remove the rear wheel :)
That’s a good idea! All four of my kids can ride a bike now so I’ll never have to use this post again, but it would be good for others to know there might be some challenges!