I made one of these for my first child when he was about 14 months old, based on the wonderful book by Tricia Kuffner, The Toddlers Busy Book. My son LOVED this toy so much I dragged it with us on a cross country flight to Maine even though I packed as lightly as humanly possible. (It may have been a little disconcerting for airport security, but I didn’t regret the decision.)
I don’t now if he had a touch of obsessive compulsive disorder or if this is normal toddler behavior, but he could play with this toy literally endlessly. Mid tantrum? Tired? Hungry? It didn’t matter. If someone dumped out the balls from the can, he had no choice but to scurry around as quickly as possible to put them all back in. Now that I’m reflecting on the experience, we grown-ups sound a little mean, but really, this activity brought him great joy. I think he felt he was doing productive work and didn’t seem bothered by our amusement.
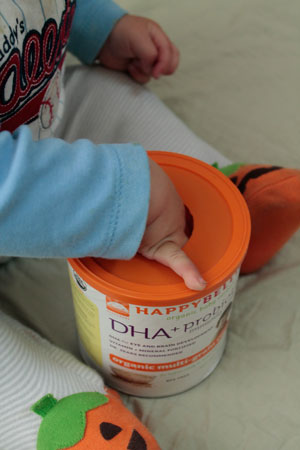
Over the years and after another child, the lid did start to break, so we just made another one for my third child. He’s only 10 months old, but I can’t even describe how appealing the sound of the balls rattling around in the can is to him. He can’t quite get the balls in by himself unless I place them over the opening and let him push them in, but I don’t think I’ve ever seen him this eager to explore a “toy” (store-bought or otherwise). I ended up taking the lid off for him so he could get the balls in and out by himself. With the lid, I know this is going to entertain him for quite a few months to come.
Recommended Age Range: Baby/Toddler
Time Required: 10-30 minutes depending on amount of time spent decorating
Difficulty: Relatively Easy (hardest part is cutting the circular hole, so go slow)
Cost: A couple dollars for ping pong and golf balls, though I did use some supplies like a drafting compass and calipers that everyone might not already have.
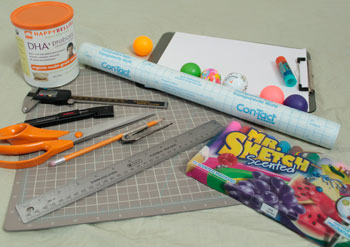
Materials:
- A can with a plastic lid (coffee can, formula container, peanut container, Ovaltine container, Gerber’s Lil Crunchie snacks…we used a Happy Bellies rice cereal container)
- Ping pong balls (ping pong balls make the best sound and are the least dangerous, but can use golf balls, bouncy balls, or anything similarly sized)
- 2 sheets of paper (optional, if you want to decorate the can…we didn’t the first time we made one)
- glue
- markers (optional, for decorating)
- contact paper (optional, for decorating)
Supplies & Tools:
- calipers (optional, for making hole precisely the right size to require them to be pushed through the hole)
- drafting compass (could also use a template for drawing circle)
- x-acto knife
- self-healing mat (or other cutting surface)
- ruler (optional, for decorating)
- scissors (optional, for decorating)
Instructions:
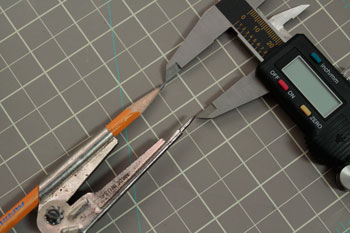
- Measure the diameter of your balls. I used calipers. My ping pong balls were 40 mm. The biggest ball in my assortment was 44 mm.
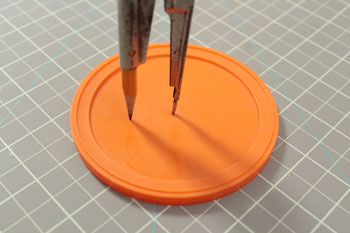
- Find the radius (half the diameter) of the biggest ball and spread the needle of the compass and the tip of the pencil to that measurement (see below). I went with 22 mm. One negative aspect of having a variety of ball is that only the biggest ones can be set on the hole and pushed through. The smaller ones just fall in easily. With my 10 month old, I kind of wish I had cut the hole to 20 mm, so I could place the ping pong balls on top and he could have the satisfaction of pushing them through. When he’s a little bigger and has better hand-eye coordination, it won’t matter.
- Draw the circle on the plastic lid using the compass. Place the needle in the center of the lid and move the compass all the way around. You may need to press hard to get the pencil to show up.
- Cut out the circle with the x-action knife on the self-healing mat. (Note: This is harder than it looks. My method involved making several (like 100) very small cuts, picking up my x-acto knife and re-positioning it between each cut. However, remember that your baby won’t care if the hole is not perfect. On my first “model”, 4 years ago, the hole was pretty lopsided, but it got tons of use with both my first and second children.) After you cut the hole, you can be done! There really is no reason to decorate it. I just wanted my picture to look a little nicer.
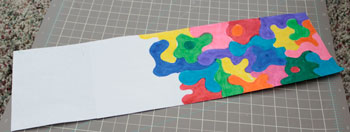
- If you want to decorate the can, use a ruler to measure the height of the can, then cut strips of paper that wide.
- Assuming your can is too big for one piece of paper to go all the way around, glue your strips of paper together to make a bigger piece.
- Decorate the paper.
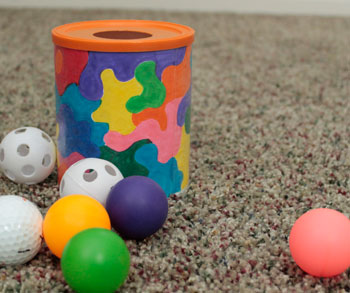
- Glue it on the can.
- Cut a strip of contact paper the same width.
- Cover your decorated paper with contact paper.
Related Links
Homemade Fun for Babies and Toddlers
Homemade Fun for Preschoolers
Best Books for Babies and Toddlers


thanks for linking up to #familyfrugallinky
Just to let you know that this post is one of my weekly features over on the Family Frugal Linky. Hope to see you over there again today! http://www.multicraftingmummy.com/2015/05/frugal-rainy-day-activities.html
Wow, you took such careful detail in making this. It is just so cute and a great activity for keeping kiddos occupied. Thanks for sharing with Littles Learning Link Up. I pinned your post to my Toddler Ideas board.
I hope to have you stop by again this week. I can’t wait to see what you share.
I love how decorative you made the can! I admit that I’m the lazy mom who would just give the child the can the way it is, lol!