I’ll be honest. I’m a little cheap. I wasn’t always this way, but I’ve been with my ultra-frugal husband for almost 20 years now (crazy) and he’s rubbed off a bit. An organization in my area that provides STEM classes for kids recently advertised a computer building class for nearly FOUR HUNDRED DOLLARS. What?! I’m not trying to disparage the quality of the class, but I happen to know that the hardware the kids are using is the Raspberry Pi Kano computer kit which costs under $150. (Update: There is now a newer edition.)
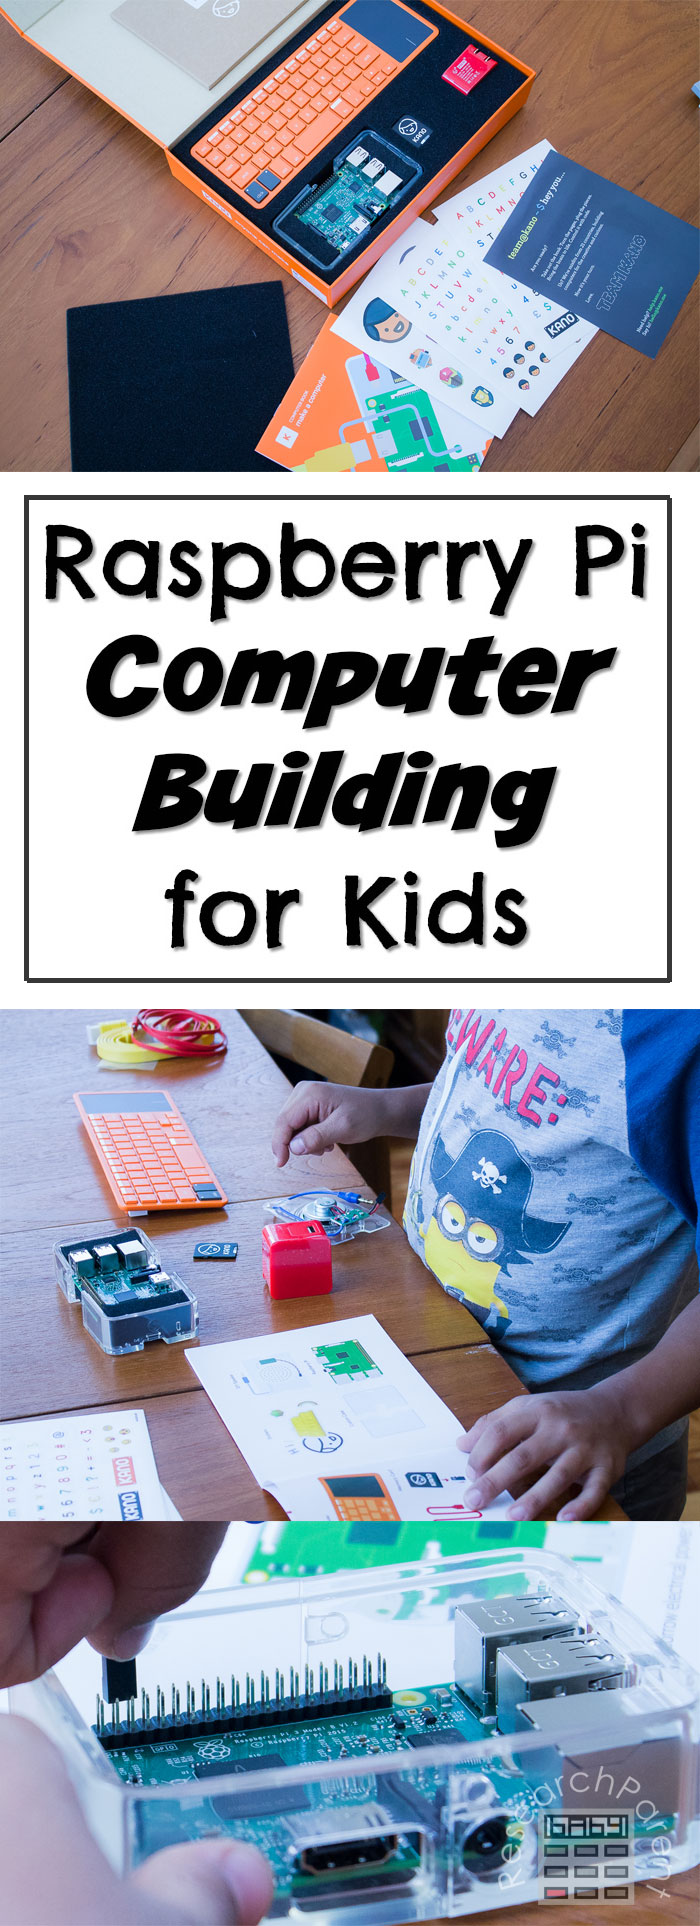
I decided I wanted to give my son an at-home, less expensive computer building experience. I’ve built a number of desktop computers from the ground up by individually choosing all the components. I was initially planning to replicate that process, but build around an inexpensive Raspberry Pi instead of a motherboard and processor. However, the more I looked into the Kano kit, the more I was impressed with how user-friendly, and more importantly, kid-friendly, it seems to be.
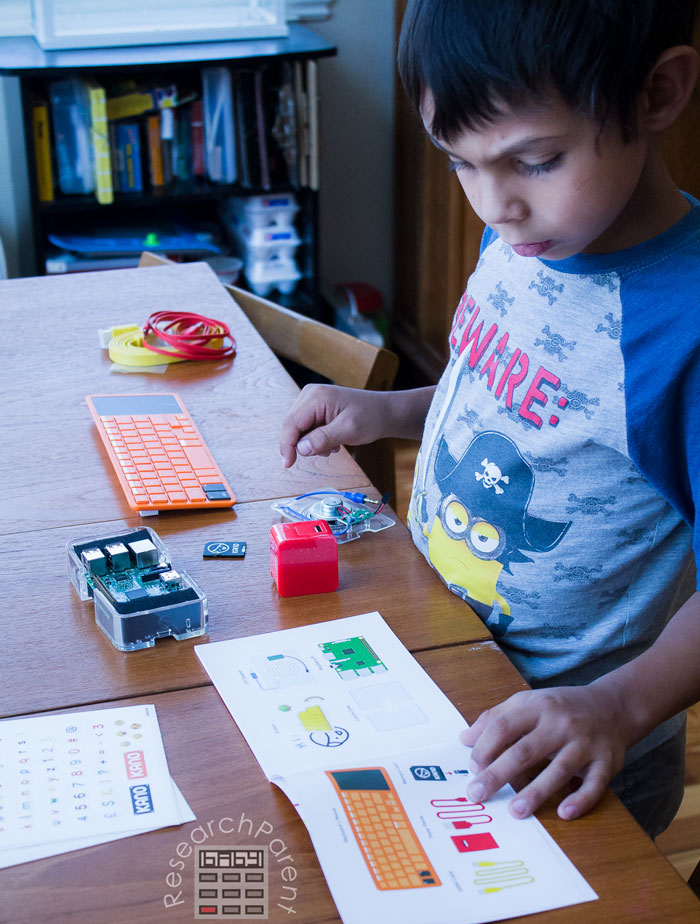
While I’m sure I could have put together a Raspberry Pi computer from scratch for under $100, I paid the premium with the goal that my nearly 8 year old son would put this computer together with no assistance from me. For the most part, he succeeded. He did need me to a help him read a couple words in the very child-friendly manual, help him snap in the cover of the case, and understand some of the prompts on the screen once we turned it on. However, as you’ll see from the picture tutorial below, it really is straightforward enough that a child can do it on their own.

So what did I get for the extra cost besides everything we needed in a cute little box? For one, a very child-friendly instruction manual that explains all the steps of assembly in colorful, easy-to-understand pictures and not-overly-wordy directions. Another benefit is that the Kano operating system is designed specifically for children. It comes preloaded with a bunch of educational applications for kids, some of which I’ll discuss briefly after the tutorial. My son is most excited about Hack Minecraft. He’s been using it for about a month now and is still having a ton of fun with it (and actually programming!). I’m most excited about Scratch, MIT’s programming language for kids. We haven’t started using it yet, but I’m looking forward to digging into that more when we have some free time.
Recommended Age Range: Elementary, Middle School
Time Required: ~40 minutes
Difficulty: Easy
Cost: $120-$150 for the Kano Computer Kit
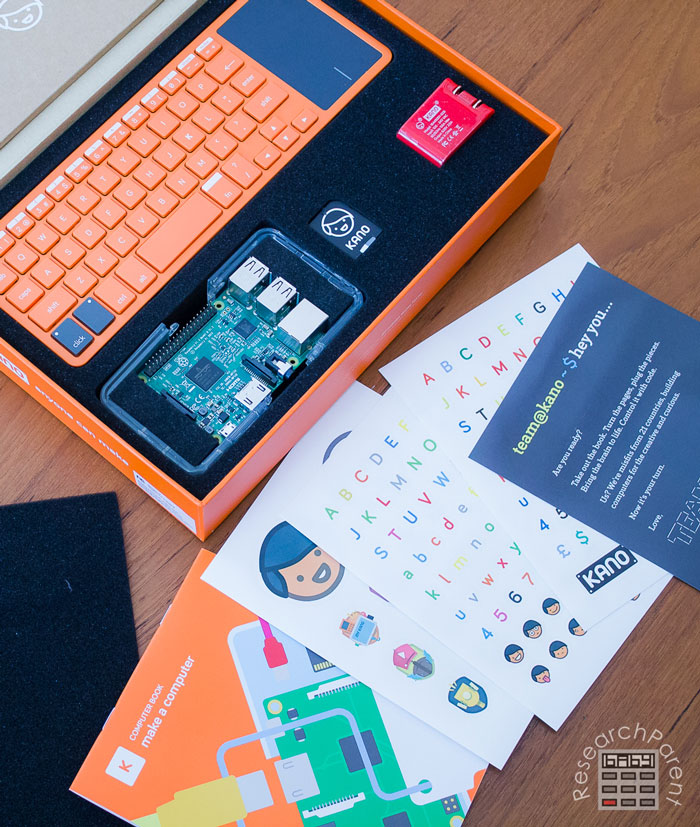
Supplies:
- Kano computer kit
- TV or computer monitor
Instructions:
- Open the box and take out all the pieces.
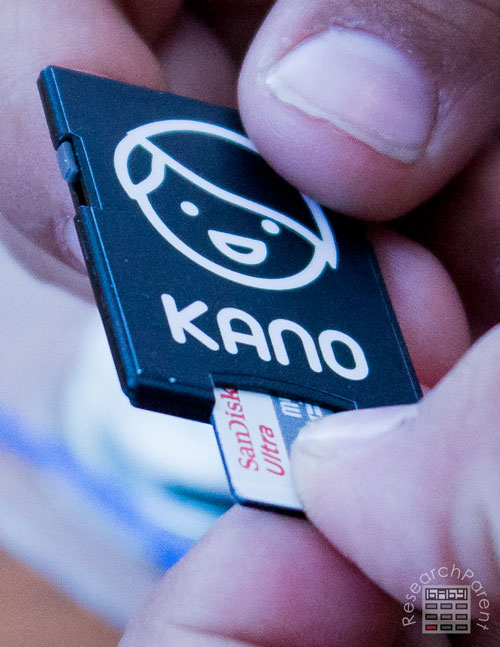
- The kit comes with a micro SD card inside an adapter the size of a standard SD card. First, the child needs to pull the micro SD card out of the adapter.
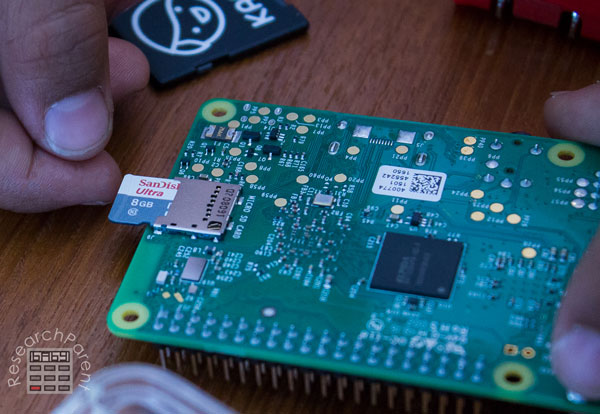
- Next the child needs to insert this card into the Raspberry Pi. This memory card will store the computer’s data.
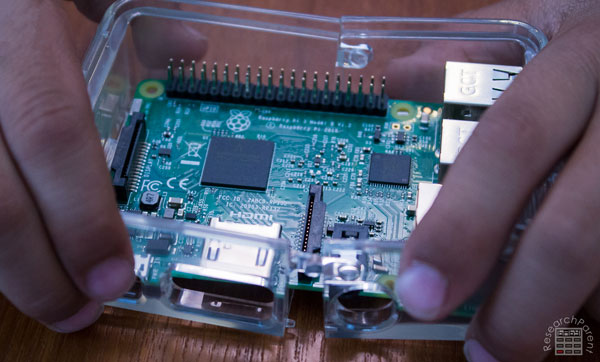
- The next step is to assemble the case to protect the Raspberry Pi. When my son was doing this on his own, he first accidentally put the case together WITHOUT the Raspberry side inside. Since the case needs to be assembled around the Raspberry Pi, he had to try again. No harm done. He got it right on the second try. Note that you also have to make sure that the case is assembled such that the holes in the case line up with the ports in the Raspberry Pi.
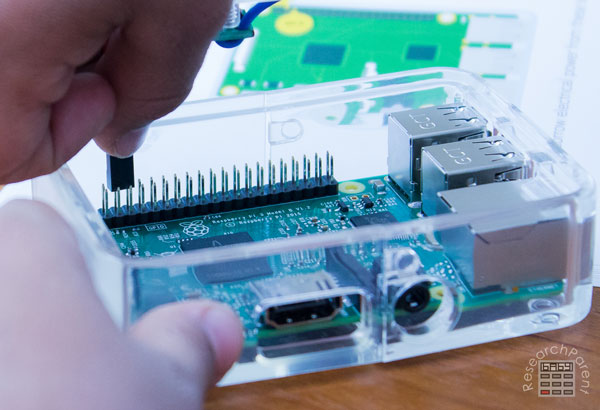
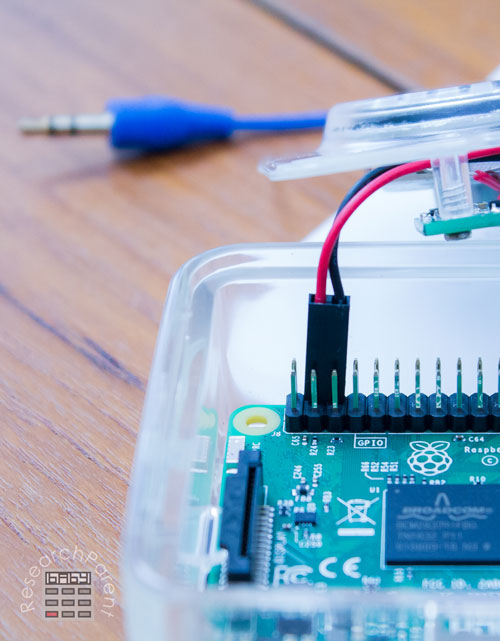
- The speaker is on the lid to the case. Before you snap in the lid/speaker, you need to plug the speaker’s power cord into the Raspberry Pi. The instructions give a graphical illustration of where the speaker’s power wire should be connected. I watched carefully at this point to make sure that my son plugged the connector into the correct pins. The connector should be plugged into the row of pins closest to the edge of the board into the second and third pins from the short edge. When it is connected, the red wire should be closer to the short end of the case than the black wire.
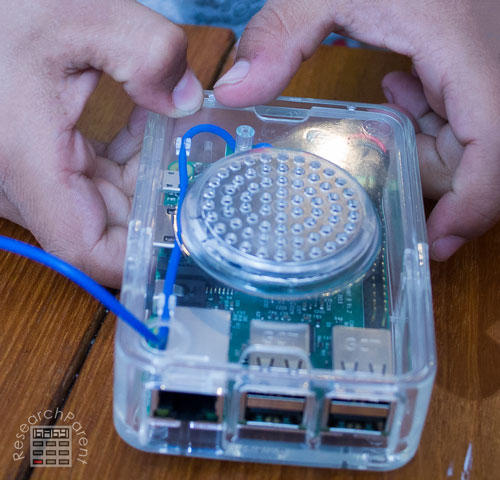
- Next, clip the lid with the speaker into the top of the case. My son had a little trouble getting it to click, so I helped him with this step.
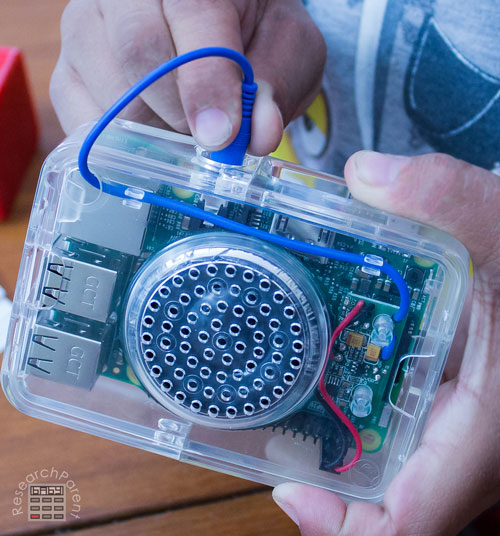
- Plug in the blue speaker cord into the speaker jack so that the Raspberry Pi can send sound to the speaker.
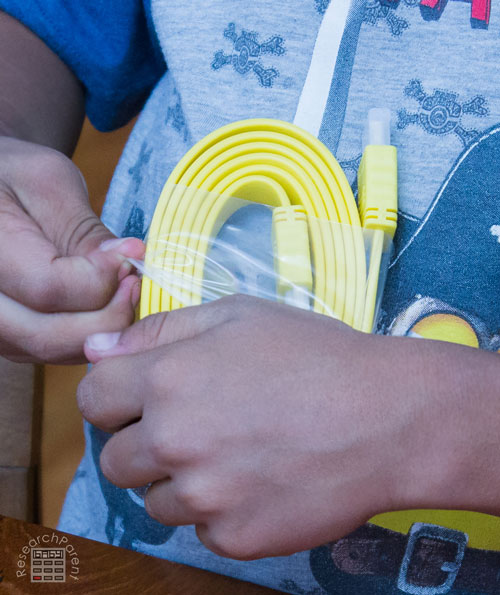
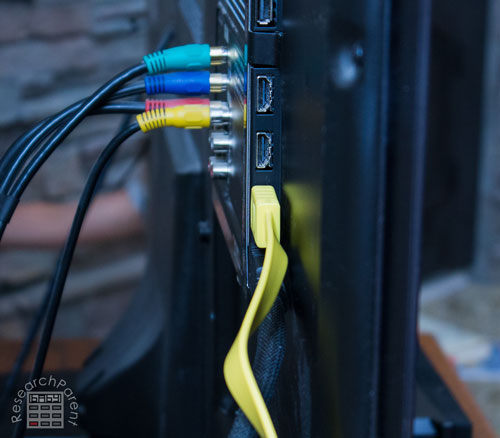
- Now the child needs to attach the computer to a screen in order to see what it can do. Open up the yellow HDMI cable.
- If you have a computer monitor lying around, you can use that. However, since we didn’t have one and I didn’t want to buy one, we’ve just been using our TV. (Most TV’s have multiple inputs, so you can leave it plugged in and just switch inputs to watch TV.) Plug the yellow cable into one of the HDMI ports on your TV or monitor as shown. I actually did this step, just to make sure my son didn’t knock over our TV.
- Then plug the other end of the HDMI cable into the HDMI port of the computer.
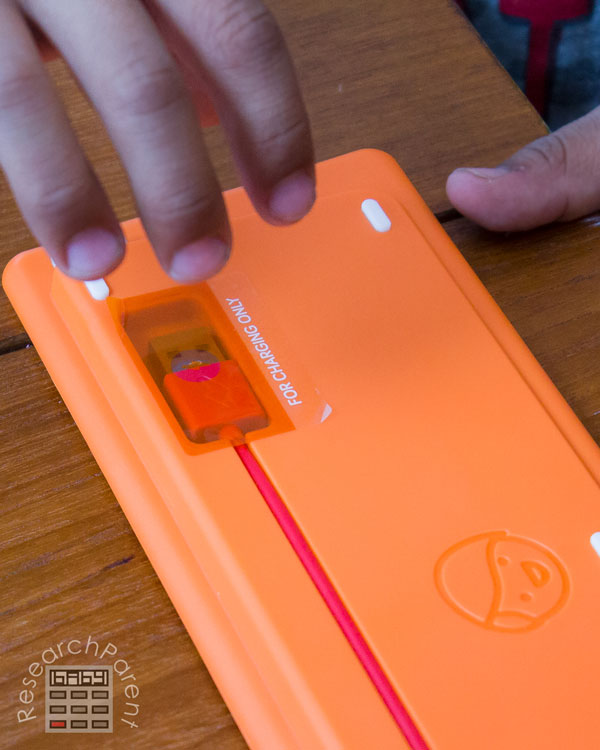
- Next comes the keyboard. My son first took off the sticker from the red charging cable. However, the keyboard ships already charged and even though he’s used it for several hours, so far he hasn’t needed to charge the keyboard. When the keyboard stops working or starts acting funny, it will be time to charge it.
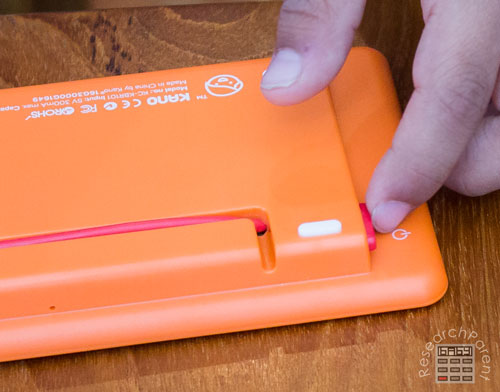
- Push the red power button to turn on the keyboard.
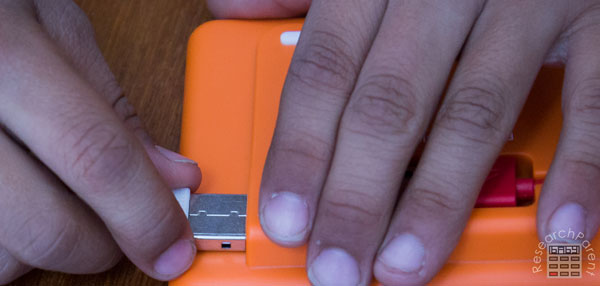
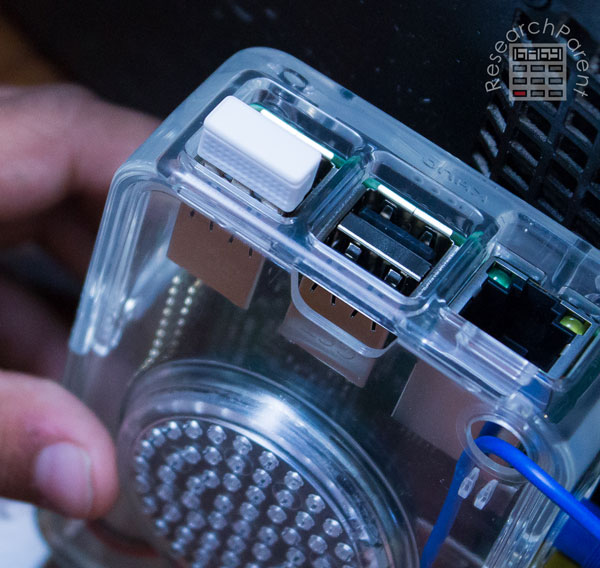
- Remove the small white USB piece from the keyboard. This is a radio antenna so that the computer can wirelessly talk to the keyboard.
- Plug the radio antenna into any of the USB ports on the computer.
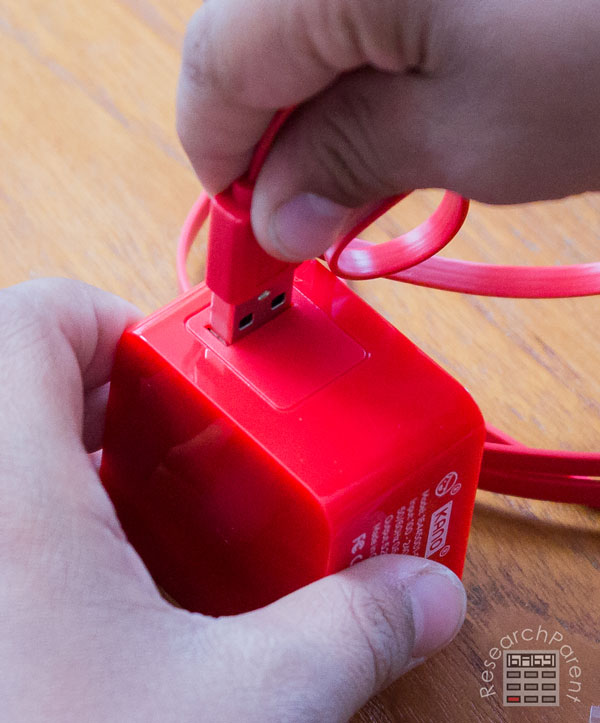
- To give power to the computer connect the USB-end of the red cable into the red power brick.
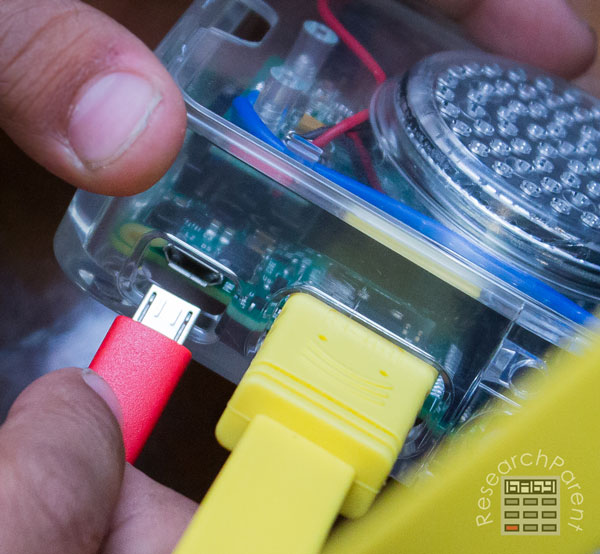
- Plug the other end of the red power cable into the matching port on the computer.
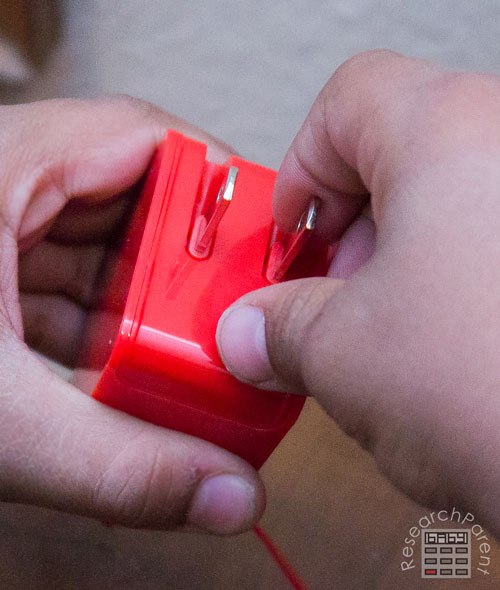
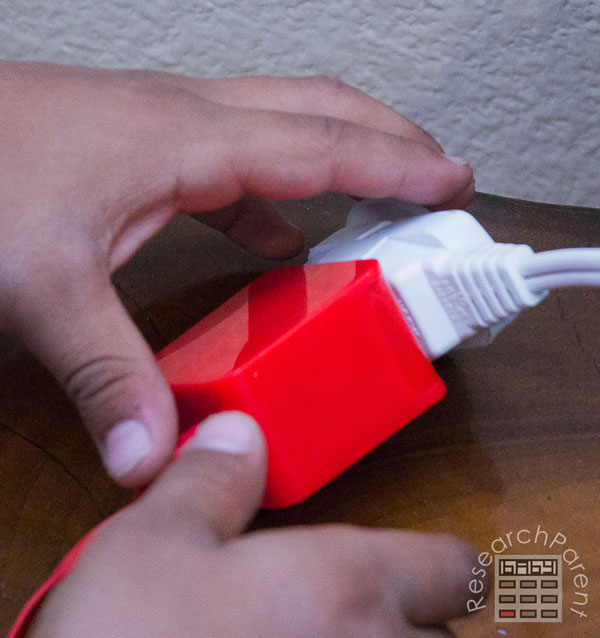
- Pull the prongs out of the power brick.
- Plug in the power brick. Do this step for your child if you’re not comfortable with them doing it themselves.
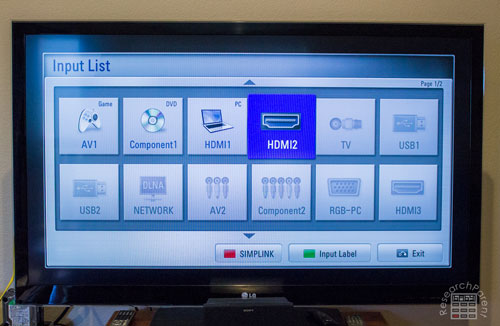
- After you plug in your computer, it is already turned on. If your TV/monitor is not showing the computer’s black and white prompt, you may need to change the input on your device. I did this by hitting the “input” button on my TV’s remote and then trying the HDMI inputs until I found the one connected to the computer. This input selection process may be slightly different for your device.
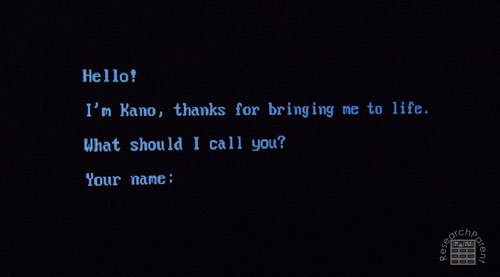
- Once the correct input was selected, we saw this greeting from our Kano computer.
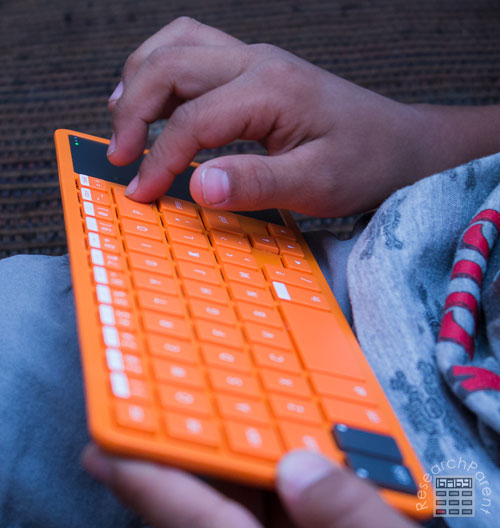
- Use the keyboard to type in your name.
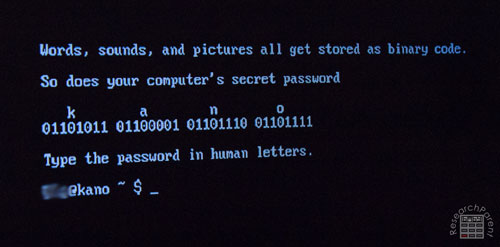
- Next, we were asked to type in the password. My son assumed he could make up his own password at this point, but found he actually needed to type “kano.”
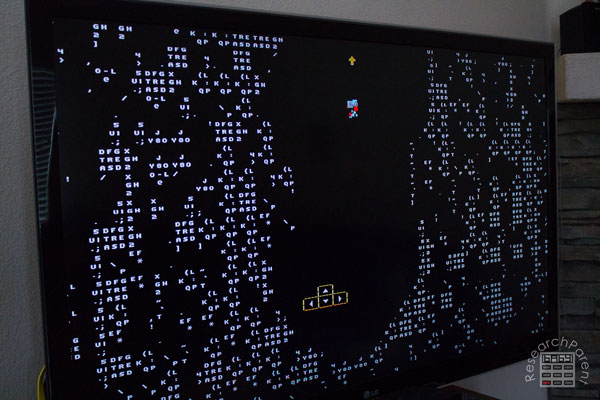
- Next, a Matrix-y looking game appeared which required my son to use the arrow keys on his keyboard.
- When he got to the end of the mini game, he got to another screen that showed him how to use the mouse to move and click using his keyboard.
- My son continued to follow the prompts to connect to our wireless (I had to give him our family’s wireless password).
- Next he was guided through creating his own little customized character.
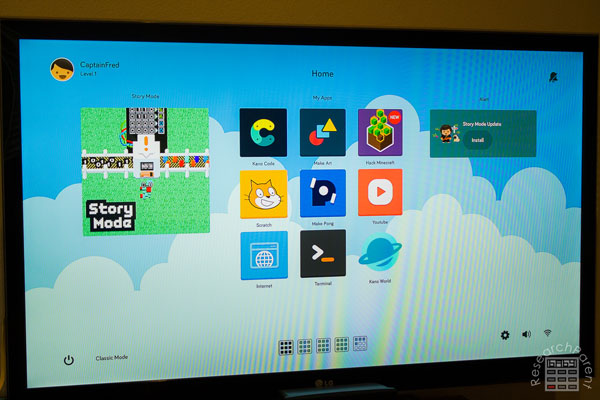
- After all the initial setup, we made it to the desktop filled with pages and pages of programs and apps.
- Explore and enjoy!

![]()
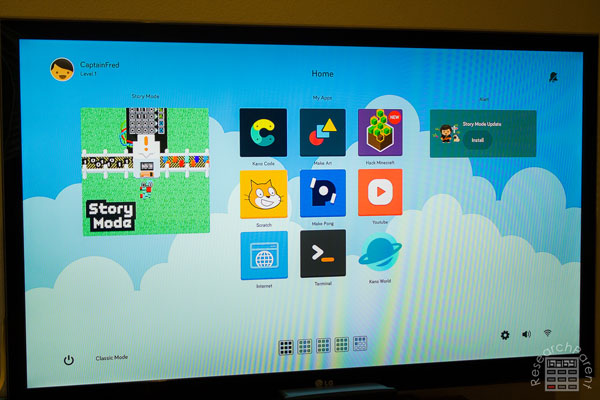
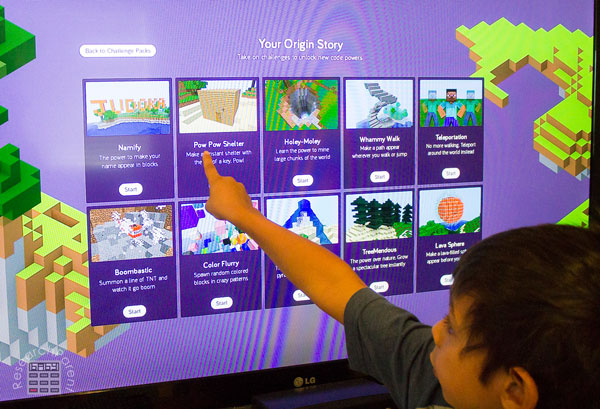
My son has been using this computer for about a month now. I choose to limit his screen time to about 20 minutes per day. So far, all he’s chosen to do with his time is play Hack Minecraft, but he hasn’t grown bored with it. Even though he can only read at about a 2nd grade level, he is still able to follow the tutorials to program “superpowers.”
One feature that seems great, but so far he’s only explored a little bit, is Story Mode. It seems like this is a very kid-friendly way to walk through all that the computer is capable of doing while learning about the parts of a computer. The character is walking around in a world that is built on top of a Raspberry Pi. As they move around, the user learns about the different components. For example, this is the red power cable. By talking to the man near the power cable, the child learns more about the power cable including that it is important to make sure you shut down properly so you don’t lose data.
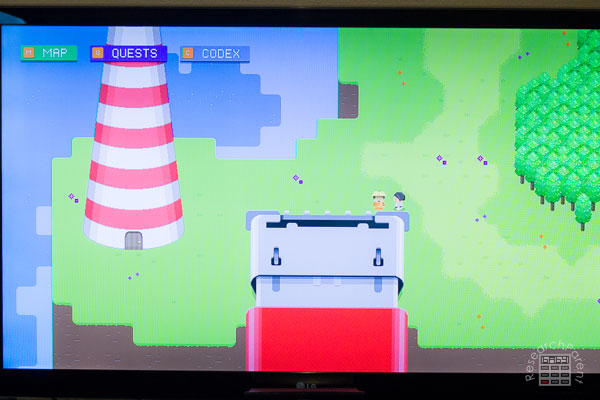
As I mentioned, as a computer programmer, I am most excited to dive into Scratch which was designed as a programming language for kids. Given the wild imaginations of my kids (and children in general), I’m excited to see what sort of crazy things they create.
Overall, I am pretty pleased with the way this little computer building experience has turned out. On the downside, my son has run into some minor glitches using the software. For example, he has been told he didn’t shut down properly when he swears he did. Also, there was one time when Hack Minecraft seemed unable to switch back to hack mode until he restarted the device. Given the low cost of the device compared to an ACTUAL laptop or computer, issues like these don’t bother me too much. Minor frustrations associated with using technology seem to be an unavoidable fact of life.
On the positive side, he really was able to assemble this computer almost entirely alone. He gained some confidence working with electronics and some familiarity with the parts of a computer. For the most part, I’ve also let him navigate his way around the software as well. Despite the minor frustrations that has involved, he has had a really good time exploring and learning. The kid-friendly operating system Kano put together really is a fun little playground for kids to start programming.
If you have any questions, please let me know!
Click here for more Computer Science and Engineering activities for kids.
Related Links
Robotics Activities for Kids
Technology and Engineering Activities for Kids
Science Activities for Kids


Dear Michelle:
I read your review and was executed about this Kano Raspberry Pi product. You wrote this review yesterday as I am reading this Saturday, October 14th. You say this product costs about $120. Yet, the affiliate link to Amazon shows the Amazon Prime price at $148.93. That is quite a difference. I also read some of the reviews and an very skeptical of the product. Please explain this price difference.
Hi, Herminia! You’re right! That’s annoying. I paid $120. If you’re really interested in buying it, you might want to think about setting a price watch on CamelCamelCamel for when it drops back down to $120. You can see from this link that the price history seems to fluctuate a lot. Unfortunately, it’s possible that the reason for the price increase is that the 2017 edition is now out so there’s a lower supply of the 2016 edition (which is what we used). The 2017 edition appears to be $145 right now.
As for the skepticism, I don’t blame you. For such a low price, you know it has to have limitations or issues. As I mention at the end of my post, my son *has* experienced a couple bugs. Once he had to restart the system to get Minecraft to work properly. However, he has played for hours and hours and he hasn’t experienced anywhere near the amount of glitches that first reviewer on Amazon has experienced. It’s definitely not perfect, but I think it’s a fair price for what it is — a really simple, inexpensive, kid-friendly computer that promotes teaching kids to learn to program (especially at $120 vs. $150). Apart from that first reviewer, it seems like most people are pretty happy with it. Our family definitely falls in that camp.
Thanks for the thorough review! I’ve been looking at this kit for a while – maybe we’ll wait and see if they come out with a more stable version (or the cost comes down)?
No problem! I just saw right after I posted this that the 2017 version is out. It wasn’t on Amazon when I bought my kit in early September. The 2017 version is too new to have many reviews, but hopefully they’ve worked out some of the bugs. So far, glitches haven’t been too big of an issue for us, but it would be great to have a completely bug-free product!
Thanks for the article, I enjoyed it. Although I may not buy the kit, it has given me renewed interest in encouraging my children to program. I’m not a confident programmer myself so I’m learning on the way too. I love the idea of building a computer.
That’s great! I’m a computer programmer for my (part-time) day job and I didn’t learn to program at all until I was 18 and in college, so there’s no rush. Also, Scratch, which is what I’m really interested in, can be used for free on any computer. I liked the idea of my son having his own beginner computer and it comes installed as part of this kit, but I don’t even think you need to install it to use it. I’m pretty sure there’s a version that can be used entirely online. I plan to look into it more and hopefully follow up with some really simple tutorials. Thanks for reading and taking the time to comment. :)