Are you following along with my Spike Prime Tutorials? First, I created a series of 5 posts starting with the unboxing. Now, I am working on a series of challenges. I will list them all below and hopefully update the links as I go. If you want stay up to date with my robot tutorials, sign up for my newsletter! My goal in creating this series is that kids will be able to develop their engineering, coding, and problem-solving skills in an engaging way. These are not tutorials to follow, but actual missions that kids can work on their own or together to accomplish. At the bottom of this post, I will post my own solution guide in case anyone is feeling stuck. A little frustration can be motivating, but so much frustration that they want to quit is not what we’re hoping to achieve.
This is my first challenge that will involve using an actual sensor. In that way, this is the first ACTUAL robot tutorial of this entire website. (If you haven’t already, feel free to check out all the mini-bot tutorials I made several years ago when my kids were little! Those involved learning about electronic components, but since they were not responding to their environment, they were *technically* not real robots!)
I was excited for my kids to try out the distance sensor, in particular, because I think it might be useful for the FIRST LEGO League Challenge competition that I’m hoping to coach this year. Basically, the goal is that rather than telling exactly how far forward the car should go, the child should place an object in front of the car’s path and then get it to stop when it is a certain distance from that object. A more difficult challenge would be to not tell the car how far to turn either, but even I’m not sure how to do that yet! Instead, I still allowed my kids to tell the car how many rotations to turn.
This challenge is also a little more difficult than previous challenges because the kids have to somehow find a way to attach the distance sensor to the robot itself. This attachment will be slightly more challenging than the first attachment required in the Pushing an Obejct Challenge. Kids are likely to find that they prefer one task over the other. Some kids will prefer the building. Others will prefer the coding. Personally, I prefer the coding, but my 9 year old LOVES to build. Neither is better than the other and both preferences play a valuable role on a robotics team.
For your reference, here are the challenges that I’ve done so far and the ones that I’m planning to write soon. Sign up for my newsletter to stay up-to-date!
- Spike Prime Challenge 1: Moving to a Square
- Spike Prime Challenge 2: Avoiding an Obstacle
- Spike Prime Challenge 3: Pushing an Object
- Spike Prime Challenge 4: Using a Distance Center for Navigation (*this post*)
- Spike Prime Challenge 5: Knocking Over a Tower
- Spike Prime Challenge 6: Lifting a Square
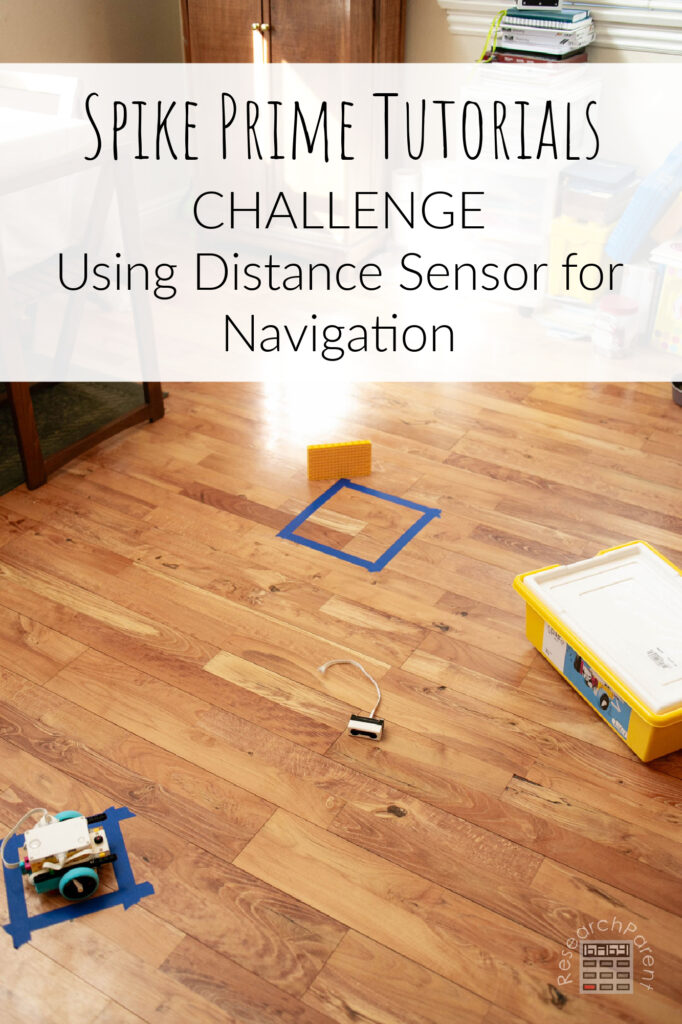
Spike Prime Challenge: Using the Distance Sensor for Navigation Details
Recommended Age Range: Elementary, Middle School, High School
Time Required: This took my kids about 20 minutes, but it could be more or less!
Difficulty: Easy to Medium
Cost: The LEGO Education Spike Prime Set costs $400 on the LEGO site. As of this writing, it is more expensive on Amazon, but I would check to compare!
The Challenge
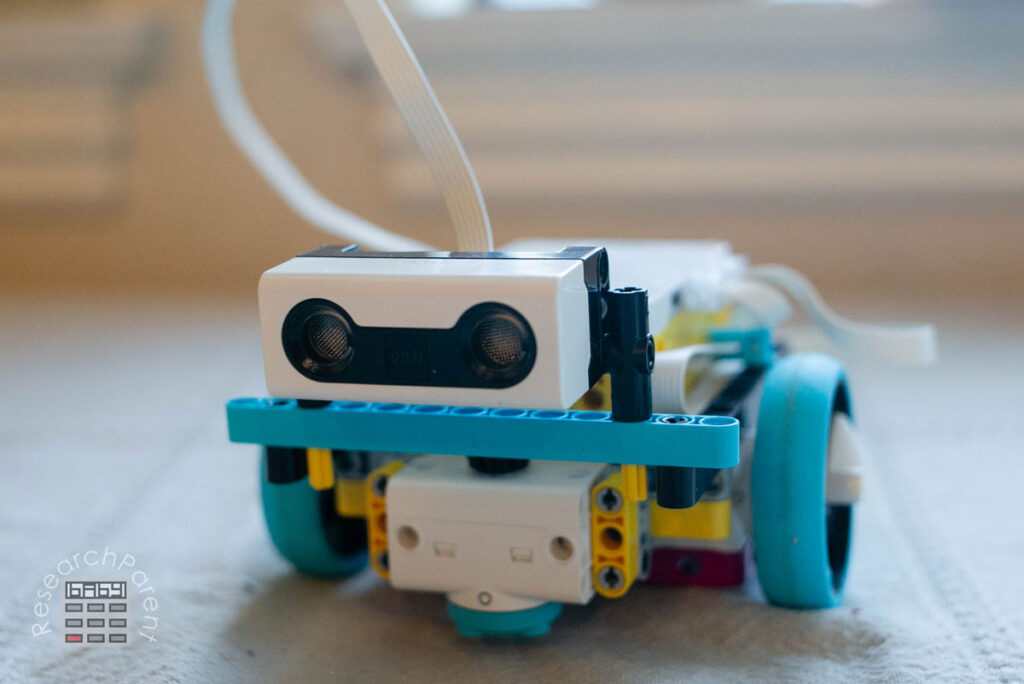
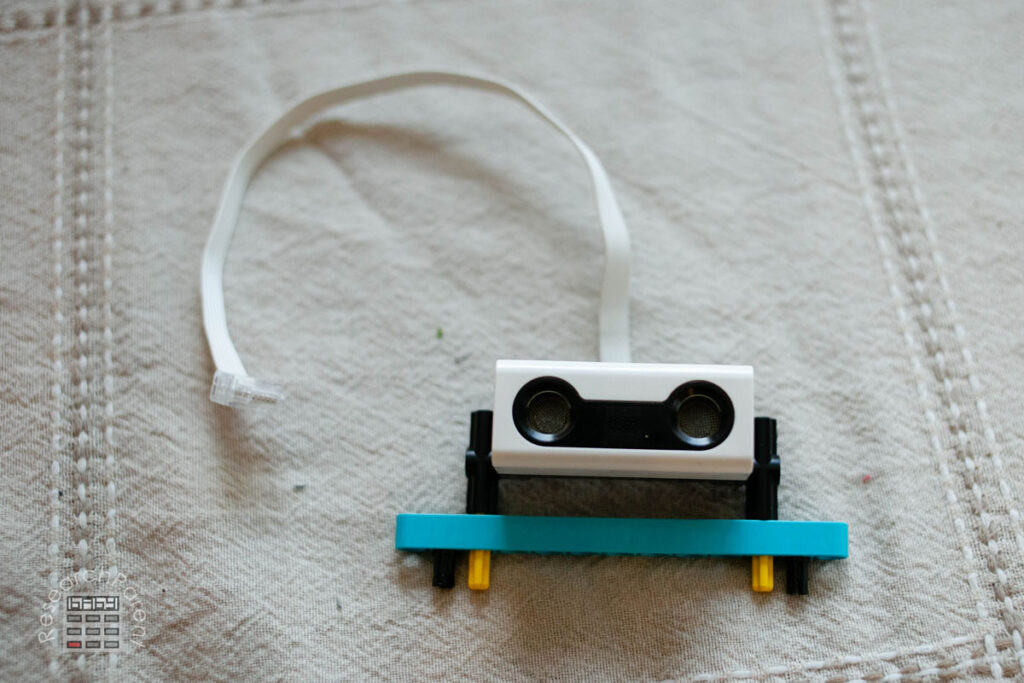
This challenge involves two parts. The first part is to somehow take the distance sensor and attach it to the hub using the pieces in the yellow bin that came with the robot. (If you have other pieces, feel free to use those as well!) You can think of the sensor like eyes. You have to put the eyes on the front of the car so that it can “see” where it’s going.
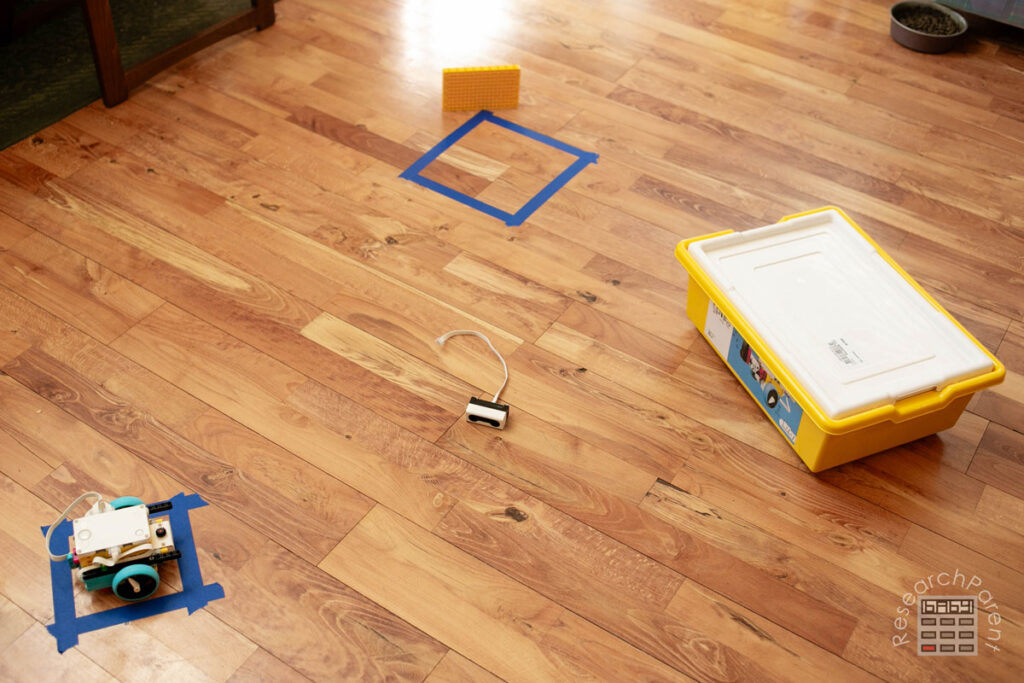
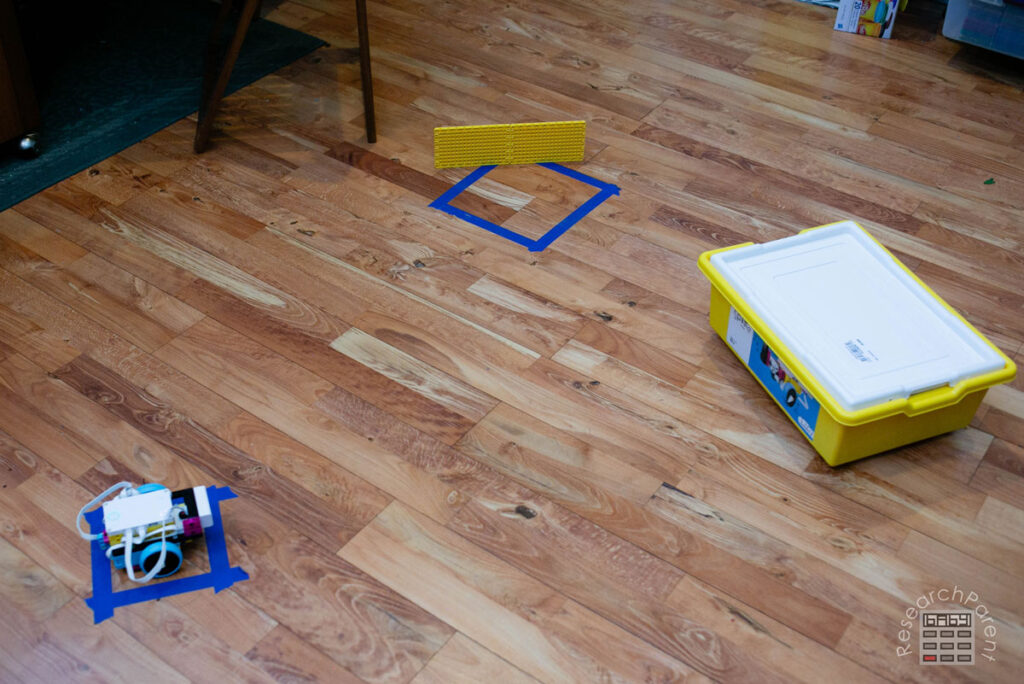
The second part of the challenge is to use the “eyes” to tell the car when to stop rather than telling the car how many rotations to move forward. No longer can they say “move forward for 3 rotations.” That block is no longer allowed is no longer allowed in this challenge. Instead the car will approach “walls” and you will tell it to stop when it is a certain distance from a wall. Note that I used the yellow bin and the two yellow surfaces for my walls, but kids can use different household items and position them where ever they want.
The goal is to make it from the starting square to the target square without telling the robot to move forward for a specified distance or number of rotations.
My Solution
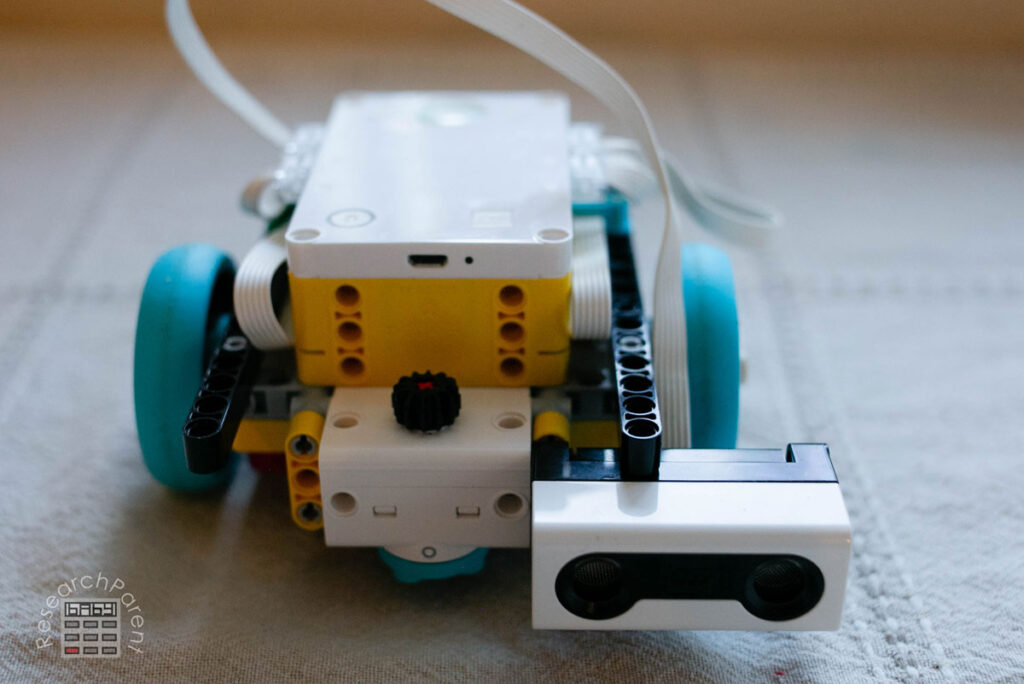
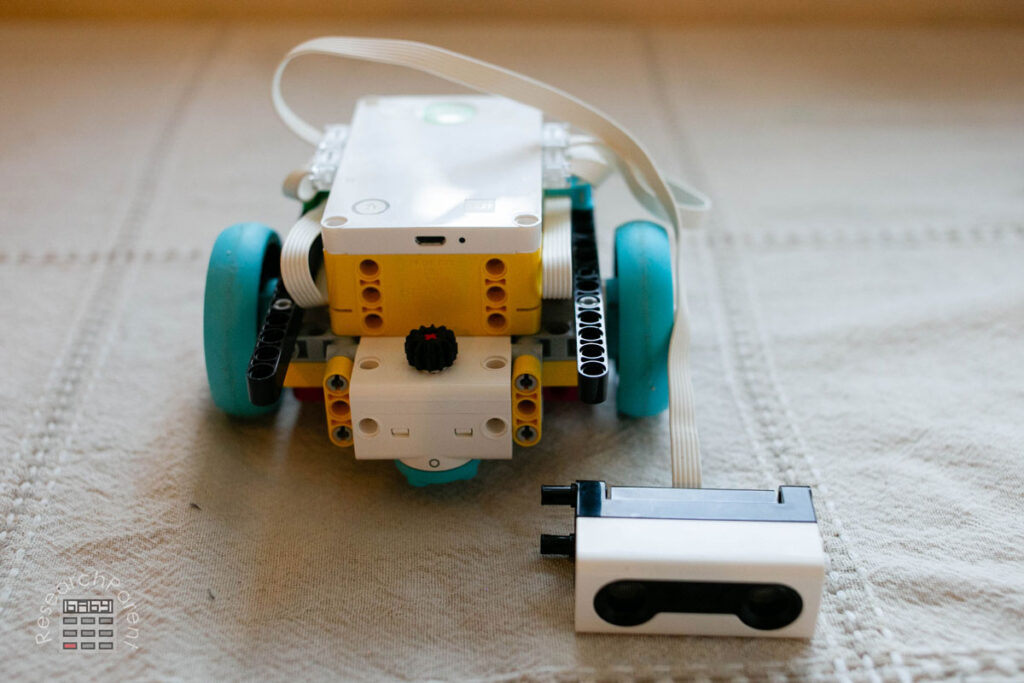
The first step is to attach the distance sensor to your bot. There are several different ways that you could go about solving this challenge. To give you an example, I’m going to first show you the different ways my 13-year-old, my 9-year-old, and I built our attachments. Here is my 9 year old’s design:
The biggest issue with this design is that the “eyes” can rotate up and down. This could be considered a feature as you have the option of pointing the eyes upward or in any direction you want. However, if we were professionally designing a robot, we would definitely want to lock the sensor in place. It would be terrible if this were a Mars rover and driving over bump terrain caused the sensor to rotate straight down into the bot itself. However, for this particular challenge, my 9-year-old’s design worked perfectly.
Next, here is my design. My primary goal was to have a simple design that locked the sensor in place.
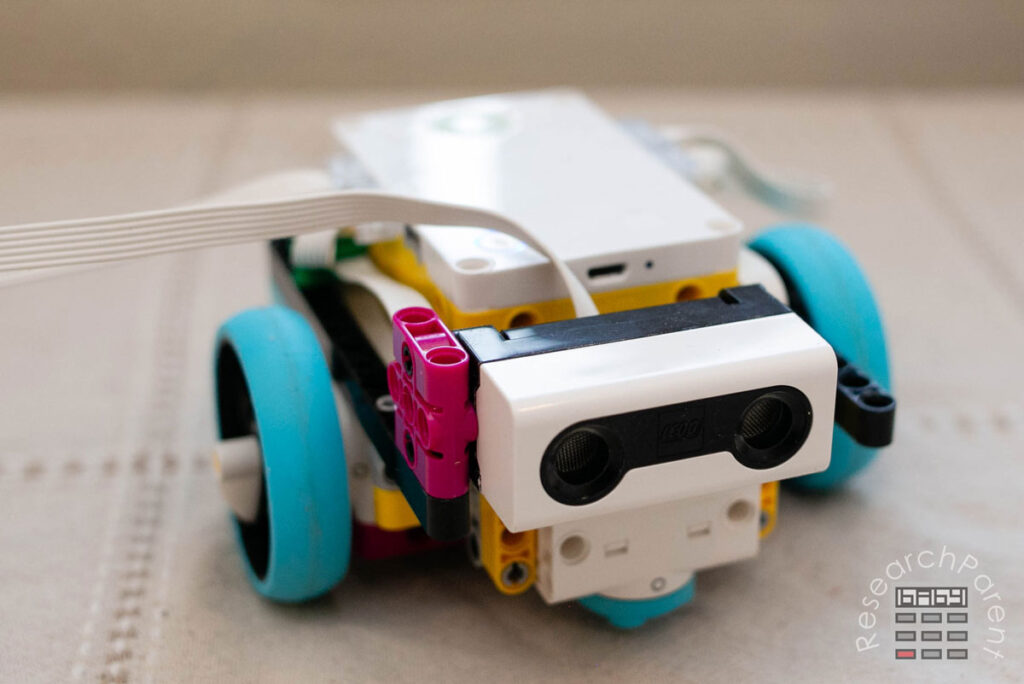
This design does the job, with 4 pins and one square piece that allows us to connect two surfaces in different planes.
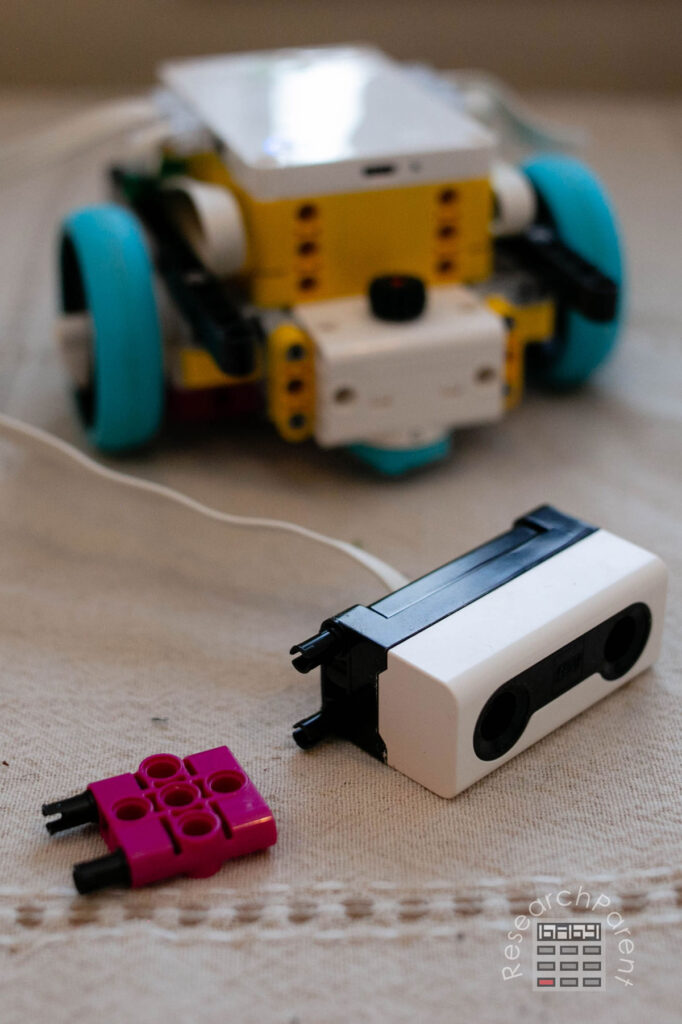
Finally, I will show you my 13-year-old’s design. It made me laughs when I saw it.
He simply used two pins to connect the sensor directly to the motor, which hadn’t even occured to me. It is off center, but still capable of “seeing” walls as it approaches them. All-in-all, his functions well, has the sensor locks in place and uses two fifths the number of pieces as my design. Well-played, sir.
Once you have your sensor design, the next step is to set up walls so that the bot will have an indicator of where to stop. My goal was to have my robot drive straight until it needed to make roughly a right angle turn to get to the blue square, then drive straight until it was close to my second wall. This is how I set up my walls:
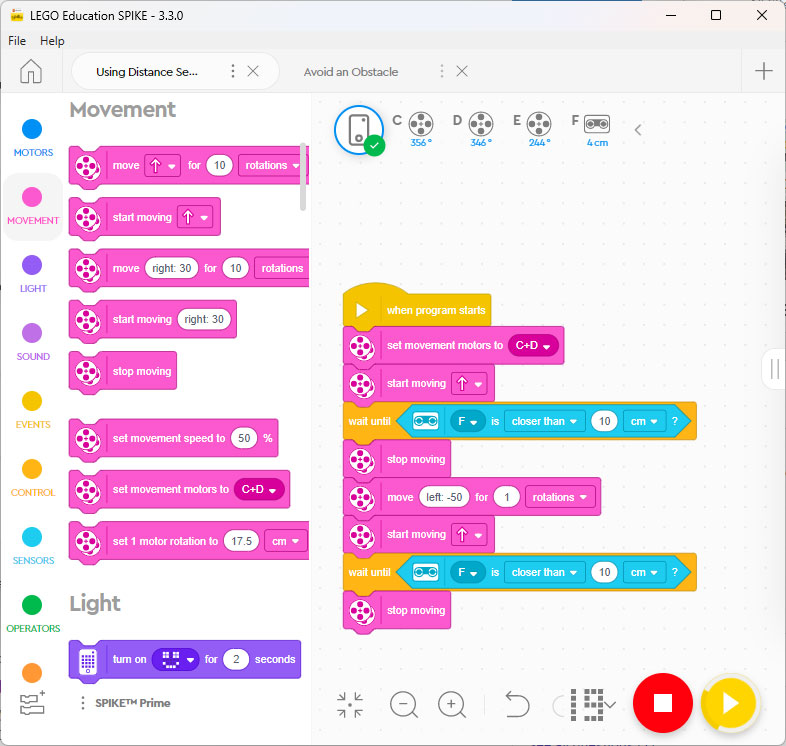
And here is the program I wrote that would accomplish this task:
Good luck doing your first challenge with a sensor! Feel free to reach out with questions!
Related Links
Robotics Activities for Kids
Science Activities for Kids
All Learning Activities

Leave a Reply