If you’ve been following along with my series on getting started with the Spike Prime and learning to program the Spike Prime through challenges, you’ll see that things are starting to warm up. The skills that kids will learn in this and the following challenges will be VERY useful if you ever decide to compete in a FIRST LEGO League Challenge competition. The challenges are starting to get a little more difficult, but not so difficult as to be frustrating. Hopefully your kiddo will find this challenge to push the limits of their abilities in a way that is exciting and fun. If not, I’ll offer some tips down below to help them out!
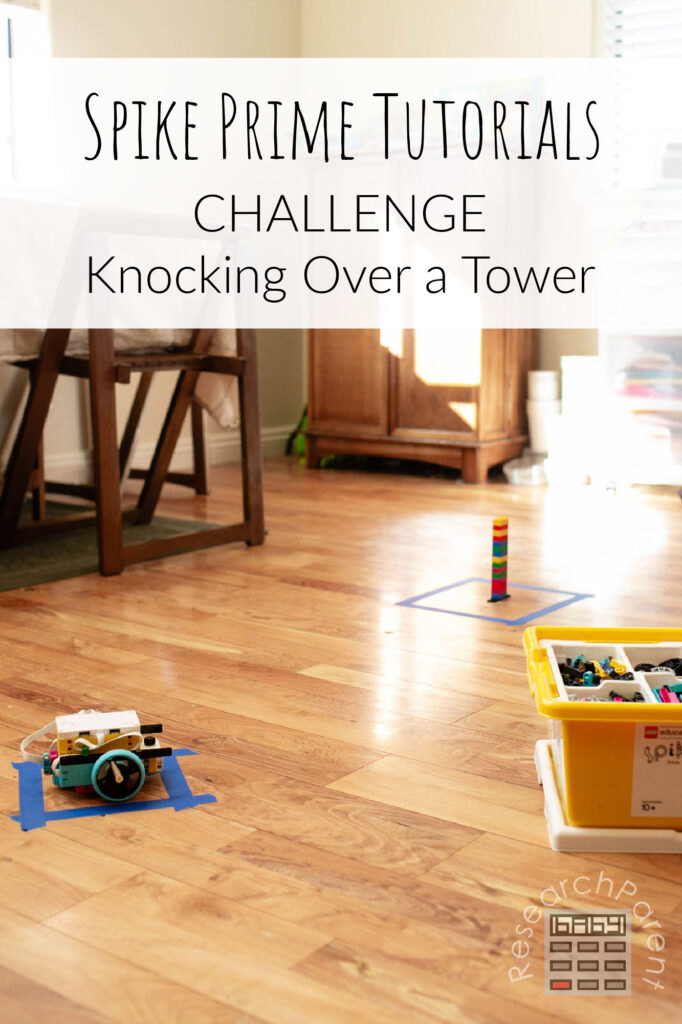
This is my first year acting as a FIRST LEGO League Challenge coach. However, last year my oldest participated in the competition and I got to see how everything played out. (That was what made me realize how FUN this competition could be. And, of course, educational.) I’m not sure how the high school competition works, but at least for this 4th through 8th grage age group, nearly all of the missions involve, first, driving the car to a desired location and, second, pushing on levers or surfaces in a variety of ways. This challenge replicates exactly those objectives.
For your reference, here is a list of all the challenges I’ve either written so far or plan to write up soon. I’m sure this list will grow over time, so feel free to sign up for my newsletter if you’d like to stay up-to-date. (Note that if you have no experience using a Spike Prime, my getting started series of 5 posts might be a better place to begin.)
- Spike Prime Challenge 1: Moving to a Square
- Spike Prime Challenge 2: Avoiding an Obstacle
- Spike Prime Challenge 3: Pushing an Object
- Spike Prime Challenge 4: Using a Distance Center for Navigation
- Spike Prime Challenge 5: Knocking Over a Tower (*this post*)
- Spike Prime Challenge 6: Lifting a Square
Spike Prime Challenge: Knocking Over a Tower Details
Recommended Age Range: Elementary, Middle School, High School
Time Required: This took my kids about 20 minutes, but it could be more or less!
Difficulty: Medium to Hard
Cost: The LEGO Education Spike Prime Set costs $400 on the LEGO site. As of this writing, it is more expensive on Amazon, but I would check to compare!
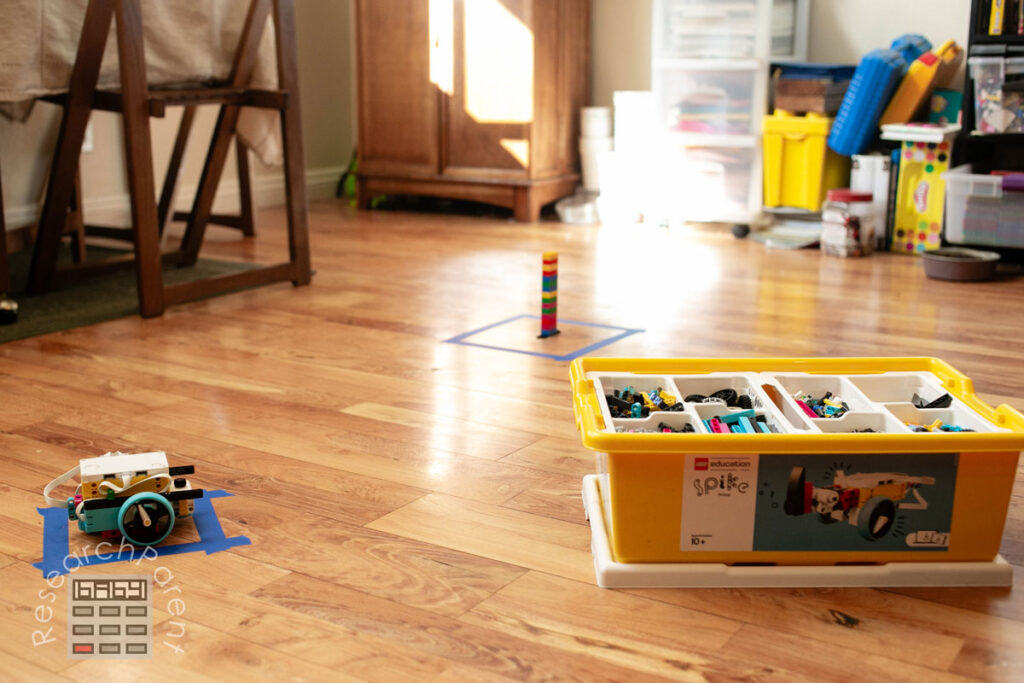
The Challenge
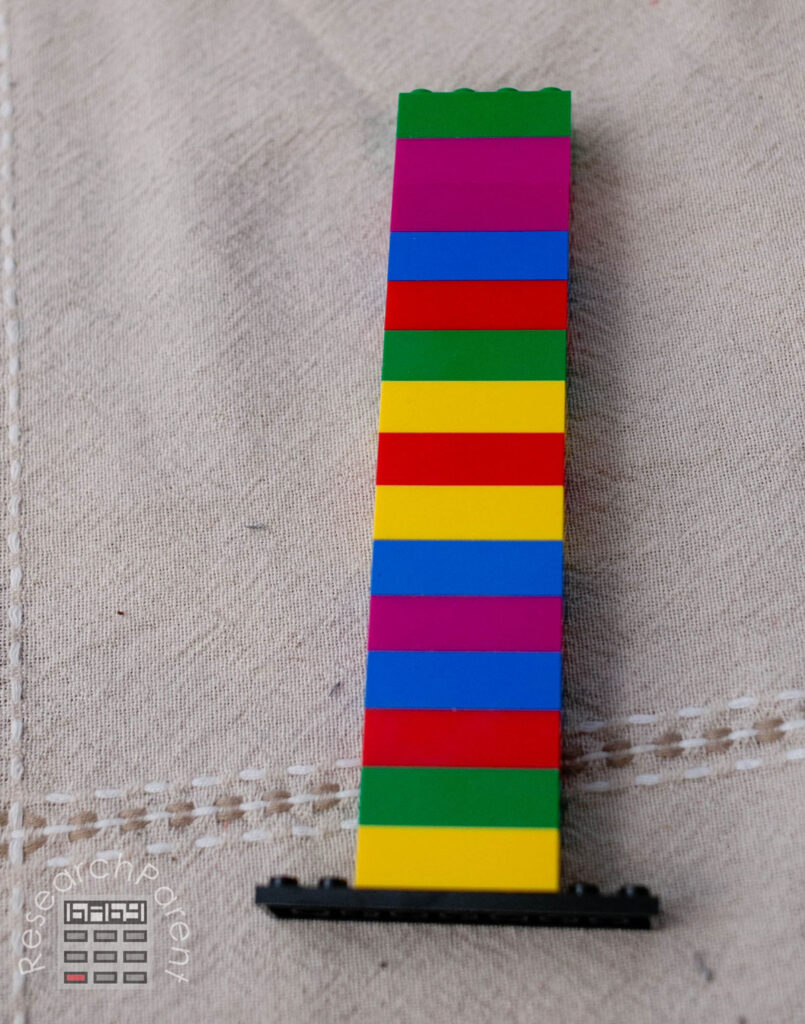
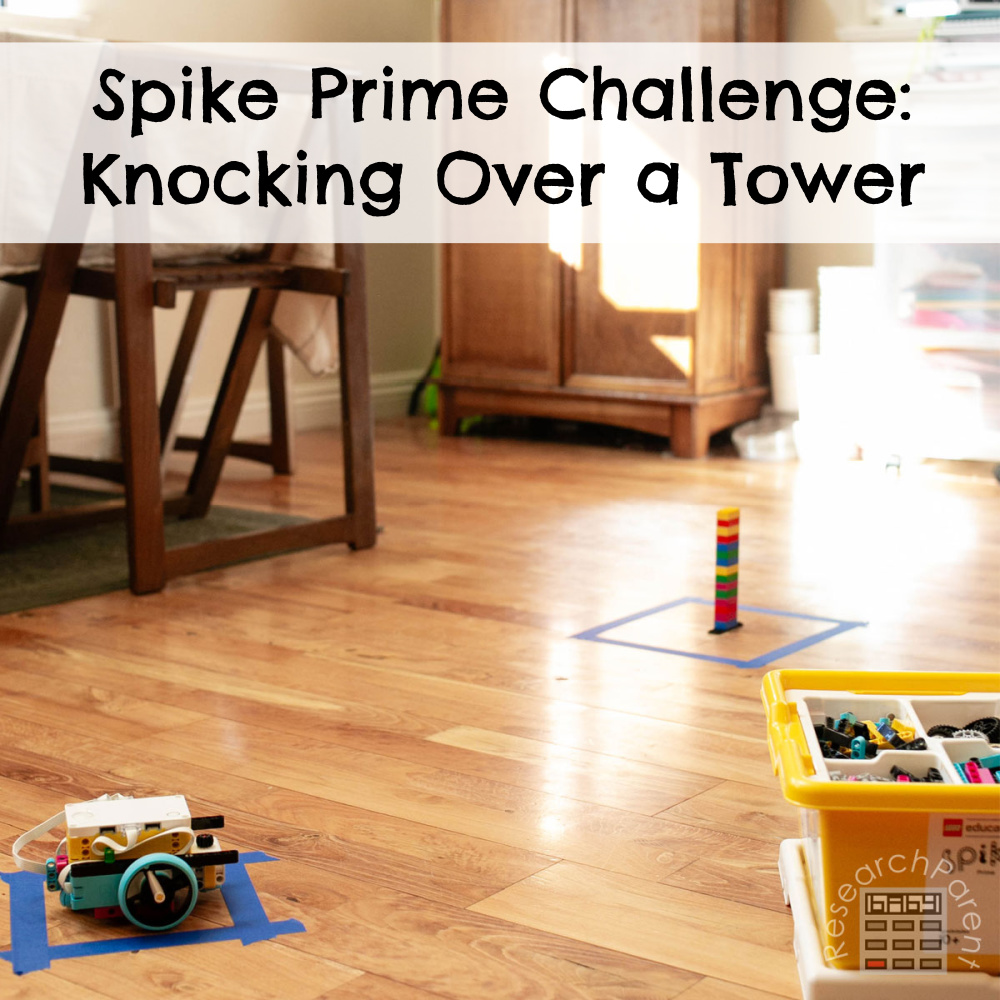
The first step is to build a tower. I used all the regular LEGO bricks that came wth my yellow kit and attached them to a wider base. You will want to place this tower inside the destination square.
I actually had two different levels of this challenge for my own kids. The first level was simply to knock over the tower in the targe square. However, my kids quickly realized that they could just drive into it to knock it over, which is not what I was going for. That was totally fine though, because I congratulated them, then added further restrictions to make the challenge more difficult. As far as they knew, I planned it that way.
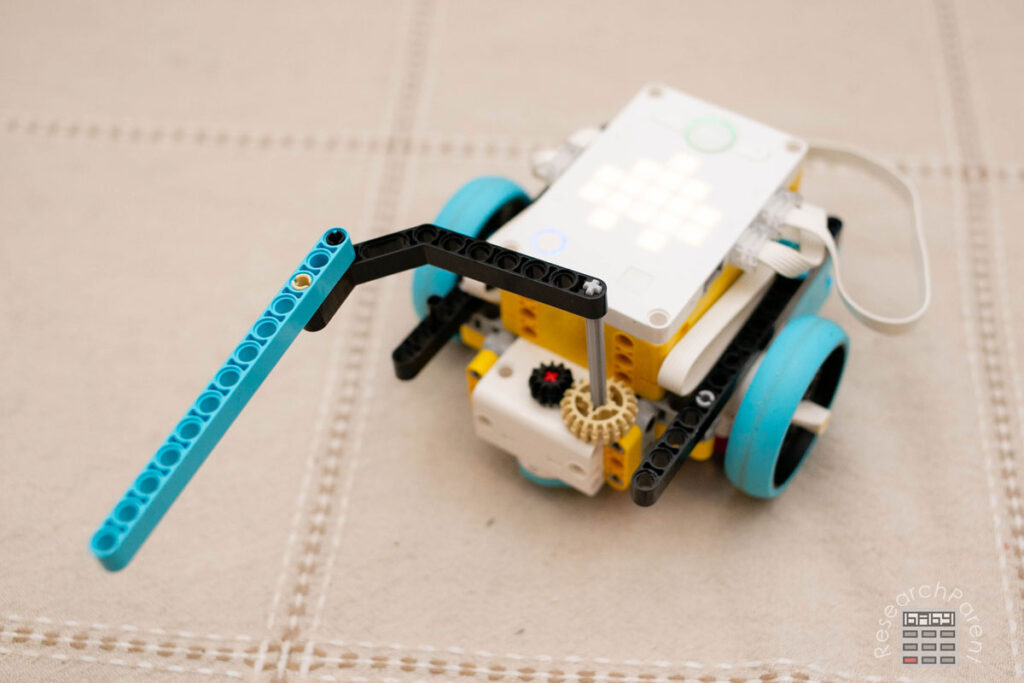
The real point of this challenge, as I envisioned it, was for them to build an attachment using the gear in the front of the bot to knock over the tower by swiping from the side. Therefore, if you’d like to make this challenge a little more difficult for your kids, tell them that the wheels of the bot cannot cross the blue line. Therefore, they have to build something that extends from their bot.
They might just build a jousting pole. In that case, tell them that they have to approach the bot from the skinny side, which will make jousting more difficult. Or you could put obstacles around the two sides that you don’t want them to approach from so they have to try knocking it over from one of the sides that is facing the skinny side of the tower.
With my kids, I actually just explained the type of attachment I wanted them to build (basically a windshield wiper that lays horizontal.) Since my oldest had already participated in FIRST LEGO League last year, he knew exactly what I meant. For my younger kids, I both explained what I wanted and helped them get started by showing them how to place a gear next to the first gear to build at attachment that would rotate in that direction. Feel free to look at my solution for ideas if your kids are getting stuck!
My Solution
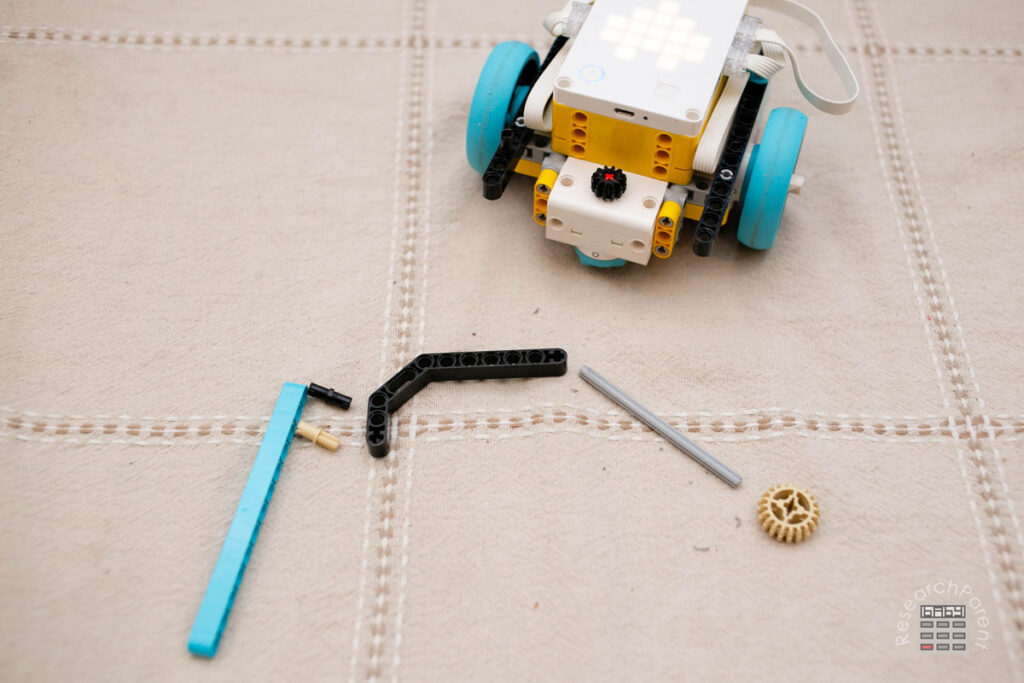
The first step was to build an attachment using the gear at the front of the bot. Since the gear already rotates in the direction that we want out attachment to move, this is a fairly straightforward process, though kids might not see the connection immediately. The more they work on this style of attachments, the more naturally they will start to see solutions.
Here is what I came up with:
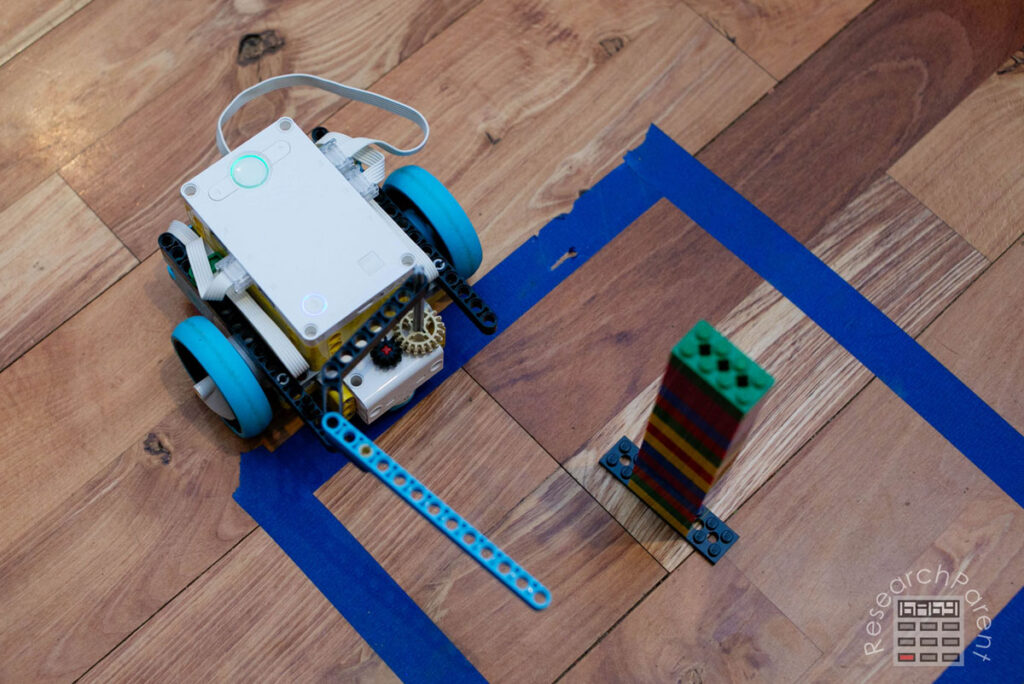
This is the code I wrote to solve the challenge. The trickiest part is getting the robot to the exact right location (lined up with the blue tape) angled exactly facing the tower. This probably took me like 20 slight adjustments to get it just right. Remember that your robot will need to move for different numbers of rotations since our squares are not in the exact same locations.
Here is where my robot landed after I fine-tuned the code to get it to the target square. Honestly, I would have liked it to be a little more centered, but this worked and perfection was not the goal.
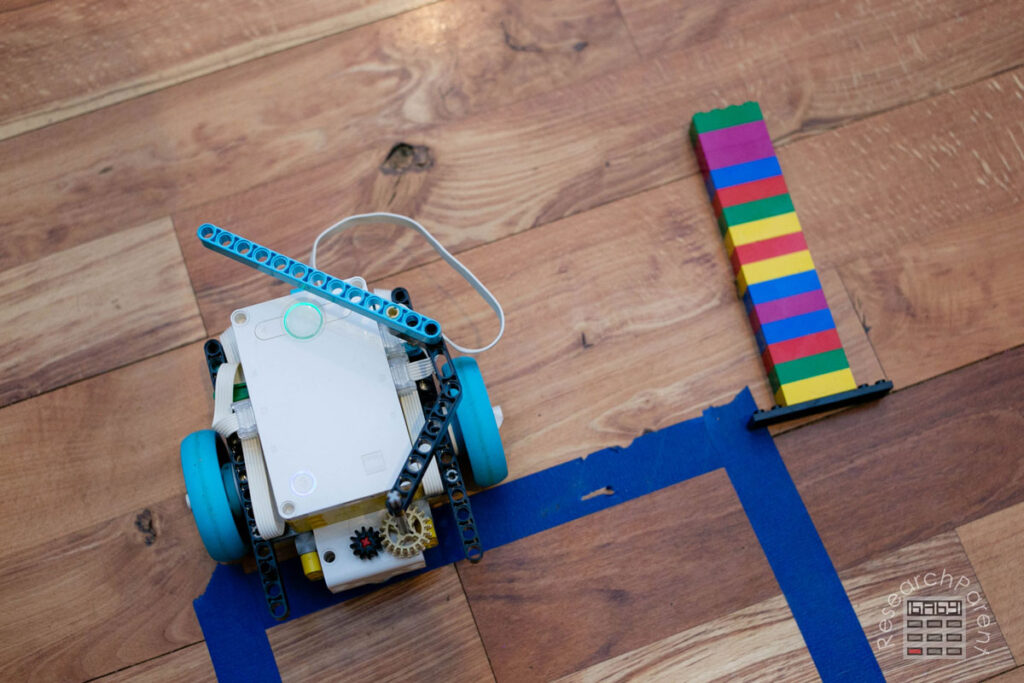
This is what it looked like after it knocked over the tower:
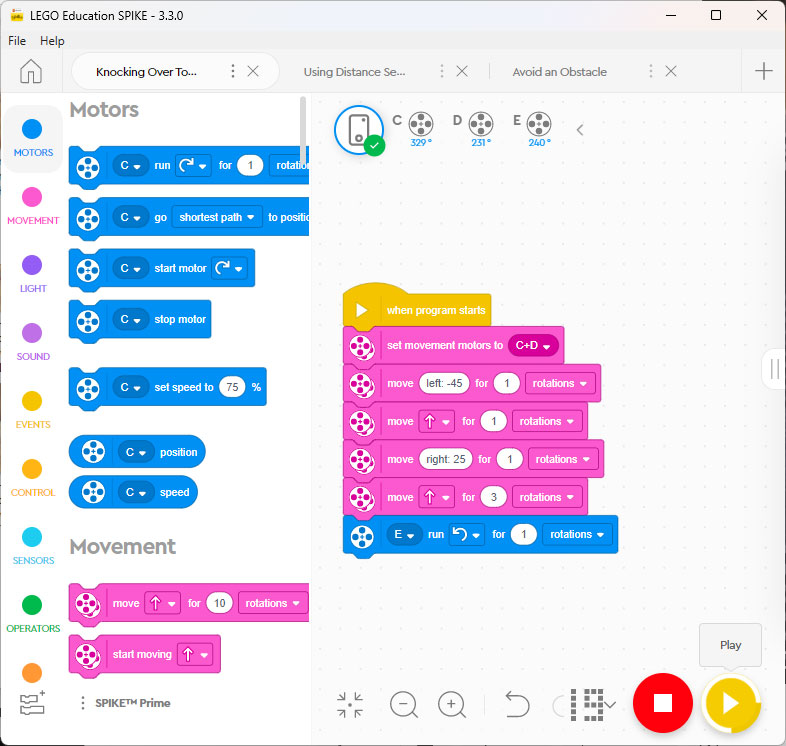
And here is my code! It would have been a good idea to have the gear rotate back to it’s starting position so it would be ready for the next run, but I just lifted the attachment by hand, rotated it to where I wanted it, and then set it back into place each time.
Good luck with this challenge! 😊
Related Links
Robotics Activities for Kids
Science Activities for Kids
All Learning Activities


Leave a Reply