In the future, I’m planning to write a lot more “challenges” for the Spike Pime robot. However, this is the last in a series of 6 that I’m putting together before I start coaching a FIRST LEGO League challenge team. I feel like kids who compete the 5 original Spike Prime Tutorials plus the 6 challenges (listed below) will have gone from complete Spike Prime beginner to being ready to compete.
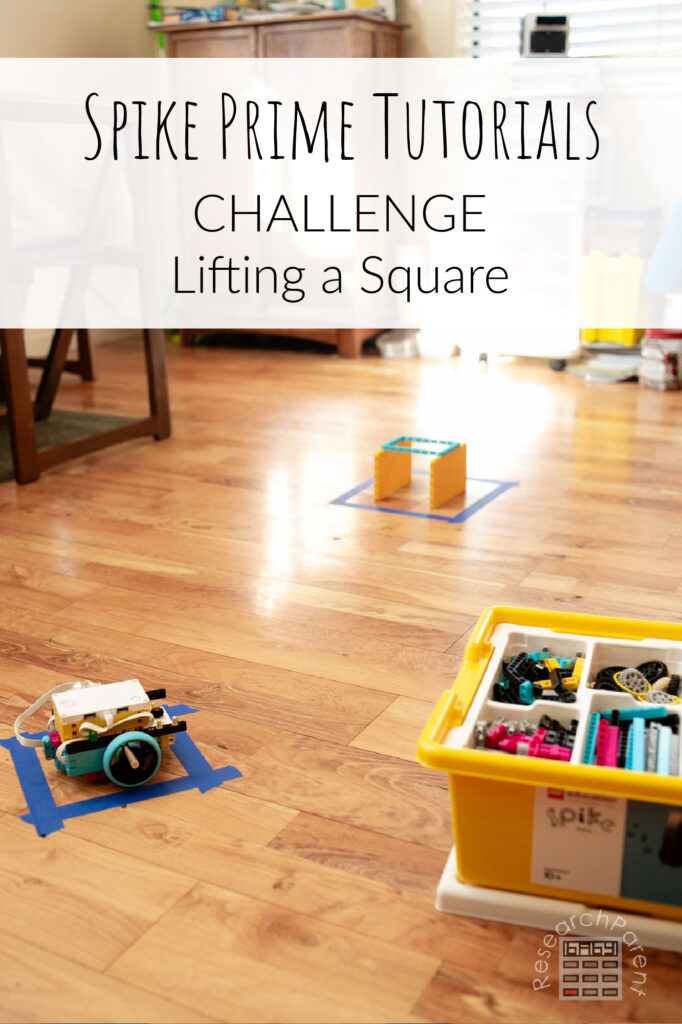
My goal for this series of challenges is to only use pieces that come in the LEGO Spike Prime Education set. (That’s the big yellow box.) For the actual competition, I suspect we’ll want the expansion set so that we can build a multi-functional robot. However, even the missions that are part of the competition can all be done one at a time with these basic pieces. There is a TON of robotics that kids can learn from just the base Spike Prime Education set.
This challenge in particular requires a skill that is extremely useful in the FLL competition world. Namely, to build an attachment using gears to create an arm of the robot that can operate in a particular way. That was also the intent of my knocking over a tower challenge. However, while that one could hypothetically be solved without creating an arm that moves, this one would be much more tricky.
This one is also slightly more challenging than the previous tower-knocking challenge, because the gears need to turn in different places. One gear will lie flat and the other will stand vertically in order to get that up-and-down motion. Of course, kids could redesign their robots completely, but I’m assuming that they start with the base robot described here.
The challenge and my solution in particular will be described in detail below. In case you have missed any of the previous challenges in this 6-part series, here they are for your reference. If you want to be notified of future challenges, feel free to sign up for my newsletter!
- Spike Prime Challenge 1: Moving to a Square
- Spike Prime Challenge 2: Avoiding an Obstacle
- Spike Prime Challenge 3: Pushing an Object
- Spike Prime Challenge 4: Using a Distance Center for Navigation
- Spike Prime Challenge 5: Knocking Over a Tower
- Spike Prime Challenge 6: Lifting a Square (*this post*)
Spike Prime Challenge: Lifting a Square Details
Recommended Age Range: Elementary, Middle School, High School
Time Required: This took my kids about 20 minutes, but it could be more or less!
Difficulty: Medium to Hard
Cost: The LEGO Education Spike Prime Set costs $400 on the LEGO site. As of this writing, it is more expensive on Amazon, but I would check to compare!
The Challenge
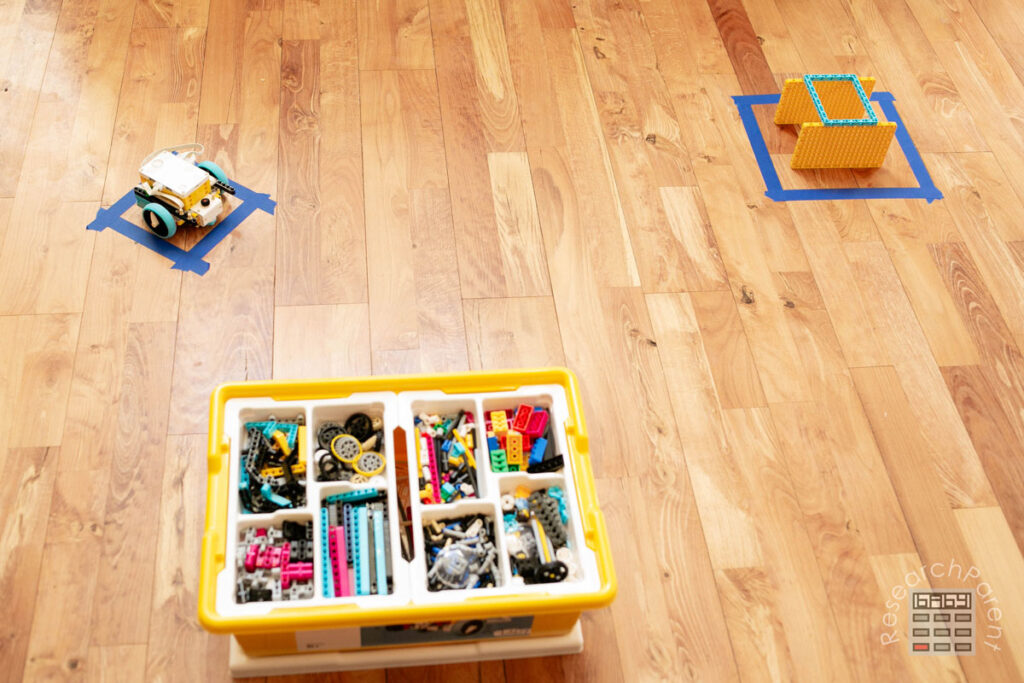
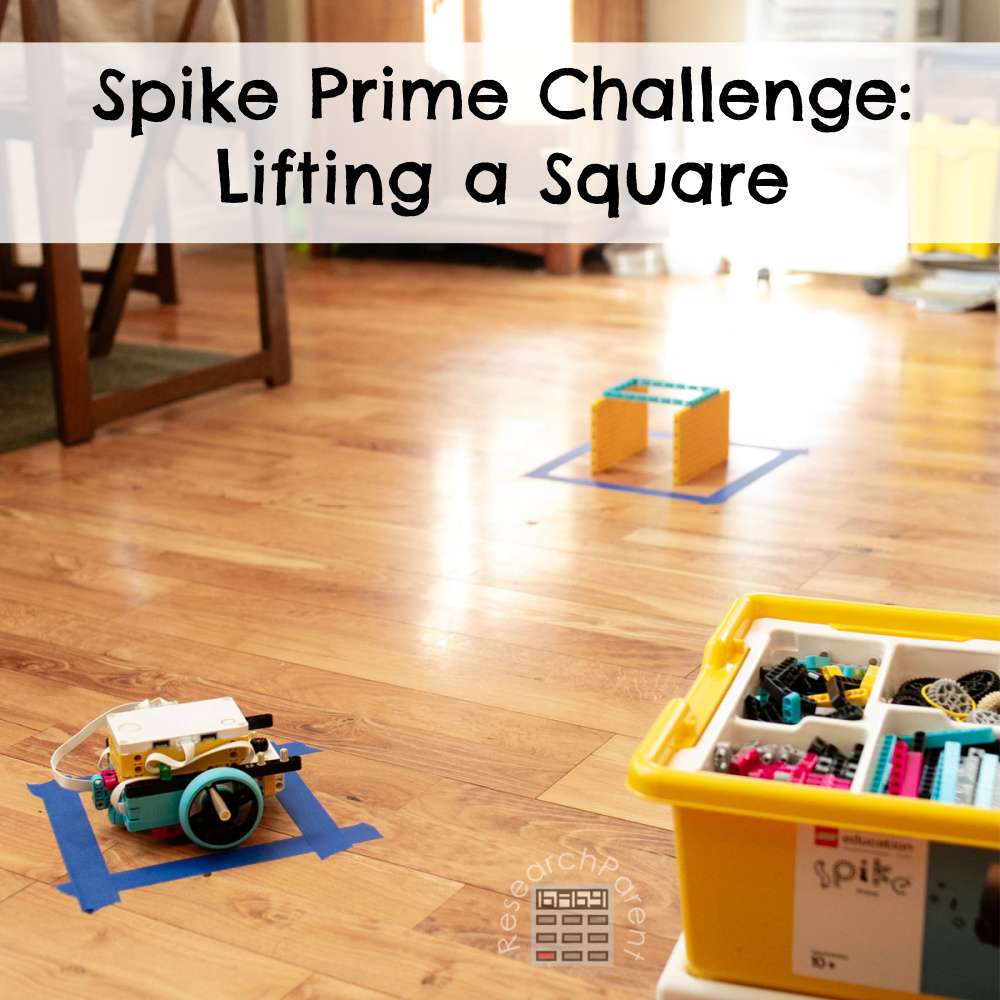
The challenge is fairly straightforward. First, set up the starting and target squares as in the Moving a Square challenge. Next create a structure in the target square as shown. The two solid yellow pieces from the Spike Prime Education set will support the blue rectangular frame. (I realize now that I should have called this challenge Lifting the Quadrilateral, not Lifting the Square. 🤦🏽♀️)
Once everything is set up, the challenge is to completely remove the blue piece from the two yellow pieces holding it up without knocking over the yellow pieces. If kids get clever and build an attachment that simply pushes it off, congratulate them on their success, then specify that they now have to take the blue frame back to the starting square once they remove it. (This would REALLY replicate a FLL challenge.) By requiring them to pick up the piece and move it somewhere else, odds are that they will find a solution requiring them to create a rotating lever arm.
My Solution
This is the most challenging of these initial series of challenges by far! The kids have to think 3 dimensionally to see how a gear rotating in a horizontal plane can be used to create a level that will move in a vertical plane. (Of course, the kids can always re-design the base robot so that the gear is vertical. I don’t like to remove any options from the table!) All that to say, if you or your child needs to look at my solution for ideas, don’t feel bad! We all learn by modeling others.
As with the distance sensor for navigation challenge, I’m going to start by first showing you three different attachments. The first was built by my 9 and 11-year old, but it didn’t quite fit on the robot, though it still worked, as you’ll see. The next one was my 13-year-old’s design which removed the issue that my younger kids were experiencing. The last one was designed by me, where I took my 13-year-old’s design (yes, I realize I took the easy way out 😂), but then I arguably improved it by simplifying it.
Here is my younger kid’s design. They figured out that to get the arm to move up and down, you have to interlock the gears perpendicular to each other. I really admire the simplicity of their design. However, you’ll notice that the gear hits the hub, causing the axel to bend slightly. Despite this, they were able to complete the challenge!
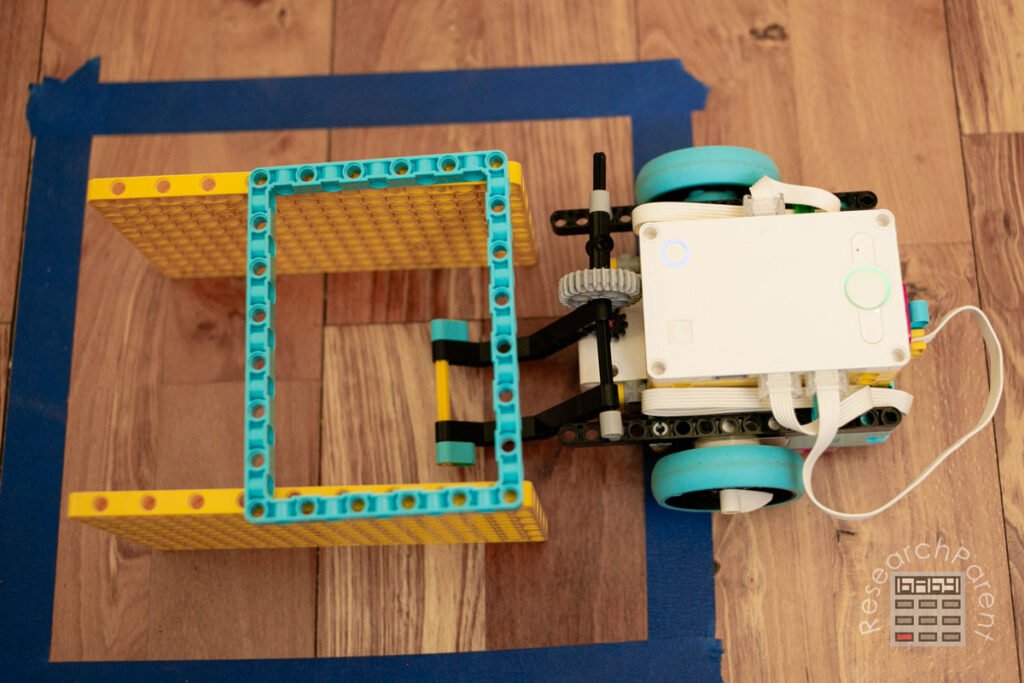
Next, here is my teen’s attachment. He took the originally attachment that the younger kids made and redesigned it so that it would fit onto the car better. This one also works, though it is slightly more complicated!
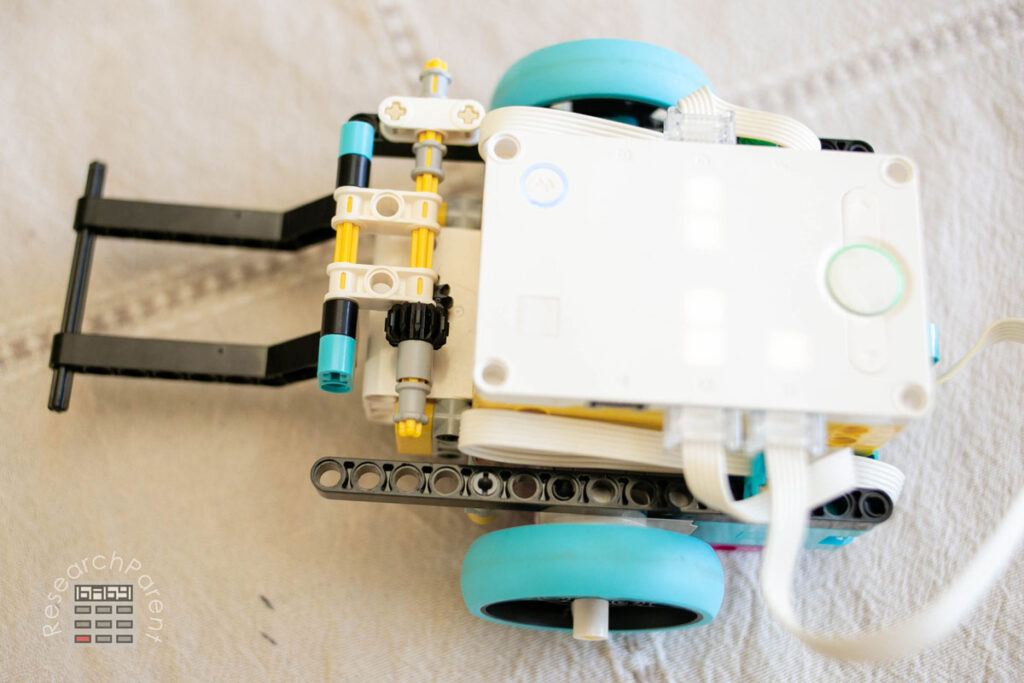
Here’s my design after I started with my oldest’s and removed the pieces I felt were unnecessary:
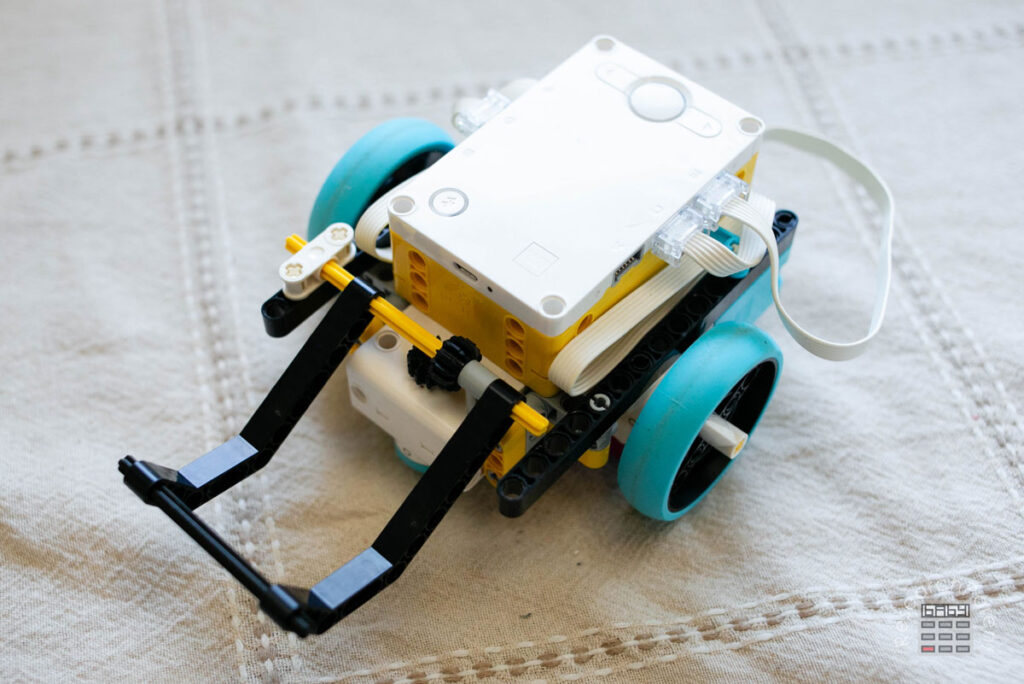
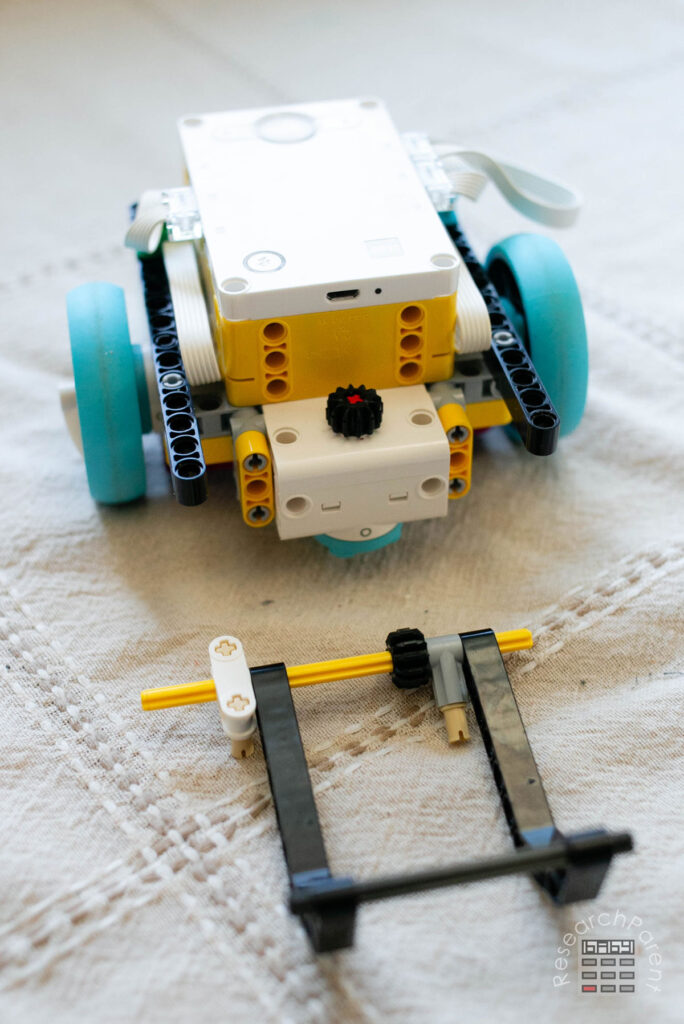
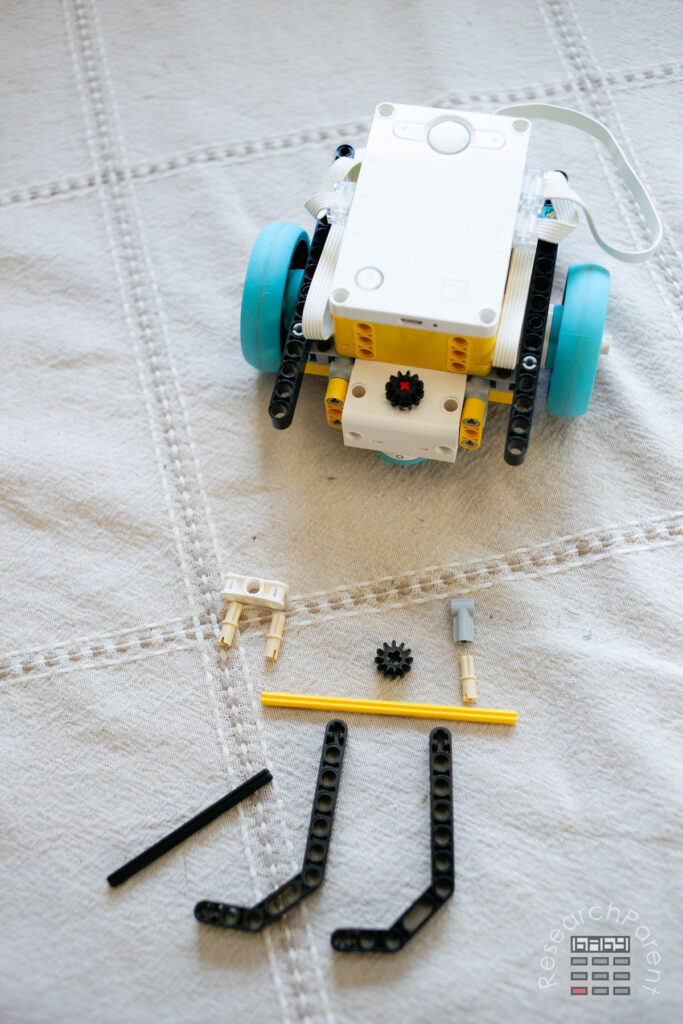
And here is my code! Note that I finally got around to figuring out how far one rotation would move the car and adding in a line of code so that I could tell the car exactly how far to go. There was still quite a bit of trial and error, however!
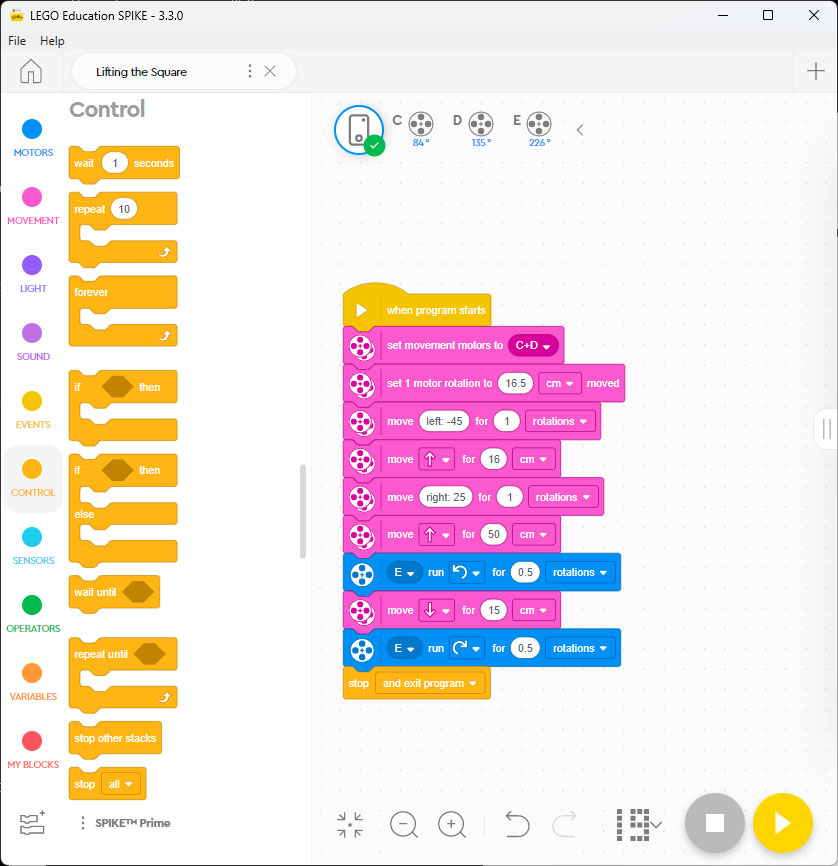
Good luck completing this challenge! If you’d like to share pictures of your attachment with me, I’d love to see them! 😄
Related Links
Robotics Activities for Kids
Science Activities for Kids
All Learning Activities


Leave a Reply