I recently finished writing the post, How to Start a Blog for a Kid, and I’ve decided to keep going while I’m still motivated. When you have a blog, it is nice to have an email address associated with your blog, using your domain name. This is not at all required, but it keeps you from having to share your personal email address when you are corresponding with your audience. It also just looks more professional. Since as I explained in the last post, I choose to use HostGator (affiliate link) as my hosting company, this post will explain how to setup HostGator email. Also, since I use Gmail for my personal account, I will describe how to send and receive emails from the new account within your personal Gmail Account. (In all honesty, I am creating this post in case I want to do this again one day, so I won’t have to look everything up again!)
Create an Email Address using Domain Name
Of course you could always just create a Gmail account to use for blog business, but it looks more professional if you have an email address of the form so_and_so@my_domain_name.com. To do this you will need to create the address with your hosting company. As I explained in the post, How to Start a Blog for a Kid, I decided to use HostGator. Assuming you have also used HostGator, you will first need to login to HostGator using the email address and password you created during the sign in process.
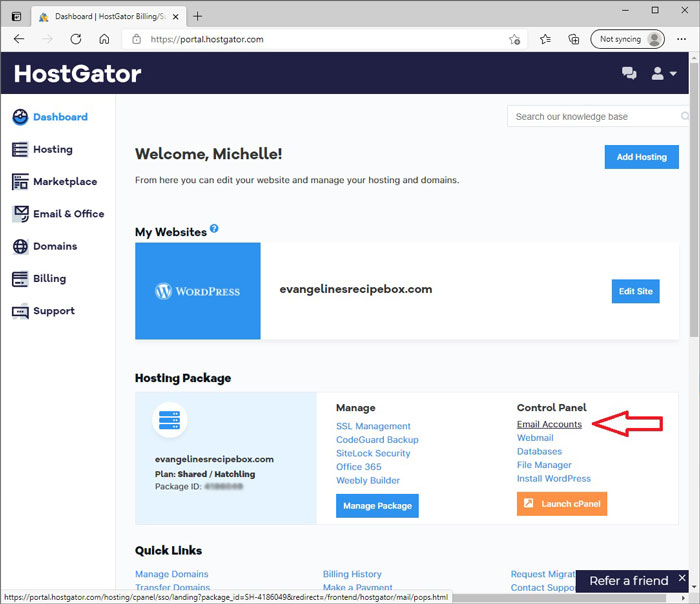
From the Dashboard, I see there is a link for Email Accounts, so I am going to try clicking on that.
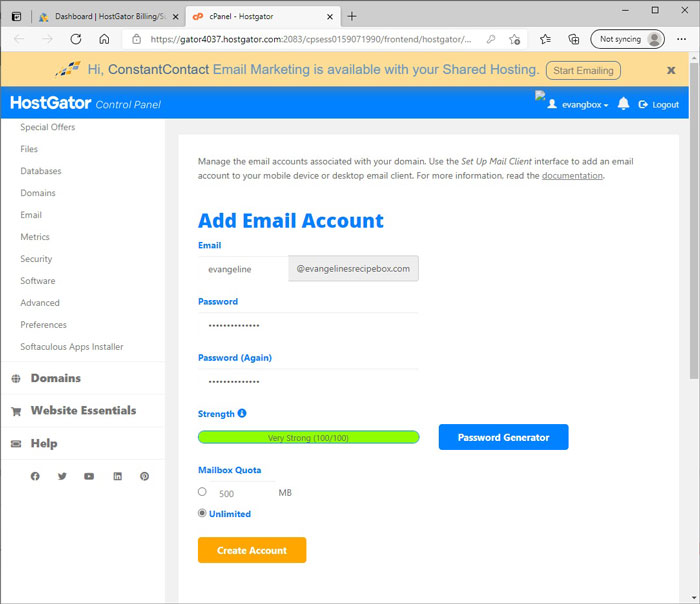
I see that the email setup process seems pretty straightforward. You will put in the username that you would like to create an email address for, then setup a password. It also looks like you have an option of limiting the size of your mailbox or not. I do not see any reason to limit this amount if it doesn’t cost any extra to have an unlimited mailbox. I chose Unlimited than selected Create Account.
Configure Gmail to Send and Receive Emails from this Address
Next you will want to configure whatever mail client you use to collect this email. This could be something like Microsoft Outlook or Windows Live Mail.
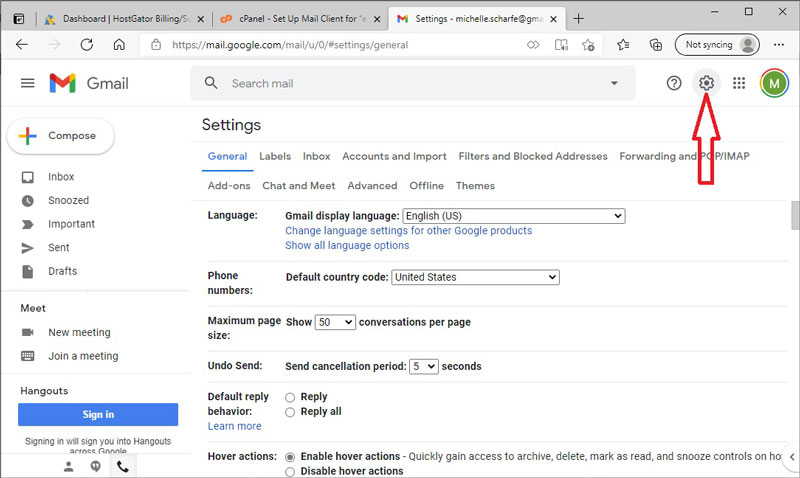
Personally, I would like the email from this account to be forward to my personal Gmail account which I check regularly. In Gmail, it is possible to send and receive emails from another account. To do this, you click on the gear icon within Gmail, then click See All Settings.
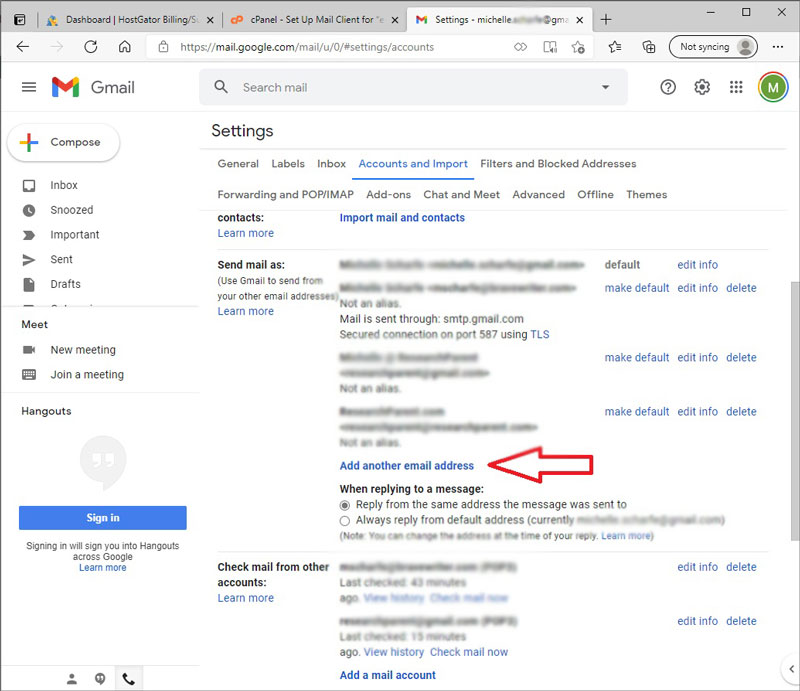
From the Settings Menu, you will want to select Accounts and Import from the top menu. If you will scroll down until you see Send Mail As. Then you will select Add Another Email Address.
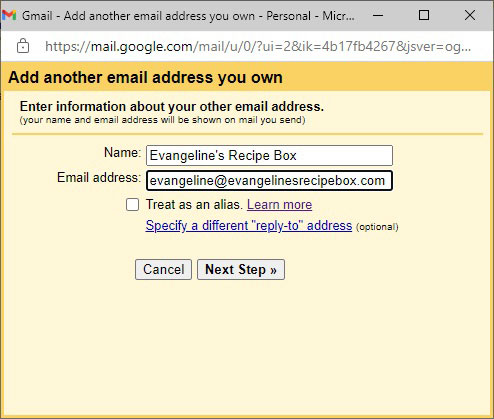
You will be prompted to enter the name associated with the account and the email address. I also choose to uncheck the Treat as an Alias button. In my mind, this is a separate account for a separate person, but I’m not sure how much this actually matters. It has always worked for me leaving it unchecked.
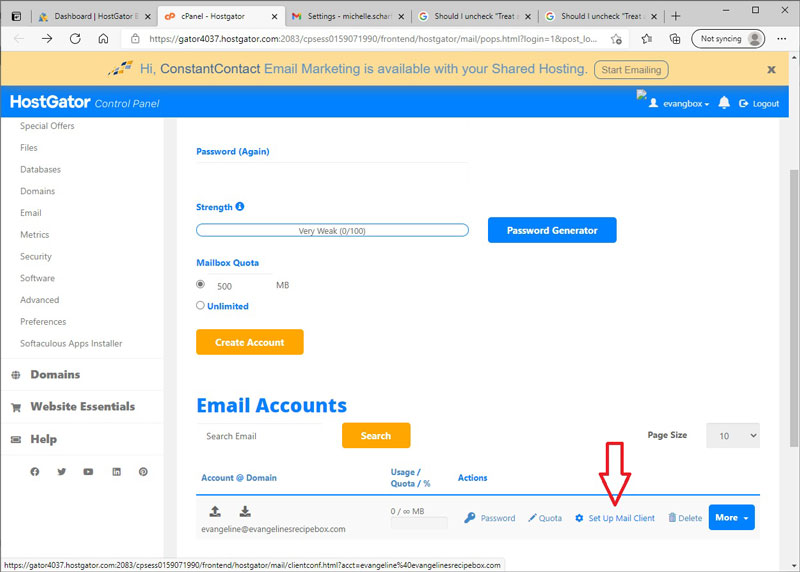
When you click on Next Step, it will take you to a screen in which you will need to enter some information. To find that information, you will need to go back to HostGator and click on the link that says Set Up Mail Client.
Specifically, what you will need are the Manual Settings located at the bottom of the page. You may want to write this information and store it somewhere or take a picture with your phone as you will need it to complete the setup process.
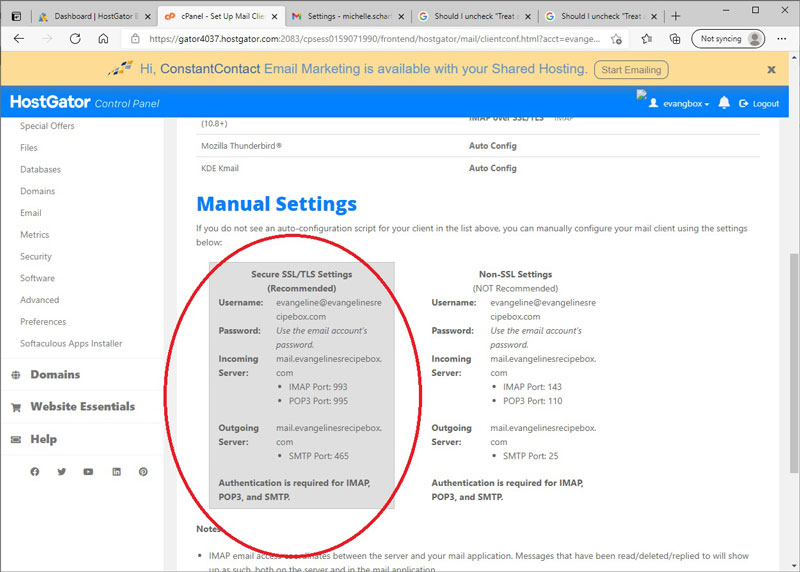
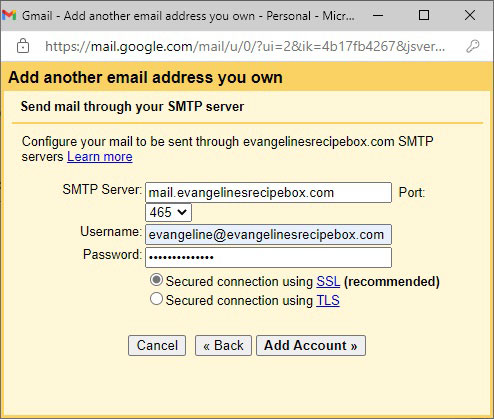
In the Outgoing Server section of this box you will find the information that Gmail is asking for. This will allow Gmail to send email using this account. You will also need to fill in the password that you created when you setup the email account. When you are finished, select Add Account.
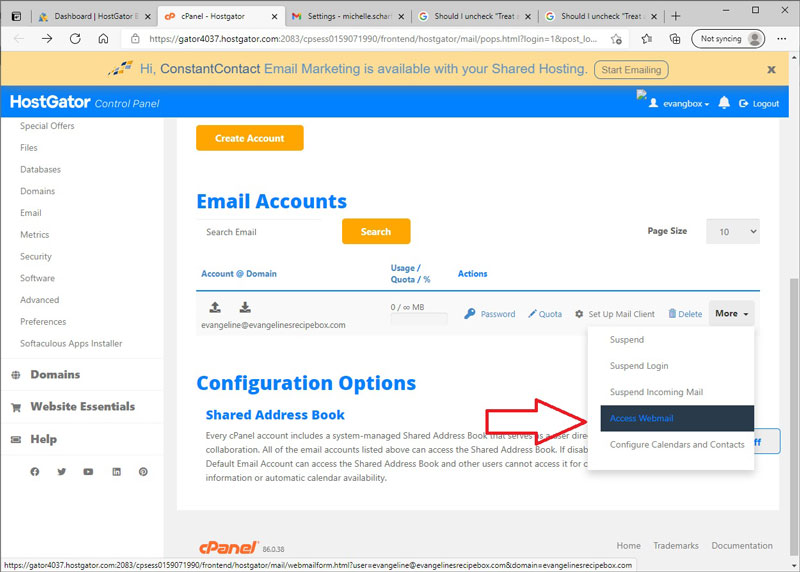
To verify that this is your account, you will need to read an email that was sent this account. That is a bit of a hiccup. To read the email, we will need to login to the email from HostGator’s version of Webmail. If you hit the back button within the HostGator page, you will go back to the email setup page. From here, you can hit the More dropdown button as shown and select Access Webmail.
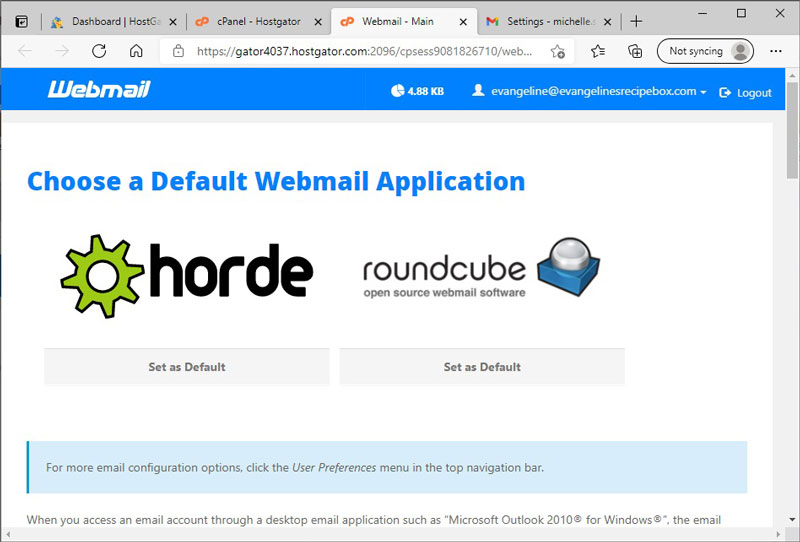
From here you will have to select a Webmail Application. I do not think it matters, so I went with the first one, Horde.
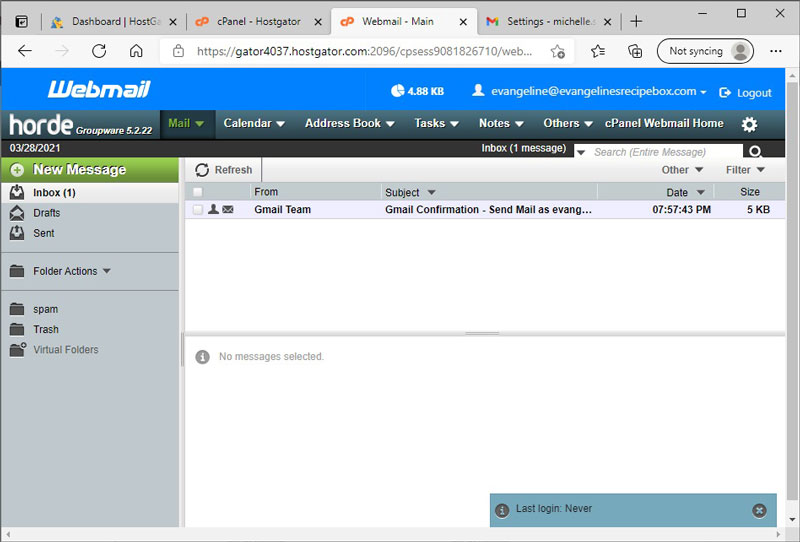
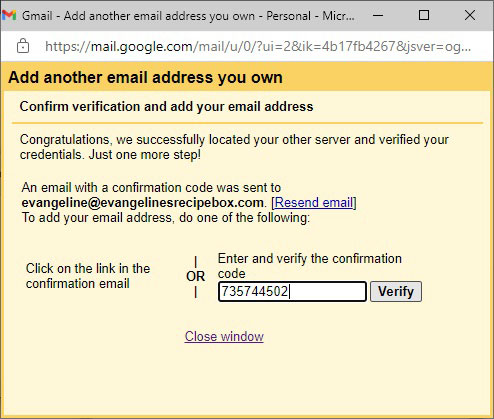
From here you should see the email that Gmail sent you. You can open the email and get the code that Gmail wants.
I chose to enter the Gmail Verification Code in the box that was still open from Gmail.
Now I am all setup to send email from this account!
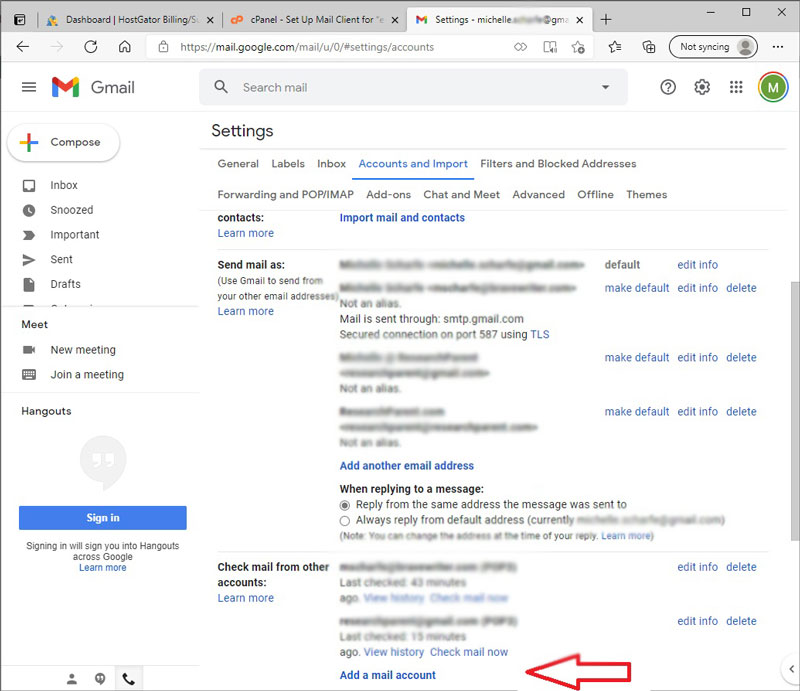
To receive email from this account in my personal Gmail inbox, I will need to go back to Gmail’s Accounts and Import Settings and “Add a mail account” in the Check Mail From Other Accounts section.
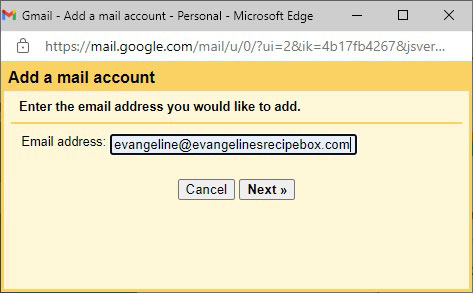
First, you will just need to enter the email address you want to check. Click Next.
Next, you will select the option to “Import emails from my other account (POP3)” and select Next. Again you will need the information that you noted above from HostGator regarding the Manual Settings.
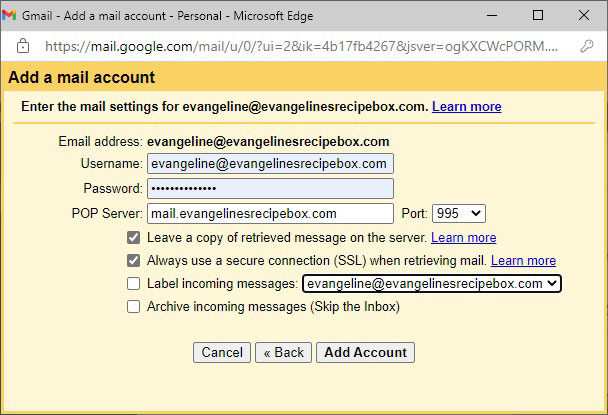
Personally, I choose to leave a copy of the messages on the original server. I also always use a secure connection. however, I don’t label my incoming messages and I do not archive them. These are my personal preferences.
Now you are all set to send and receive emails from your personal Gmail account!
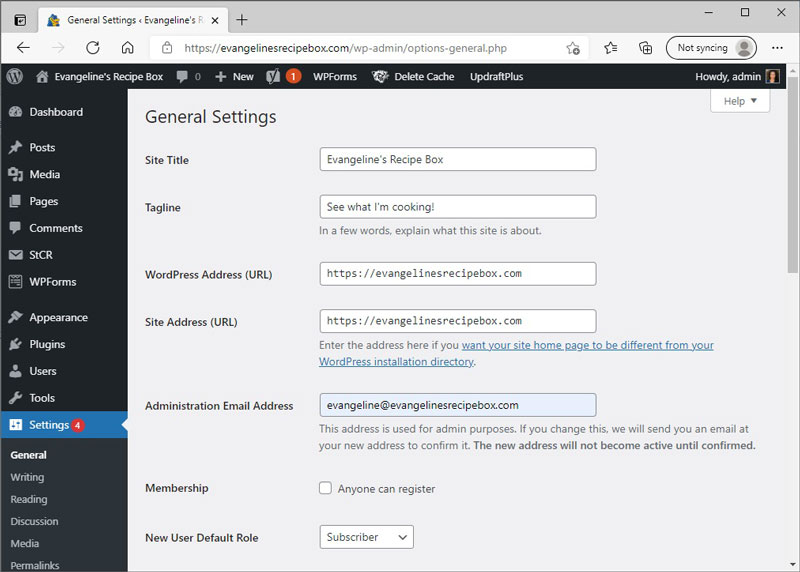
Change Admin Email in WordPress
Once you have your email all configured and you know how to send and receive emails from this address, you may want to consider changing the admin email from within your site’s settings. This will effect where notifications go, such as those for comments or from the contact forms that you will eventually set up. To do this, you simply go into the Settings menu on the left hand side of your WordPress dashboard, then change the Administrator Email Address under the General submenu.
“Starting a Blog” Series
This post will be part of a multi-part series! I will add links as I write and post these articles.
- Part 1: How to Start a Blog for a Kid
- Part 2: Setting Up Hostgator Email (this post)
- Part 3: I’ve Set Up My Blog! Now What?
- Part 4: Customizing a Premium WordPress Theme
- Part 5: Monetizing Your Blog

Leave a Reply