When my oldest was about 7, he wanted to start a blog about playing pool and I told him no. He will likely go to his grave still irritated about this refusal. At the time, I thought he was too young, and I didn’t want him out on the internet. I still feel like caution and discretion need to be used to curate what kids see on the internet. However, understanding computer technology is a vital skill that will be even more valuable in the future. As I have discovered through this blog, writing and creating digitally can be a satisfying creative outlet. Lastly, even though they are slow to become profitable, if my child puts in the hard work and energy, a blog may even grow to be a source of side income by the time they reach adulthood. For all these reasons, over the past 4 years, my view of whether or not a blog is appropriate for a child has gradually changed. This post will explain how to start a blog for a kid in a step-by-step manner.
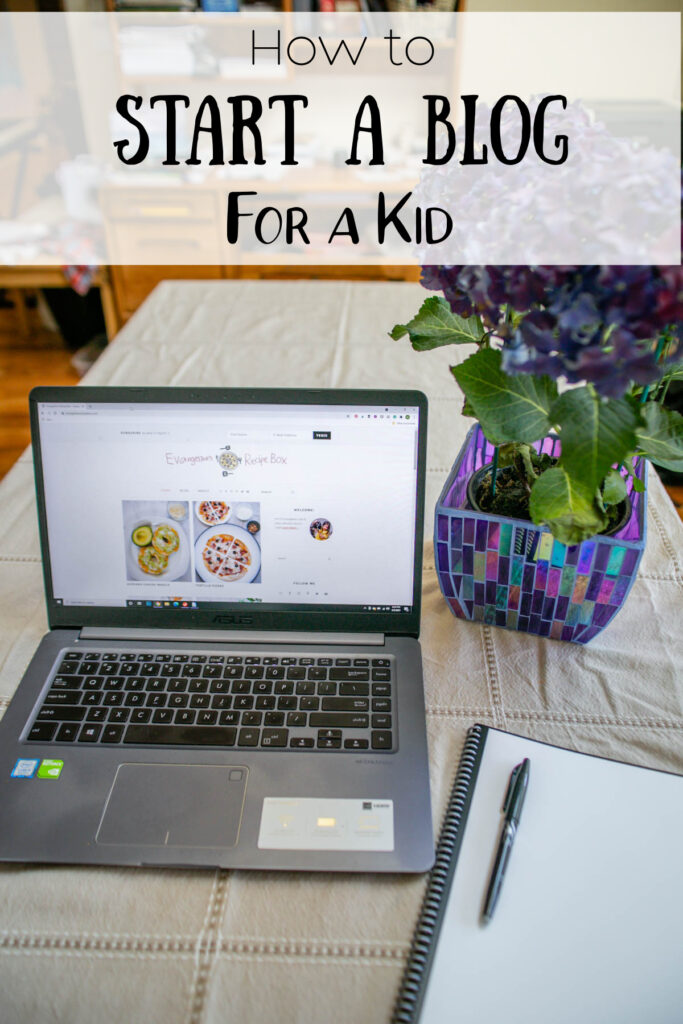
My 9 year old would like to start a cooking blog. She is a strong reader, but just learning how to write comfortably. She has no experience typing. However, she loves to cook and create her own recipes in the kitchen. My current thought on the matter is, why not? I have given her the green light. I will start it for her and as she grows older, she can add to it as she likes. I think this will both encourage her creativity and motivate her to work on her writing and typing skills.
Choosing a Blog Platform
In my life, I have created several blogs. This one that you are reading is the only one I have ever created for myself. That was 7 years ago and it was my introduction to the world of blogging. Since then, I have set up some websites for friends and modified websites for others. Because I am cheap, and especially because I don’t anticipate my daughter to spend a lot of energy on this blog right away, personally I like to go with the cheapest option possible. That rules out Square Space, Wix, and other site builders that do a lot of the heavy lifting for you. If you have the room in your budget for these drag-and-drop site builders, I say go for it! They are know for being extremely user-friendly and may well be worth the cost for you. They start in the vicinity of $15/month depending on what you want.
However, since I want to go the cheaper route, I set aside those options from consideration. However, I also steer clear of the free options, like wordpress.com or blogger.com. The reason I choose not to use these free options is because I like having control of all aspects of my blog. I have heard there are also a lot more restrictions on the ways you can monetize your blog. For example, this blog is profitable, because I have an ad manager, Mediavine, which places ads for me throughout my site. I also share Amazon Affiliate links throughout this blog that link to products we use and enjoy.
The blog platform I choose for my child’s blog is a self-hosted WordPress site. It is slightly more expensive than a free site (typically around $5/month starting out), but worth the extra cost. A self-hosted site gives her the freedom to customize her blog to her heart’s content. It also means she owns the content and has complete autonomy in deciding what she wants to put on her blog (with parent-approval, of course). Most importantly, if one day she wants to turn her blog into a business, it makes it easy to monetize. While it’s a little harder to use than a site builder like SquareSpace, it is not difficult once you get the hang of it.
Choosing a Hosting Company
I am going to write and work through the steps of starting a blog for my daughter as I do them. I have not already set up the blog. I am going to set it up as I write and take notes on my thoughts along the way. If you have decided to go the self-hosted WordPress route as I have, the first major step in setting up a blog is to decide on company to host your WordPress blog.
I have worked with several blog hosting companies over the past few years. The only mistake I have ever made is that the very first time I started a blog, the one you are currently reading, I went with the absolute cheapest company I could find. The company was JustHost and it cost only $2.25/month if you prepaid for 3 years. I had never heard of JustHost before, but since I was new to the blogging world, I had never heard of ANY blogging companies. I had nothing but problems. Apparently, because I was using shared hosting and they were not good at monitoring what was being shared, my site was blacklisted from several servers, because I was at the same IP address as a site that had been marked as malicious. I contacted the company repeatedly, and was give no help. Eventually, I had to have my site migrated over to another company. At that time, I went with Bluehost.
Through this negative experience, I have learned that I want to go with a big, well-known, and well-established company. Even if they are slightly more expensive, I think it is worth having that extra level of protection. The three companies that I am most familiar with and know all have decent customer service are Bluehost, HostGator, and SiteGround. In choosing a blog hosting company for my daughter, I am going to decide between one of these three well-known companies.
Honestly, while they are all similar, in the past I have had the best experience with SiteGround. I know it to be easy to use and their customer service was very helpful. One advantage of SiteGround over the other companies is that they include automatic daily backups. However, as I am looking at their features and pricing, I see that it is about twice as expensive as Bluehost and HostGator at $6.99/month. It also seems to limit the amount of webspace you are given to 10 GB, which though large, appears to be less than the other two companies. It also does not include a free domain for 1 year. As much as I like SiteGround, at this point, I am going to eliminate them from the running.
Now I am down to comparing Bluehost and Hostgator. I like that they both include a free SSL certificate, which is great for planning ahead in case a store might one day be added to the site. They also both provide a free domain registration for one year, which is helpful if you have not already purchased a URL. Hostgator has unlimited storage for all plans while Bluehost has a limit of 50 GB for the cheapest plan (though to be fair, I do not think my daughter will ever reach 50 GB). When I search for reviews online, it appears that Bluehost and HostGator both have relatively similar page load times and uptimes.
I know that I am planning to prepay for 3 years of hosting, because that locks in the discounted rate for as long as possible. HostGator is $2.75/month for a single shared website. Bluehost is $3.95/month, which is considerably more, but not necessarily a determining factor for me, as it is still relatively inexpensive. At this point however, HostGator is looking like the winner to me as Bluehost does not appear to have any significant advantages. Both companies have A+ ratings from the Better Business Bureau. PCMag gives HostGator a score of 4.5/5 and Bluehost a score of 4/5.
That is enough convincing for me. I have decided to go with HostGator’s least expensive shared hosting plan to start a website for my daughter. (Since writing this post, I have signed up for an affiliate account with Hostgator. If you use my link, I will earn a commission.)
Signing up with HostGator
Now that I have made the decision to go with HostGator, I will sign up for an account. Whichever company you decide to go with, if you want the cheapest option, make sure you select Shared Hosting. Even though you will be creating a WordPress site, do NOT select Managed WordPress or you will unnecessarily end up paying a lot more.
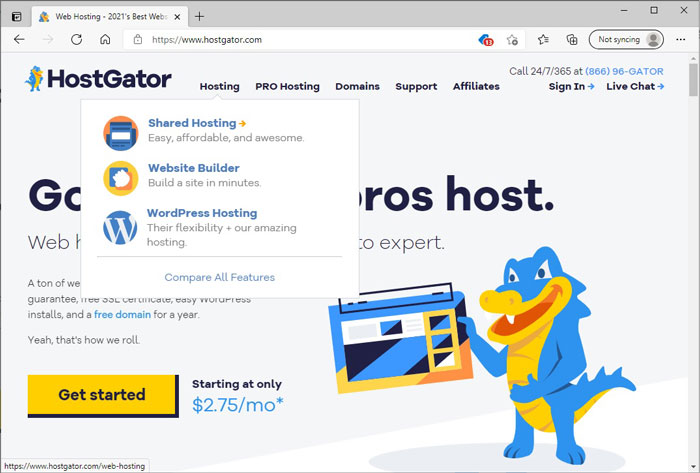
The price will likely change over time, but if you are only planning to start one blog, I recommend going with the least expensive, “Hatchling,” plan.
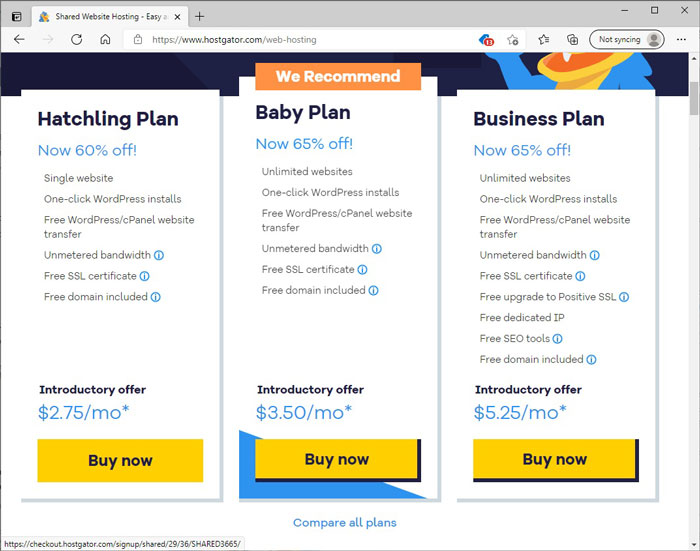
Step 1: Choose a Domain Name
If you have not already decided on a domain name, now will be your time to choose one. Personally, I have never had luck getting my first choice of domain name. Research Parent was what I came up with after finding out about a dozen other options were not available. We also just discovered that my daughter’s domain name of choice, Evangeline’s Kitchen, is not available. Now is the time get out the thesaurus and get those creative juices flowing to come up with something unique and original.
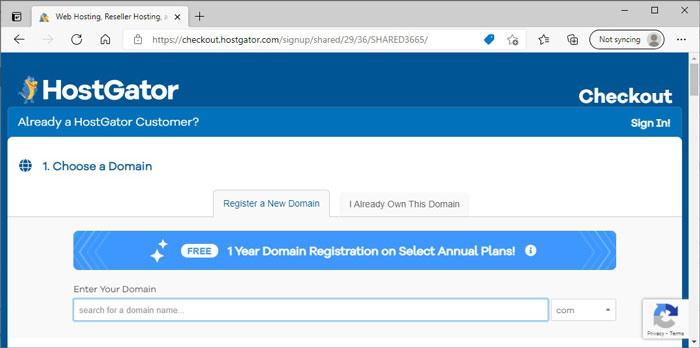
Note that if you have already purchased a domain name at another site, like GoDaddy.com, there is a tab where you can enter in this information.
At the bottom of this section, you will also have the choice to add Domain Privacy Protection if you like for $14.95/year. You will have to unselect the checkbox if you do not want to pay for this service. If you choose not to pay for this protection, people who are knowledgeable about how to do these searches will be able to find the name and mailing address associated with this domain. As I have a PO Box, this does not concern me much, but you may want to add this extra layer of anonymity to your site.
So, what did we come up with? We are not the proud owners of EvangelinesRecipeBox.com.
Step 2: Choosing a Hosting Plan
In step 2 you will be able to choose your plan and your term. I went with a 36 month Hatching plan to get the best deal and lock in this price.
Step 3: Create a HostGator Profile
In step 3, you will need to enter in your personal information and create an account password and pin.
Step 4: Enter Billing Info
We all have a lot of experience with this.
Step 5: Add Additional Services
This is where you can end up spending a lot more money if you don’t think things through. Personally, I am going to choose to skip all of these, in order to go with cheaper alternatives that will require a little more work to setup later on, but ultimately give me more control. You may or may not choose to make the same decisions. By adding the options that HostGator recommends, through HostGator, they will likely be more helpful if you ever need to contact their customer service regarding one of these issues later on. Let’s work through these one by one.
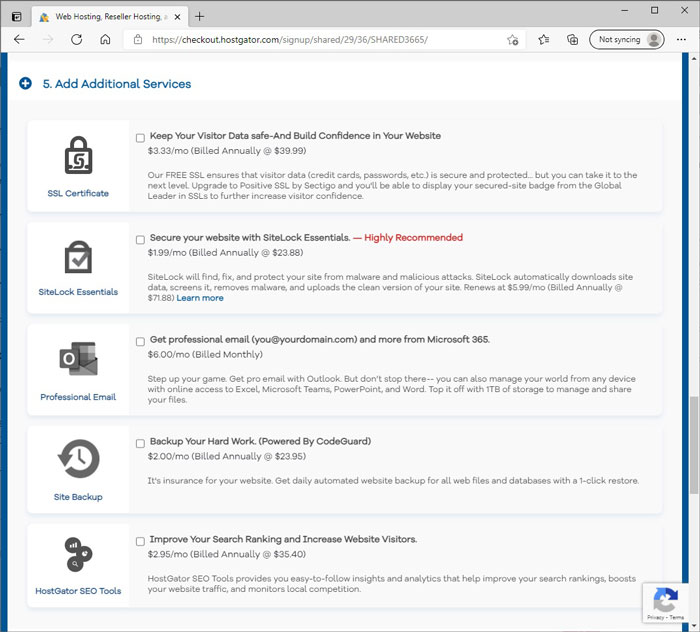
SSL Certificate
You are already paying for free SSL which will protect your customer’s information if you decide to have a store. There is no need to upgrade, especially if you do not plan to have a store on your site. If one day my daughter does want to add a store to her blog, we can upgrade if needed, but that will be far in the future.
Sitelock Essentials
This one is tempting as your site WILL ABSOLUTELY NEED SOME SORT OF PROTECTION. Personally, I am going to go with one of the free options like Securi or Wordfence, which I will show you how to install when I get to that point. However, if you think that sounds like too much work and are not planning to take that extra 5 minute step, then I recommend paying $2/month to not have to worry about it.
Professional Email
Every hosting company I have ever worked with in the past has included at least one free email address. I could not find this information on HostGator’s website and had a very fast and pleasant experience. As I expected, they do include email addresses (unlimited).
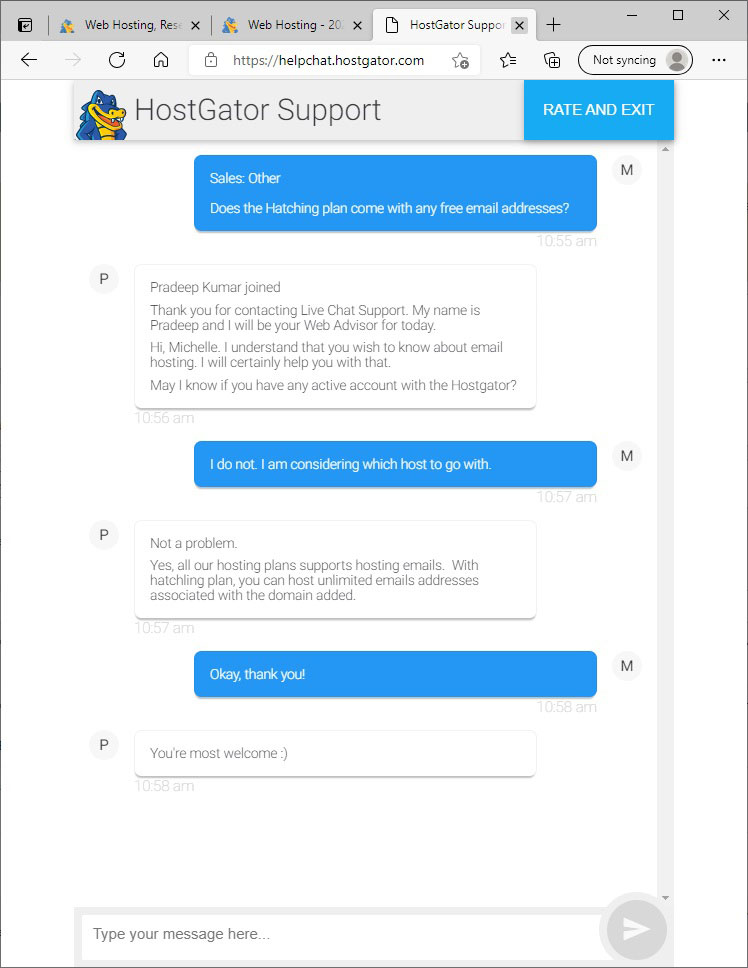
This extra “professional email” option that they are promoting is connected to Microsoft 365, which I do not need. I will likely create an email address using my daughter’s domain, then have it forwarded to a gmail account we use regularly, which will be free.
Site Backup
Site backup is definitely a feature you will want to have. However, I have used the free version of Updraft Plus in the past and I was happy with it, so I will choose that free option instead. I will show you how to install that plugin when I get to that step.
HostGator SEO Tools
You will only need Search Engine Optimization (SEO) tools if you are planning to turn your blog into a business. As this site is for my child, this capability is not critical at this point. However, even if you do care about the blogs search engine rankings, as with the malware protection and site backup, I would personally opt for a free option, such as Yoast.
Step 6: Enter Coupon Code
You will definitely want to put something in this box. Mine was already auto-populated with SHARED3665. I imagine yours will automatically be auto-populated as well as these companies are always running some sort of promotion, but it not, I would search Google for HostGator coupon code.
Step 7: Review Order Details
For right around $100, I have 3 years worth of hosting set up! Check the box saying you have read the terms of service and then hit Checkout Now.
Installing WordPress
Now that I have successfully made my purchase, I need to get WordPress installed on my account. This is the page that I am immediately presented with after my order is complete. I am going to start by viewing my Dashboard.
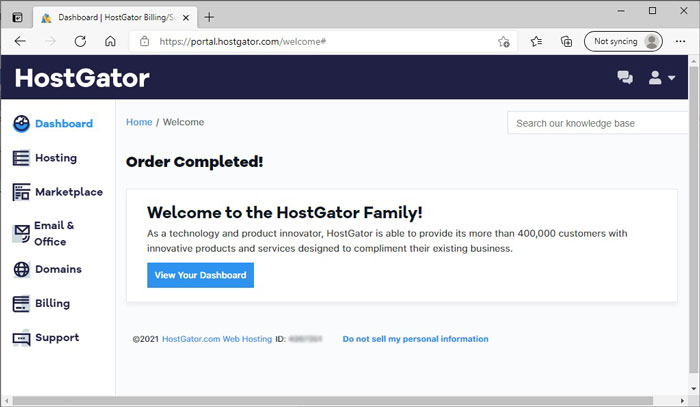
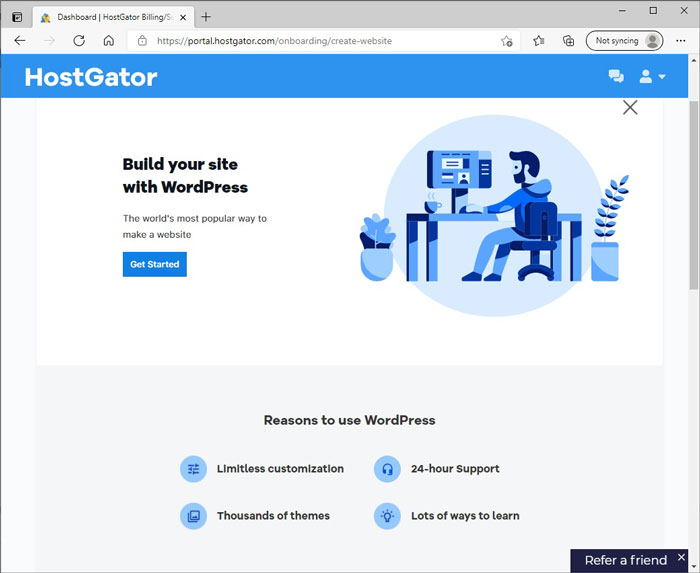
From my Dashboard, I see I have the option to Create Website and Install WordPress, both of which look promising. I am going to click Create Website, just because it seems like it might be the more user-friendly route.
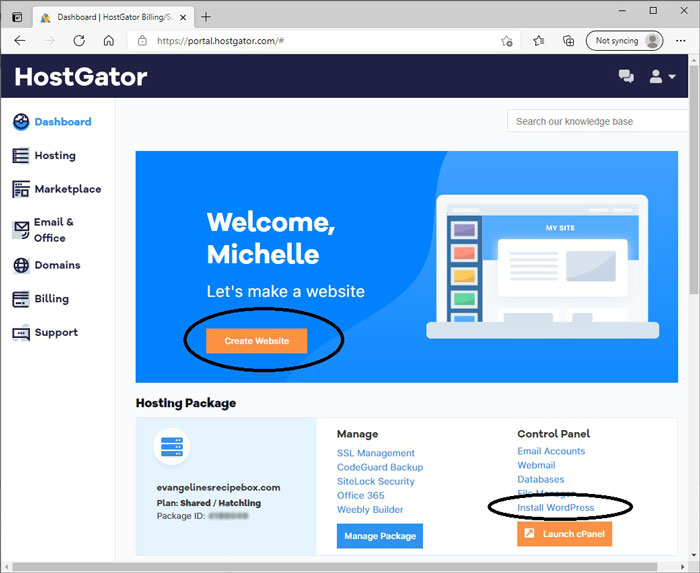
Creating a WordPress site is their heavily recommended advice, so I will select “Get Started.”
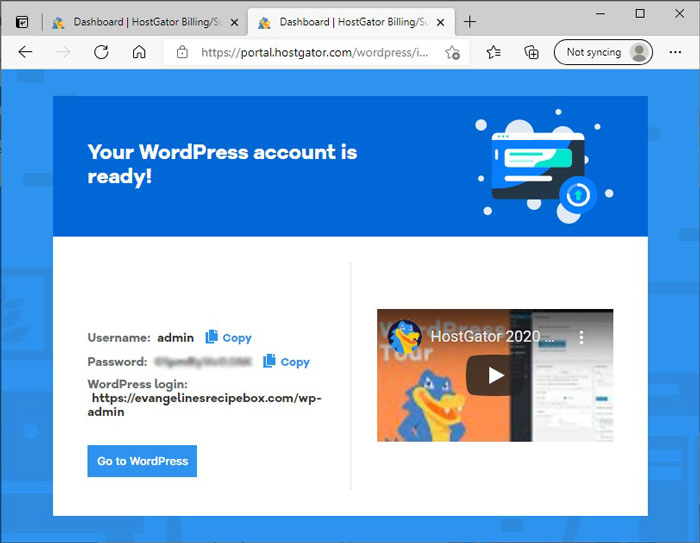
After about 1 to 2 minutes of waiting, it told me my WordPress account was ready! Success! This process has definitely gotten a lot easier than when I first started making websites 7 years ago. Make sure you that you note your Username, Password, and WordPress login URL info somewhere safe!
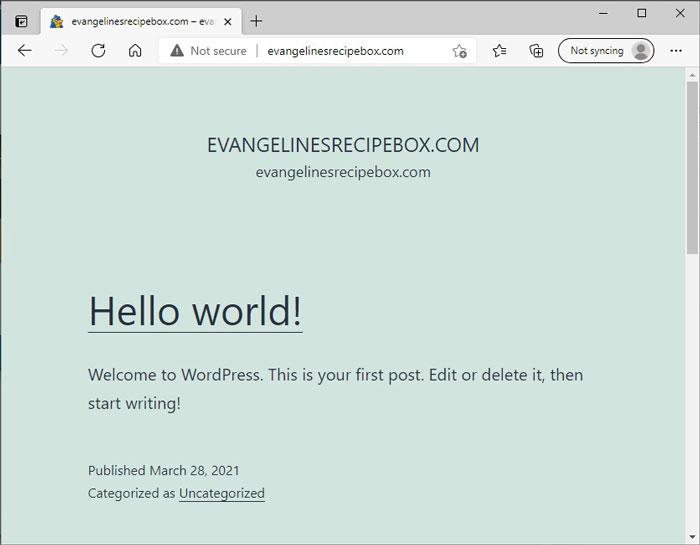
If I go to our website, I see that it is up and running with some place holder information.
Logging into Your Site
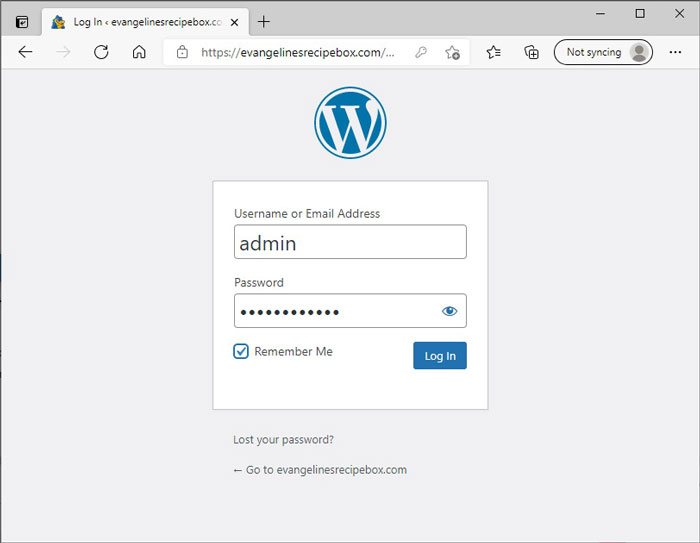
To log into your website, you will want to go to the URL listed for the WordPress login from your confirmation page. It is always your website URL with /wp-admin added to the end. You will use the username and password they provided on that same page.
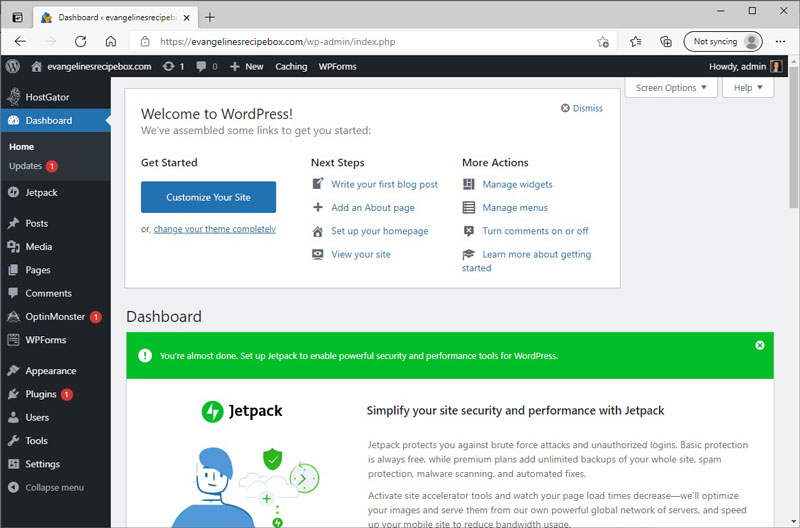
Now you will get your first view of the WordPress dashboard. It can be intimidating at first, but the more you or your child use it, the more comfortable you will get. They have some helpful links to get you started writing Your First Blog Post, an About Page, and Setting up Your Homepage. Another option I see which may be useful is Turning Comments On or Off. Depending on the age of your child and how closely you plan to monitor the site, you may want to turn commenting off at least initially.
Protecting Your WordPress Site
Before you can get to the joy of blogging, there are a few maintenance steps that you will want to take to ensure that all your hard work is protected. Thankfully, these steps will only have to be taken once.
Install a Security Plugin
All of these options can be fun to play around with, but what I care about most at the moment is making sure my site is secure and up-to-date. After doing a little research, I am planning to install the free Sucuri plugin. Another great free security plugin is Wordfence, which I have also used in the past. There is a paid version of both of these options and if the blog ever becomes profitable, I will definitely look into protecting it more thoroughly, but for now the free option is sufficient for my needs.
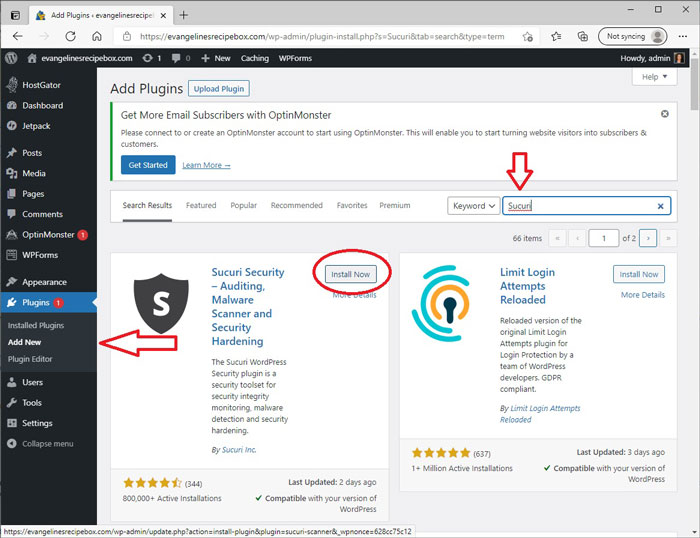
To install Sucuri, first I click on Add New from the Plugin menu along the left hand menu. Then I typed in Sucuri into the search box. Next I will click Install Now. After it is Installed you will have to click the Activate button to turn it on.
Remove Unneeded Pre-Installed Plugins
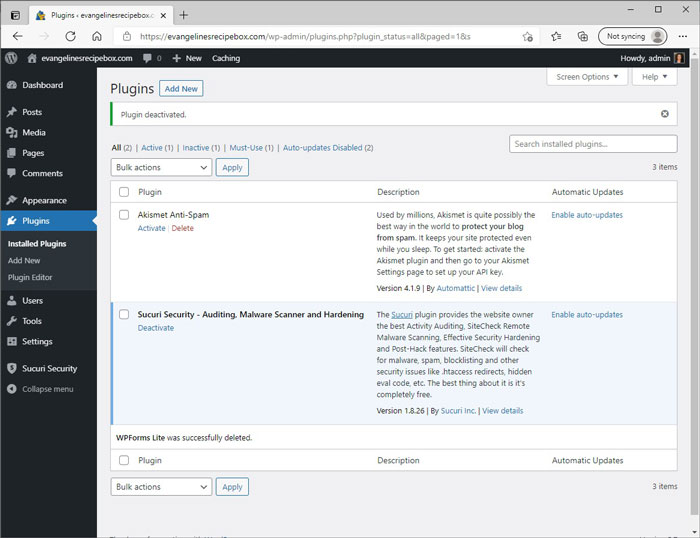
If you click on your list of Installed Plugins, you will notice that WordPress came pre-installed with a number of options. The fewer plugins your site uses, the faster it will run, so personally I recommend getting rid of anything you don’t need. If you later decide you would like to add some of these features, like a pop-up to gain subscribers, you can always add a plugin later. WordPress is very flexible in that way. Personally, the only pre-installed plugin I chose to keep is Akismet Anti-spam. The rest of them I deactivated and deleted until all I had left was Akismet and Sucuri.
Setup Anti-Spam Plugin
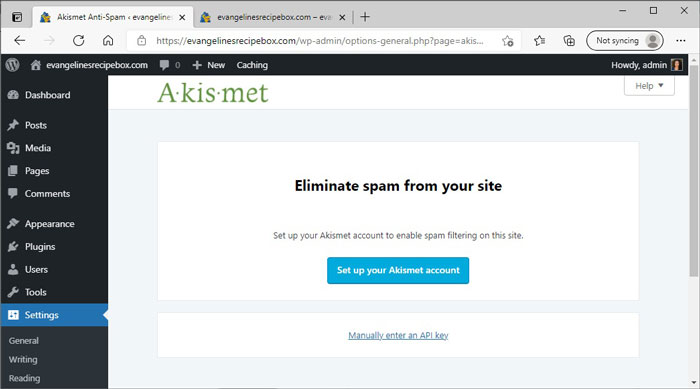
Akismet is a very effective anti-spam plugin. You will first want to hit Activate underneath its name in the Installed Plugins section (or install the plugin as you did with the security plugin if it did not come pre-installed). Once you activate it, you should see a page like this. Select “Set up your Akismet account.”
Especially for a child’s hobby blog, you will want to select a Personal account. If you would like to donate some money to the company I am sure they would appreciate that. Otherwise, you can name your price to be free.
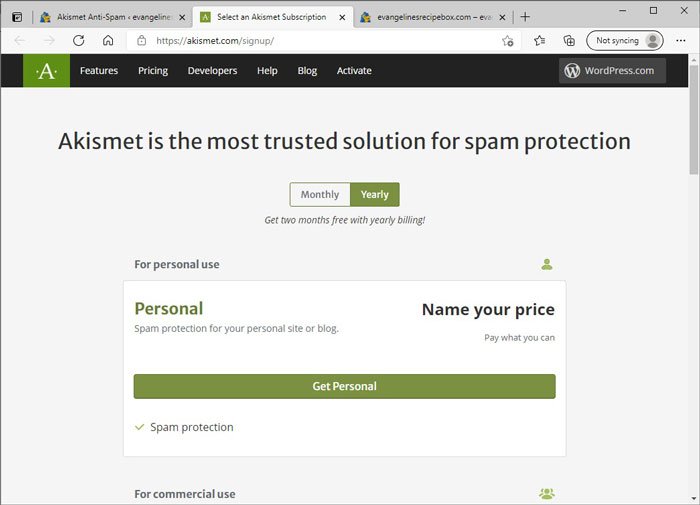
You will need to enter your name, email address, your website’s address, and confirm that you are not operating your blog for a profit. They will then send a confirmation code to the email address you provided, which you will need to copy and paste back into their site. Once you are successfully registered, they will send you an email with your special Akismet code and show this page with the remaining steps.
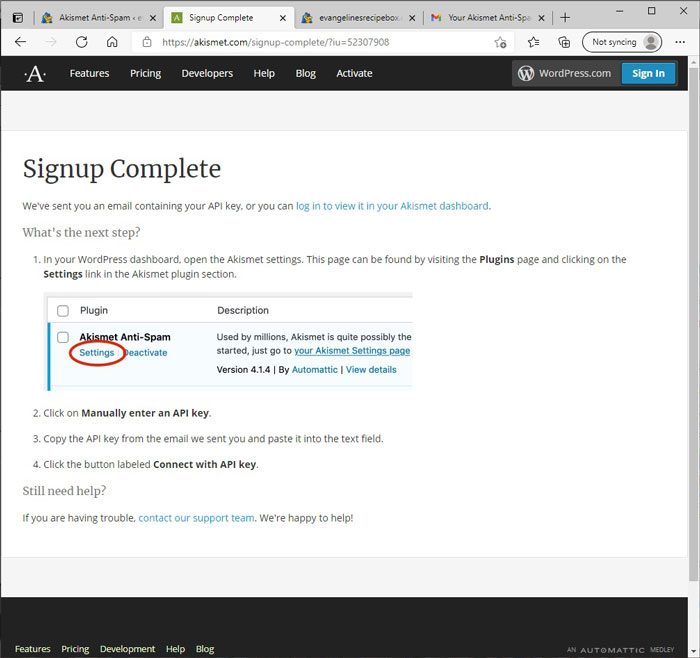
You will want to go back to your Installed Plugins then click Settings under Akismet. You will choose the “Manually enter an API key” option and then copy paste in the code sent to your email address. Once you “Connect with API key” you will be protected from spam!
Install a Backup Plugin
Another good thing to have when you are maintaining a blog is a backup plan. Personally, thankfully, (knock on wood), I have never needed to revert to a backup, but it gives me peace of mind to know they are there. The only plugin I have ever used is Updraft Plus, though there are other options available as well. To install Updraft Plus, go back to the Add New option from the Plugins menu on the left hand side of your Dashboard. Type Updraft Plus into the search bar, then Install and Activate the plugin.
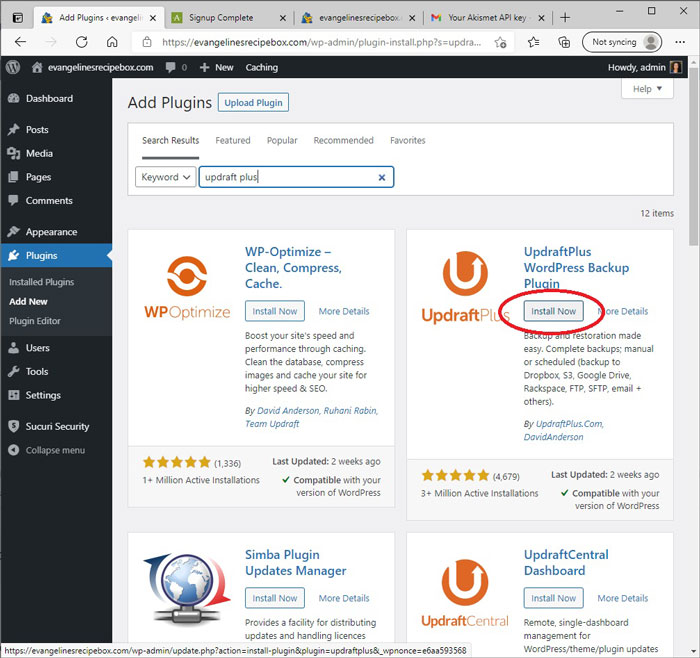
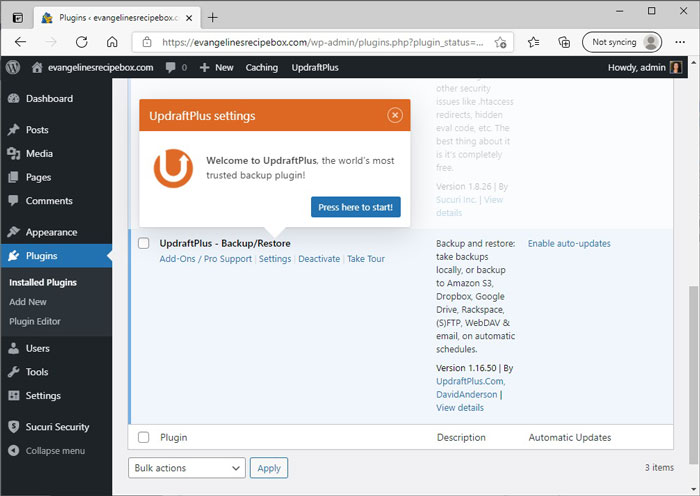
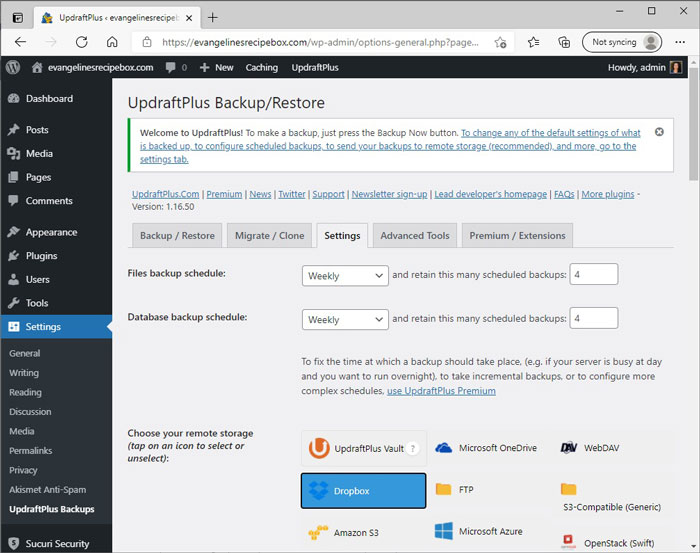
Once it is installed and activated, you will want to customize your settings. You can either click the Settings button under Updraft Plus from the Installed Plugins page of you can click “Press Here to Start.”
You can hit “Backup Now” to create your first site backup. After that, you will want to go to the Settings tab. Personally, I choose to have my site backed up weekly, since I really only work on my website on weekends. I also chose to save 4 backups so that I would have a months worth of backups. If you like, you can also choose to store your backups remotely so that if your site gets hacked, you will have them stored somewhere safe. Personally, I am choosing to connect to Dropbox as I already have a Dropbox account. Make sure you save your changes then follow the authentication prompts for whichever backup method you choose!
Customizing Your Site’s Appearance
Before you write your first blog post, you may want to take a moment to customize how your site looks.
Choosing a Theme
A theme is the overarching wrapper that determines how your site looks. There are plenty of free versions and ones you can pay for as well. Since I have already purchased a theme for the site you are currently reading, I will likely install this theme for my daughter as well, since there is no extra cost. The main advantage of using a purchased theme in addition to being able to customize the overall layout and feel of your website, is that purchased themes are often more mobile-friendly.
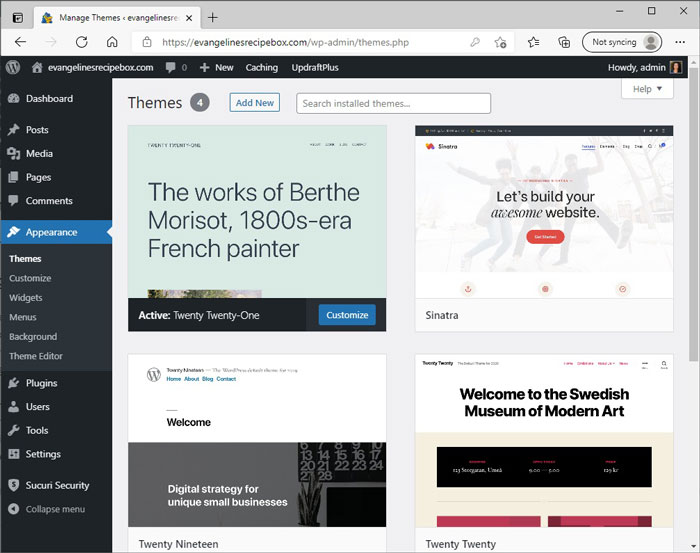
However, there are plenty of decent free themes as well. Your site will be pre-installed with WordPress’s current free theme of choice. For us, that was the Twenty Twenty-One version. To see which theme you have, you can click on Appearance in the left hand menu, and then Themes. If you would like to choose a different theme, you just hover over it and the click Activate. Or you can select Add New and then search the database.
Customize Your Theme
For demonstration purposes, I am going to stick with the free, pre-installed Twenty Twenty-One WordPress theme. I may create another tutorial when I update my daughter’s theme to the paid version to talk about more customization options.
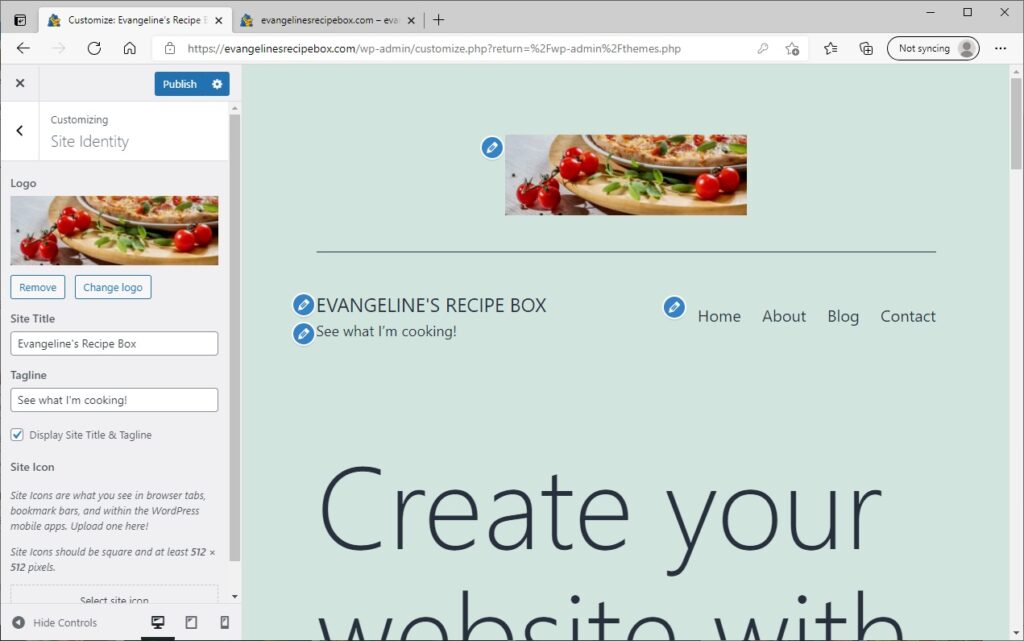
To customize your theme, you can either click Customize from the Themes menu on your active theme or you can click Customize under the left hand Appearance Menu. From there, start with your Site Identity Menu, where you can upload a logo if you want. You can also enter your site name and tagline then show whether or not you want them to appear. Just to give a sense of what it could look like with minimal effort, I downloaded a free picture from Pixabay.com which is a great place to get royalty-free stock images that you do not need to attribute. Note that your logo will appear small, but that is so that it appears correctly on phones and tablets as well. I tried once to make my logo bigger, but that ended up messing up the way it appeared on smaller devices.
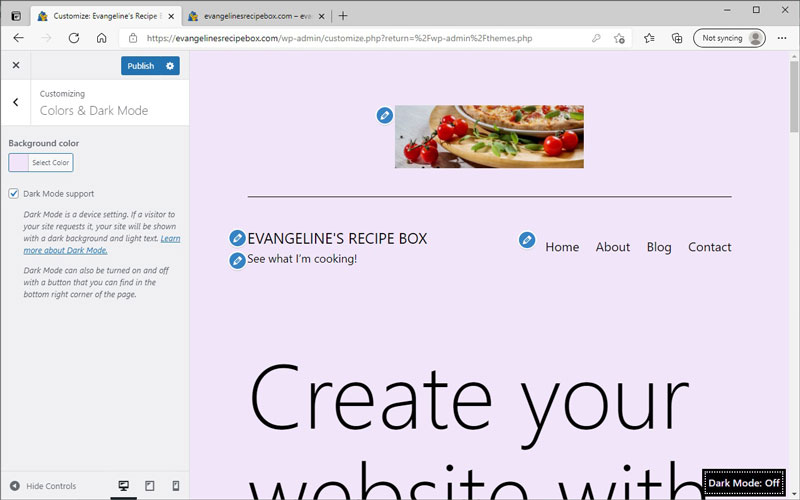
From these customization menus, you will also be able to change the background color and specify whether or not you want your site to have a dark mode for visitors that are in dark locations.
Eventually, my daughter may want to create a static homepage that directs visitors to different sections of her blog. However, especially while there isn’t much content, I think it makes sense to show the latest blog posts on the homepage. If your child has a vision for how they want their homepage to look, it might make sense to have them follow tutorials to design their homepage.
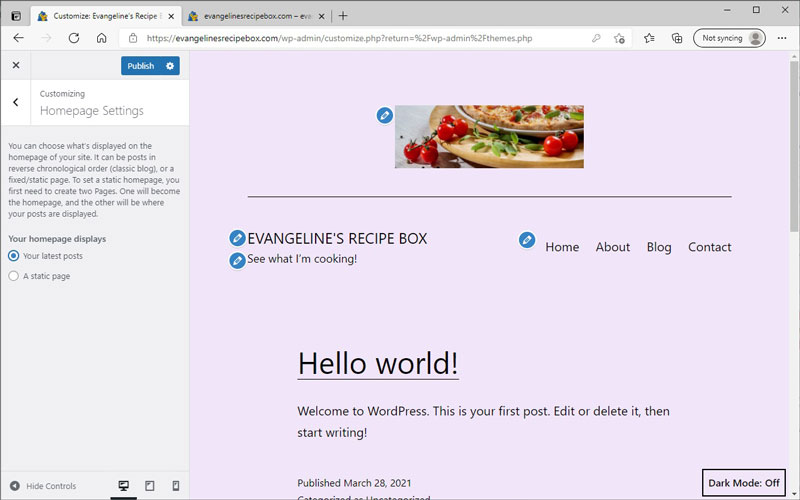
If you do choose to use your homepage to show your blog posts instead of making a static, unchanging homepage, then you will want to remove the word “Blog” from the upper right menu. That button will no long do anything if your homepage is where your blog posts are published. To change back at a later date, you can always set what page to show your blog posts on in the Reading Menu under settings in the left hand menu bar. There are a couple different ways to change your menus, but one way is to click on the Menu button from the Customize section. If you click the arrow next to the Primary menu, you will see the Blog entry, which you can then remove. You may also want to get rid of the contact page from the menu if you do not want anyone contacting your child. You can use the same technique to remove this link.
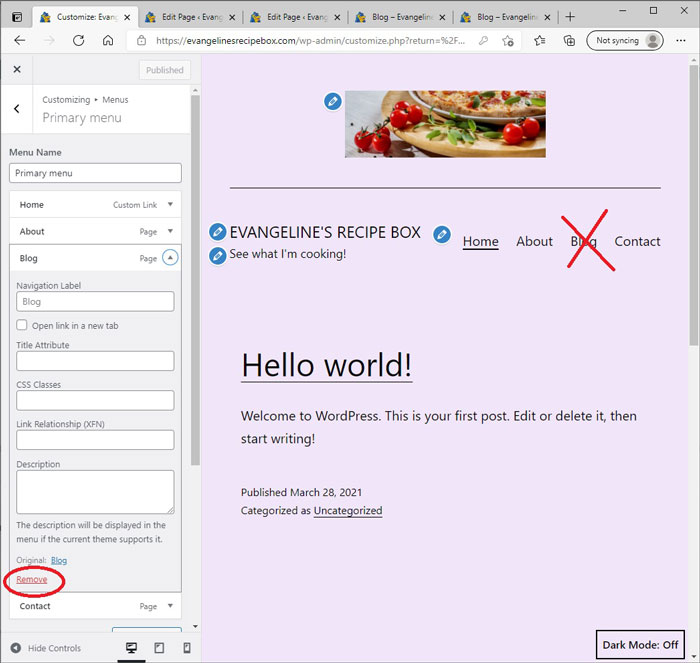
Once you are all done, you hit Publish in the upper left and the changes will go into effect!
Some Housekeeping Tasks
Before you start blogging, there are a few items you may want to take care of first. This will just make sure you start the way you intend to go.
Change How Images are Saved
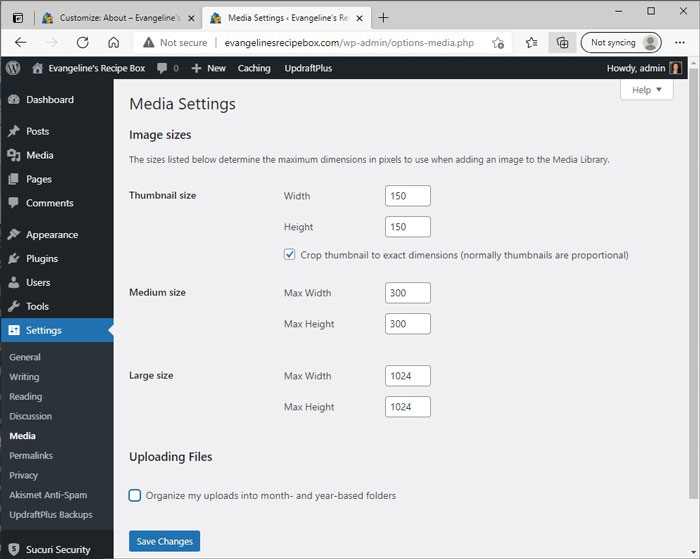
One other change that I might recommend is if you go into Settings, under Media, I choose to uncheck that box that says to organize uploads into months and year-based folders. This is just a personal preference, but it is the one other change I am going to make at this point before we start uploading images.
Change Blog Post URL Format
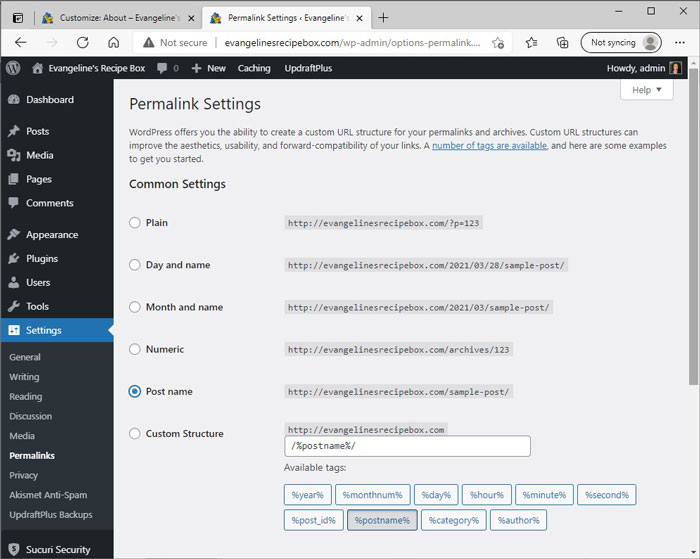
By default, WordPress wants to include the date in the URL of each of your blog posts. Personally, I don’t like this. Therefore, one other change that I prefer to make is under the Settings and Permalink menu. I change the Permalink Settings to just be Post Name.
Create a Privacy Policy
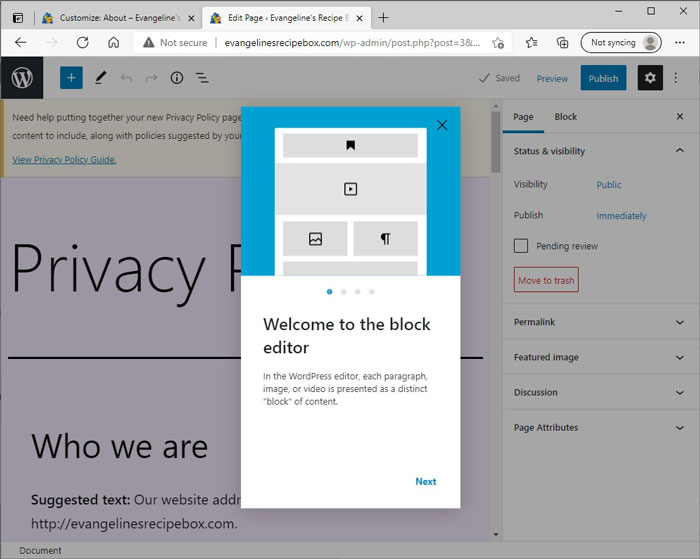
Creating a privacy policy is just a good practice by default and WordPress has already created a draft page for you. If you click on Pages in the left hand menu, you will see a Privacy Policy page is one of the few pages that are premade. If you click on Edit under the privacy page, you will be taken to a page where you can set up your privacy policy. If this is the first time you have opened up the content editor, it will give you a little tutorial to get you started. If this pops up, click Next to learn more about WordPress. If not, don’t worry!
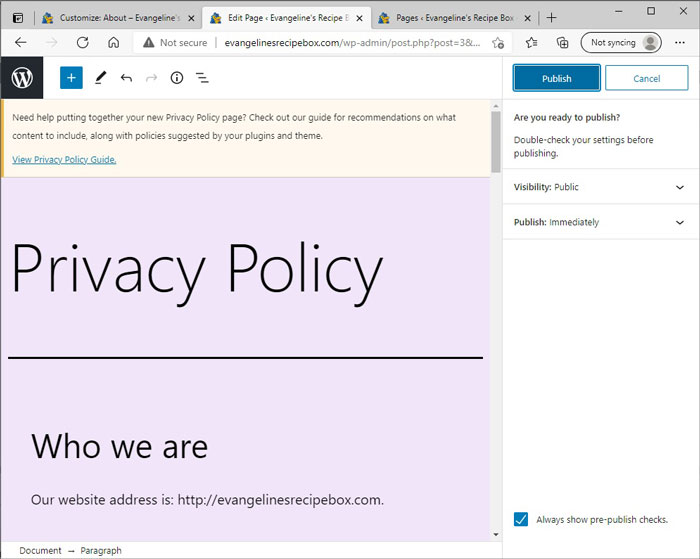
After you get past a tutorial, you will notice that they have already included a suggested privacy policy for you. All I am going to do is remove every instance of “Suggested text:” and otherwise leave it untouched. Then I will officially publish this page. Note that you will have to hit the Publish button twice to confirm that you want to publish each page.
Next Steps!
You now have a barebones blog, protected from cyber attacks, organized, and ready to be filled with delicious content!
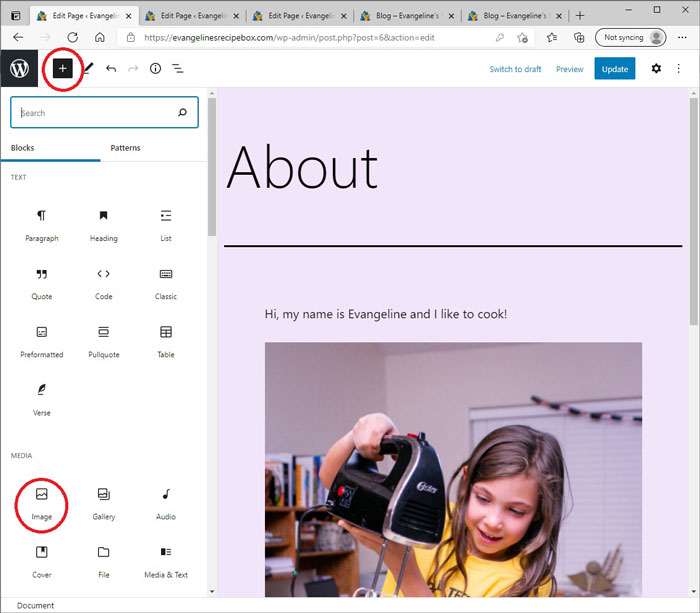
You may want to start by editing your About page. To do this, click on Pages in the left hand menu. You should see an About page already premade for you. Click Edit under the about page. You will be able to change the text and add images as you see fit using the WordPress block editor. To add blocks, click on the plus sign in the upper left hand corner
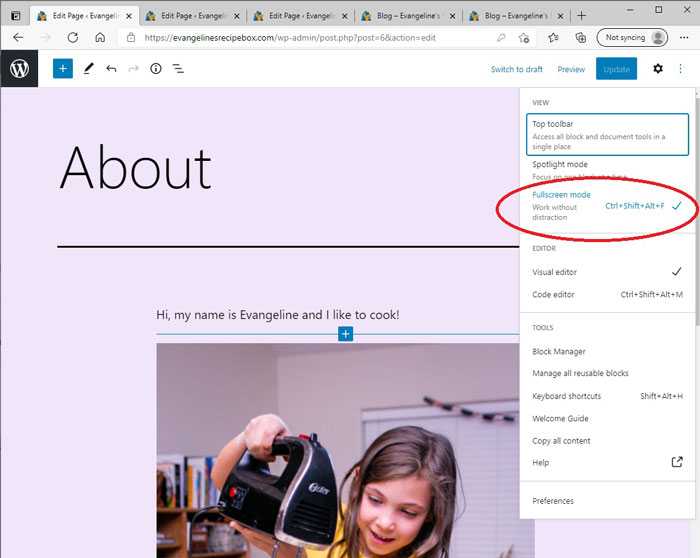
Once you are done, if you want to get out of this fullscreen editing mode, you can uncheck fullscreen in the upper right 3 dot dropdown menu.
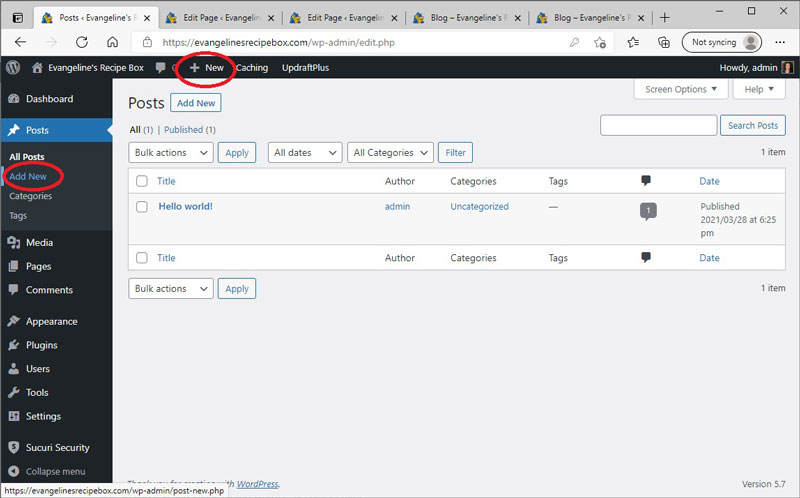
If instead you want to make a blog post, you can hit the Add New button under the Post section of the left hand menu bar. Another way to open up a blank post is to hit the plus sign at the top of the screen. From there you will also be able to add text and images using WordPress’s block editor. If you need extra explanations on how to use the block editor, you may want to look for tutorials online. Personally, I think the best way to learn to use it is just to play around with it.
Hopefully in the future I will make some tutorials on how to setup email, choose and implement a new theme, and create a static home page. It is easier to create a homepage once you have a few blog posts under your belt, otherwise your homepage doesn’t have anywhere to send your visitors.
I also plan to do a post on how to set your blog up to be monetized. Even though my daughter does not have any intention of trying to make her blog profitable anytime soon, it is a good idea to claim social media accounts as soon as possible, just to make sure you own them for any future endeavors. I will also save explaining how to sign up for Google Adsense and an Amazon Affiliate account for a later date.
Happy blogging!
“Starting a Blog” Series
This post will be part of a multi-part series! I will add links as I write and post these articles.
- Part 1: How to Start a Blog for a Kid (this post)
- Part 2: Setting Up Hostgator Email
- Part 3: I’ve Set Up My Blog! Now What?
- Part 4: Customizing a Premium WordPress Theme
- Part 5: Monetizing Your Blog


Leave a Reply