In my last couple posts, I’ve shown how to set up a blog from scratch for a child as well as how to setup an email address associated with that blog. If you’ve followed the instructions in those last two posts, you may be thinking, “I’ve setup my blog! Now what?” These next steps are not strictly necessary, but if you have already started a blog, you may want to consider them. This post will describe how to setup social media accounts and install plugins to optimize your visitor’s experience. In a future post we will also touch on installing a premium WordPress theme to make your blog more attractive. Once you have completed these steps and started creating content, you will be ready to monetize if you choose. Since this blog I am using for demonstrative purposes is a hobby blog for my daughter, none of this is vitally important at the moment, but one day she may be glad that we took these steps.
Setup Social Media Accounts
Social media accounts would mainly be used for promotion, which you may not be ready to do at this point, especially if your blog is for a child. However, if promoting your blog is an avenue you think will be pursued at some point, it is better to claim them now rather than later, just in case someone else tries to claim them first.
To setup a Facebook page you will need to be logged into your personal account. Once logged in, you can go here to Create a New Page: https://www.facebook.com/pages/creation/. You will need to fill out the page name, as well as the Category and a brief description.
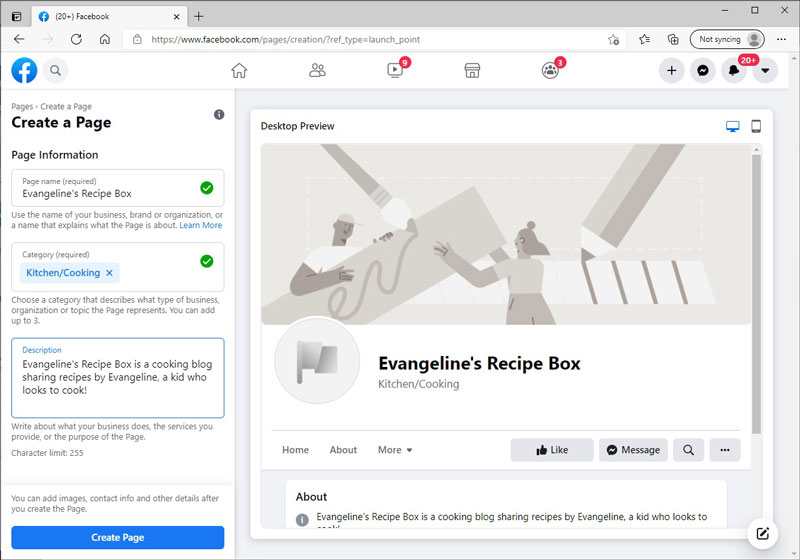
Once you create the page, you will be able to add a profile photo and a cover photo. For now I just used an image on my computer for the profile photo and a stock photo from Pixabay.com for the cover photo. I will be able to update these later.
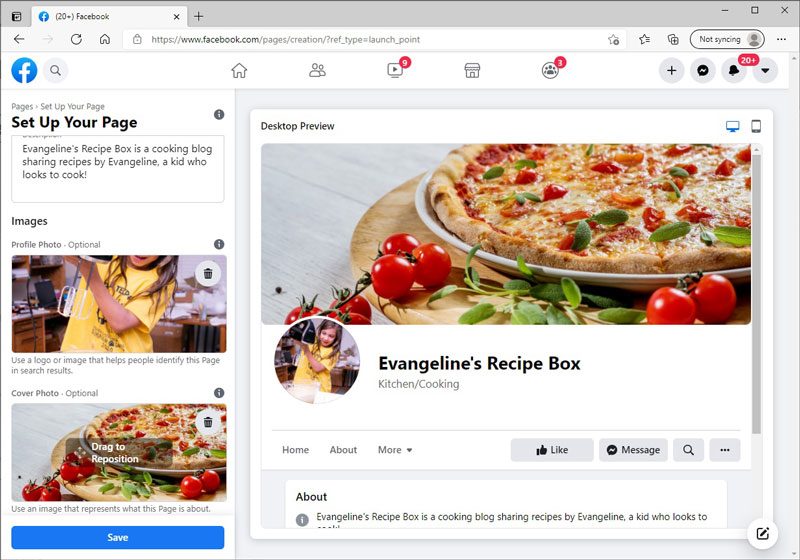
Once your page is created and saved you will want to click the link labeled Create @ Username to pick the name that you will be referred to on Facebook. For my daughter, I chose @EvangelinesRecipeBox. At this point you have claimed your page. You can go through at your leisure to follow the steps to complete your profile, such as linking to your website and creating a welcome post.
You can create a new Instagram account from this link: https://www.instagram.com/accounts/emailsignup/. You may need to logout or click Switch Accounts if you are already logged in. You will need to enter your mobile number or email address. I used the address that I created in this post associated with the blog. You will also need to enter your full name. I entered my own, since I figure I am the adult and the one ultimately responsible for whatever is posted. You will also choose a username and a password.
On the next page after you create your account, you will need to enter your birthday. Again, I entered my own information, since I am the adult. Lastly, you will be sent a confirmation code to the email address you provided. If you are using Gmail according to the tutorial I provided in this post, you may need to wait up to an hour for it to pull emails from your account. You could also go into the Accounts and Import tab of the Settings page, as described in that post and select, Check Mail Now. Once you have your confirmation code, enter it into the Instagram prompt and you will be all set. You can personalize your account as you see fit.
Pinterest might be another social media account you are interested in claiming, depending on the nature of your blog. If your posts are going to be very visual or tutorial-oriented and you would like to gain traffic, Pinterest is a great place to be. To sign up, simply go to Pinterest.com and log out if you are already logged in. Then click Sign Up. You will be prompted to enter an email address such as the one setup in this post. You will also need a password and your age. Again, I entered my own age.
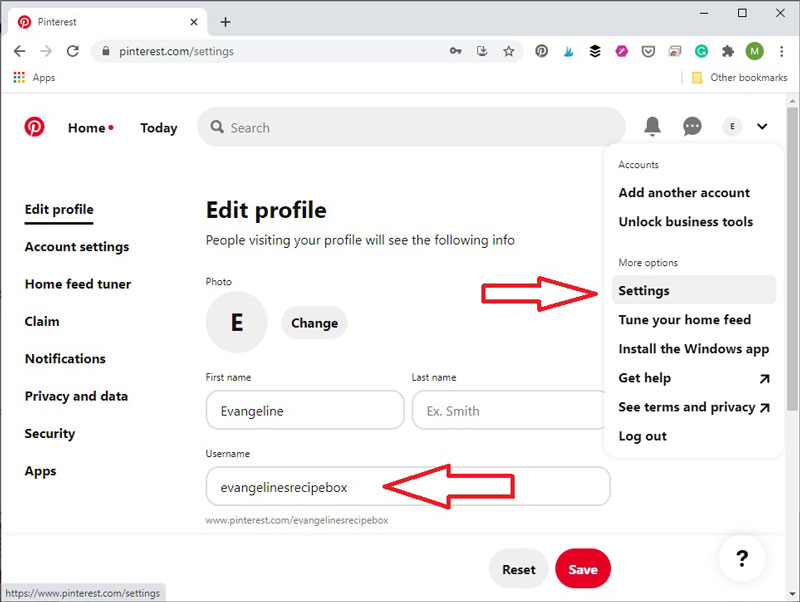
Once your account is created, they will ask you to select some interests to populate your feed with relevant posts. From there, I recommend selecting the dropdown menu in the upper right corner and going to settings. This will allow you to set your username which will specify which Pinterest web address you are given. From this page, you can also connect your account with your website and add in a description.
Last up is Twitter. Personally, I don’t use Twitter, but many people do, so you might as well claim it while you are going through this process. You can go to this link to sign up: https://twitter.com/i/flow/signup
I selected Use Email Instead so that I wouldn’t have to provide my phone number. Once again, I gave it my full name and date of birth since I would be the one posting and not my child. As with Instagram, a confirmation code will be sent to the email address provided that you will need to use to confirm your identity.
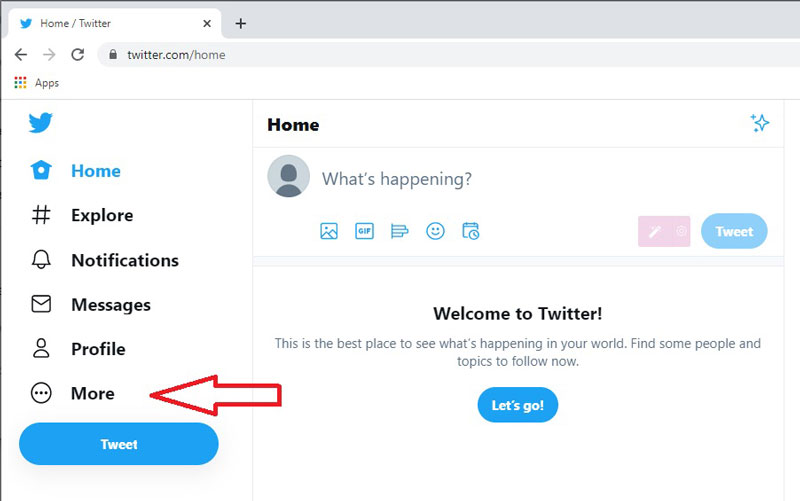
Once you are within Twitter, you will likely find that your handle is not what you want. To change it, click on the More button, then select Settings and Privacy.
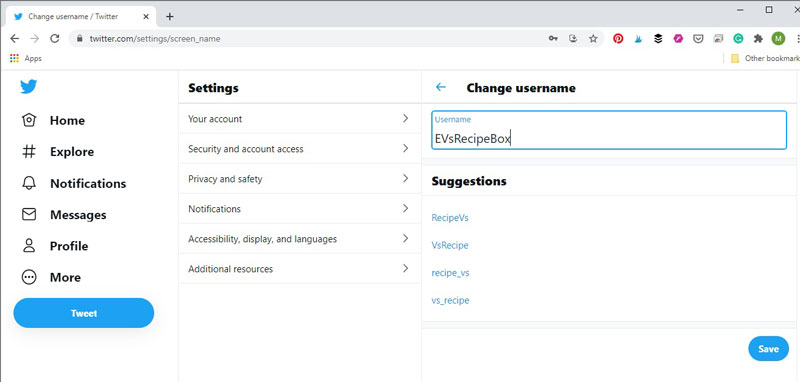
From the Account tab, you will be able to change your username. Note that your username is limited to 15 characters.
If you would like to change the display name as well, you will need to first setup your profile, then you can edit the profile and change this information.
YouTube
YouTube is a little different than the other social media channels in that it requires you to have a Google account. Thankfully, it is very easy to get a Google account. First, go to this site, then select Use Another Account: https://accounts.google.com/ServiceLogin/signinchooser. You may need to logout if you are already signed in to Google.
Next you will want to select Create Account. I selected To Manage My Business, but really I think Personal would have been more appropriate as I think they intended the Business to be a brick and mortar store. I don’t think it really matter either way.
At this point, you will be prompted to enter your name, desired username, and password.
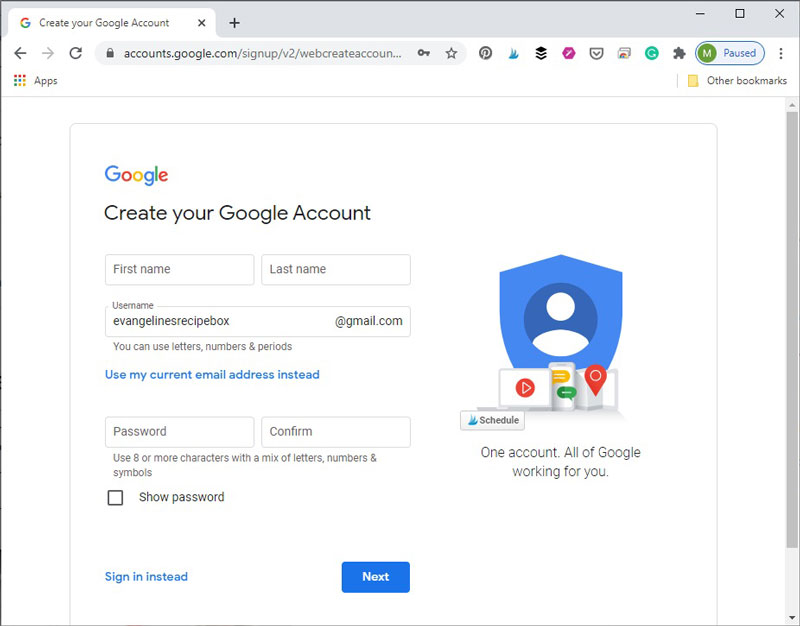
Next you will be prompted to enter your birthday and some additional information to recover your account if you ever get locked out or forget your password. You will also have to agree to their privacy terms. If you selected that this email was for a business, you will then be prompted to enter a lot of information about your business such as location and store hours. I selected “Skip” for all of these prompts except website.
Once you have a Google account, go to YouTube.com and make sure you are signed in at the upper right hand corner. If not, click sign in, and log in with your new Google Account. From the drop down menu in the upper right corner, you can also select, Create a Channel.
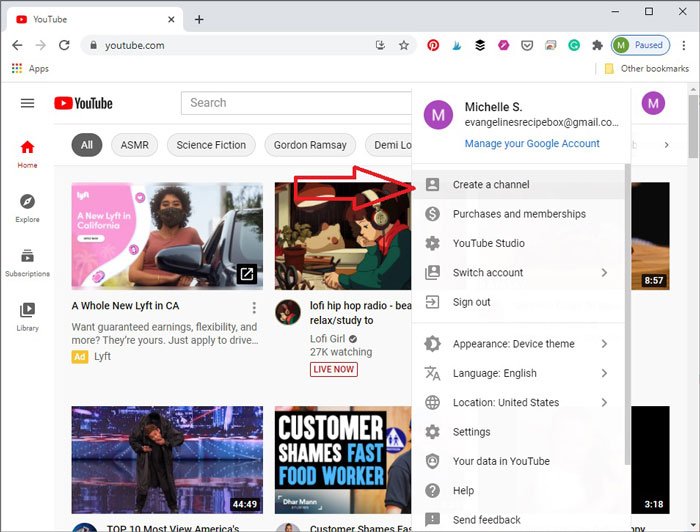
Once you get started creating a channel, you will you likely want to go the route of using a custom name.
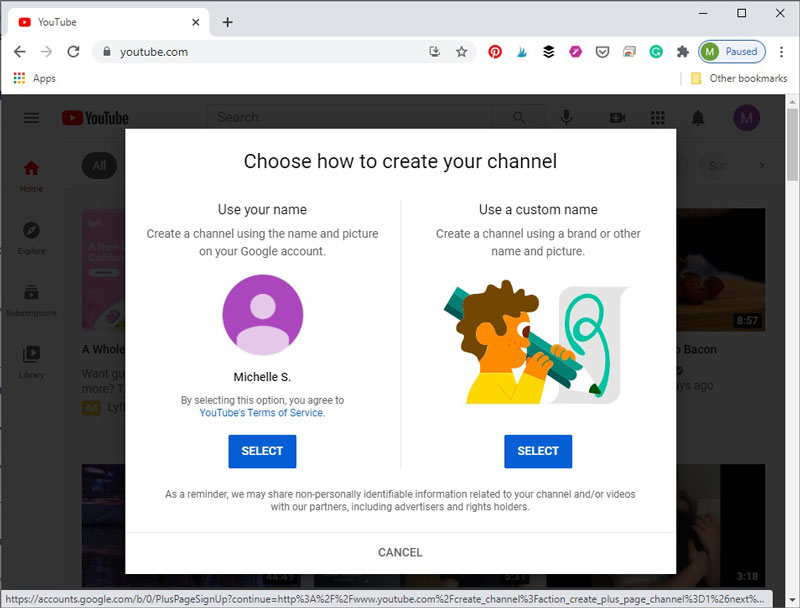
You can choose the name you would like for your channel.
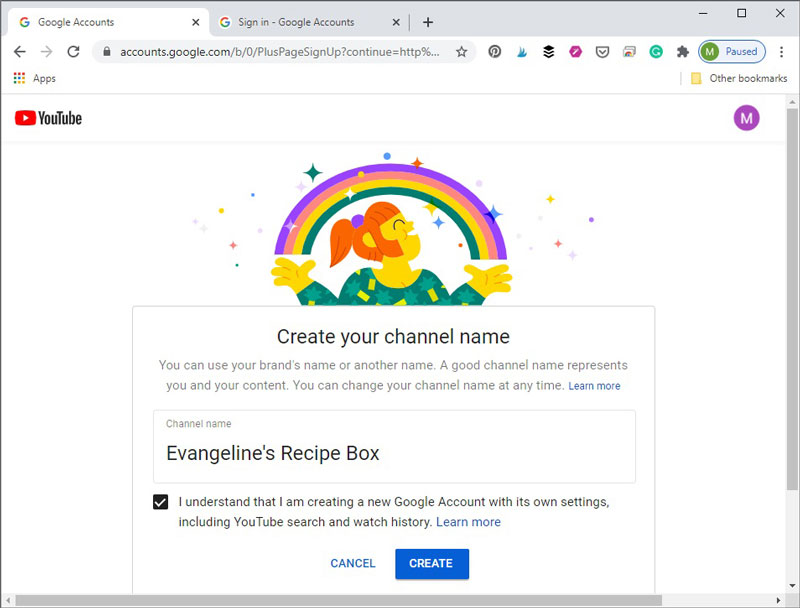
Once your channel is created, you can upload a profile picture if you choose. You can also add a description and links to your website and other social media accounts. Unfortunately, in order to have a customized URL, there are certain requirements including having an account that is at least 30 days old and has at least 100 subscribers as well. Once you meet these criteria, you can go to the Basic Info section of the Customization menu to change the URL.
Check Site Health
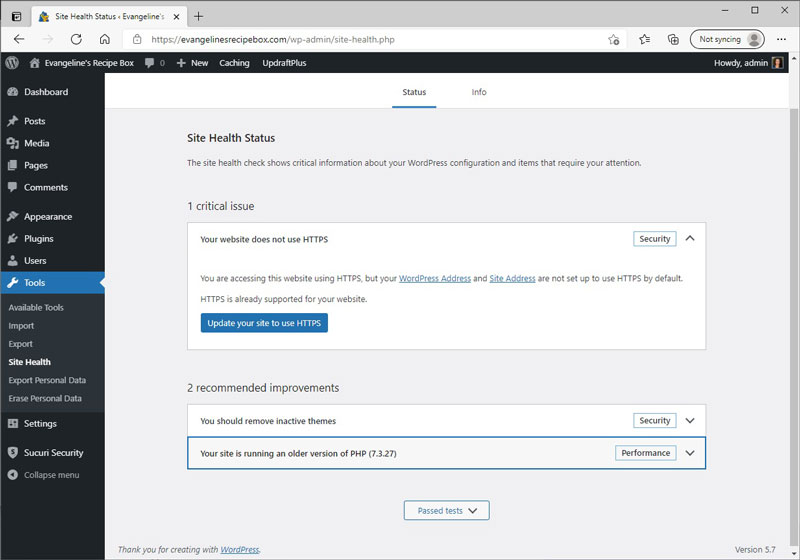
In the left hand menu, under Tools, you will notice that there is an option to check Site Health. I recommend doing this first.
Update SSL
One of the issues I noticed was that although HTTPS was supported for my site, it was not configured properly. All I had to do to fix this was click the button that said “Update Your Site to Use HTTPS.” That was easy!
Update PHP
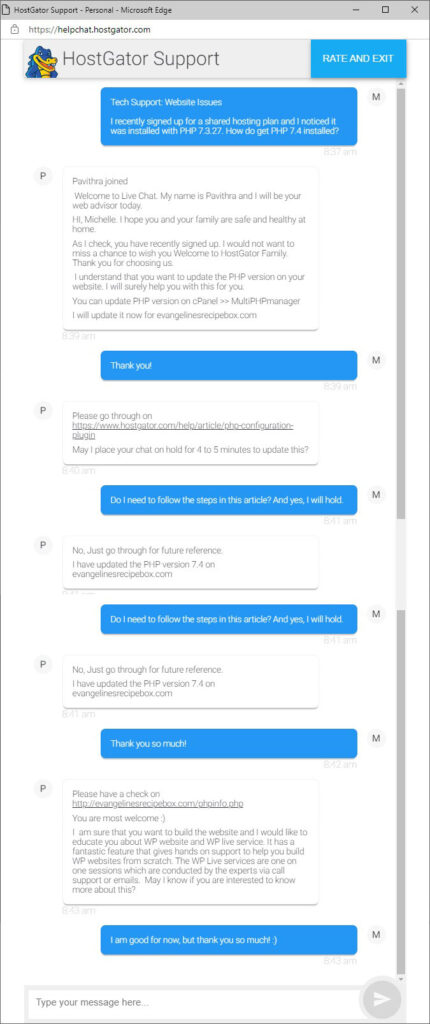
I also noticed under Recommended Improvements that my PHP was an older version than is recommended. My guess is that this is just because I happened to sign up during a transition period, but I figure this is a good opportunity to check out HostGator’s customer support.
Do do this I logged into HostGator, clicked the live chat button in the upper right, and then filled out the form saying I need Tech Support for a Website Issue. The question I asked was, “I recently signed up for a shared hosting plan and I noticed that it was installed with PHP 7.3.27. How do I get PHP 7.4 installed.”
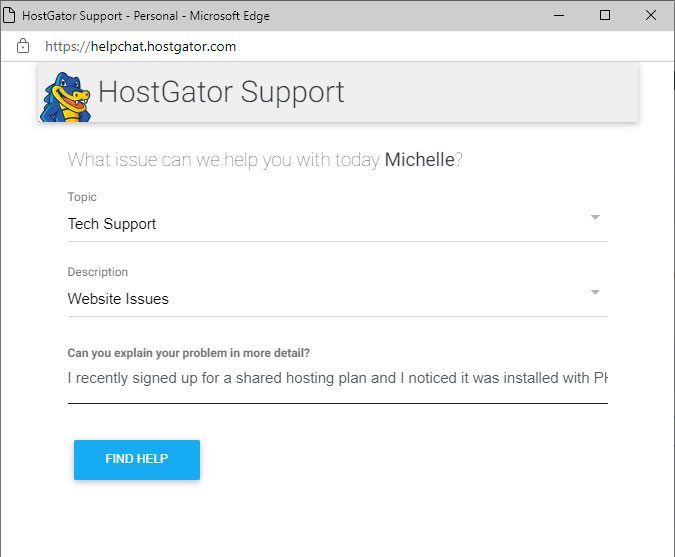
Note that on the next page, they will initially try to help you with articles. Scroll down past those articles and hit live chat at the bottom of the page.
I could not believe what an easy and pleasant experience this was! I had my issue taken care of in just minutes with no wait time whatsoever. I am thoroughly impressed! You can read the entire conversation below, if you like.
Delete Old Themes
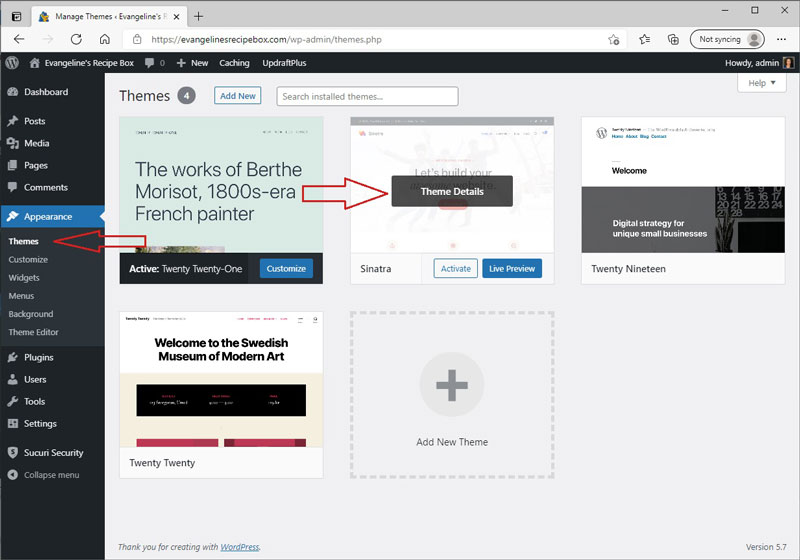
The Site Health Section also recommends deleting old themes that are not in use. This can be done by going to your Themes under the Appearance section of the left hand menu. If you hover over a theme that you not using and want to delete, you can select Theme Details.
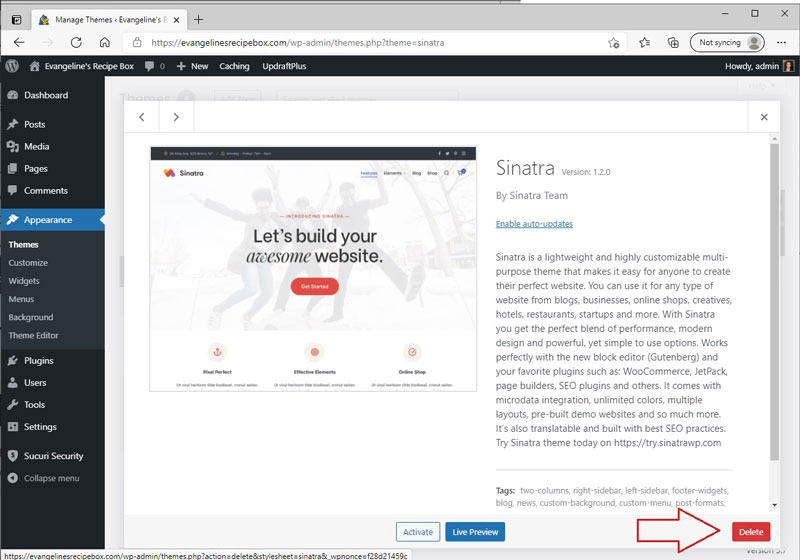
Once you are within a theme’s details, you can choose to delete the theme from the lower right corner. Do this for all the themes you are not using.
Add Useful Plugins to Blog
In addition to the security, anti-spam, and backup plugins that I recommended in my articles on How to Start a Blog for a Kid, there are some other plugins that you may want to consider if you are planning to take the blogging business seriously.
Install a Plugin for SSL
As it is, your blog has an SSL certificate, but it does not automatically redirect http:// to https://. That means users who go to the http:// address will be told that the site is insecure. To fix this, I recommend installing the Really Simple SSL plugin.
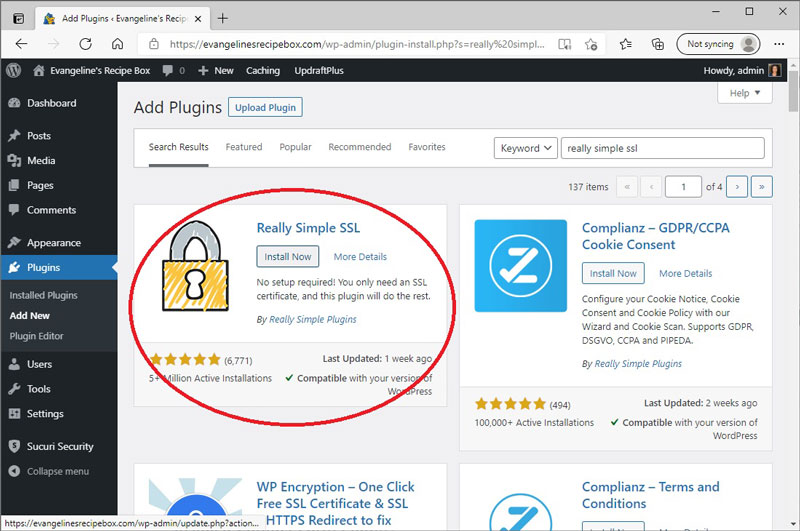
You will want to first click Install Now, then Activate. After that it will redirect you to a page where you will click, “Go ahead, activate SSL!” Then you are done!
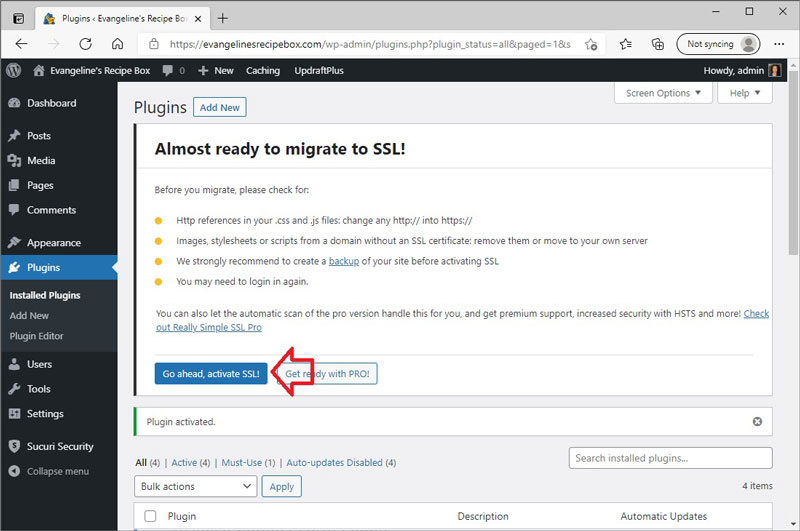
You can double check that it worked by entering your sites URL using the http:// and not https://. It should automatically redirect to the SSL (https://) version.
Install a Plugin for Speed
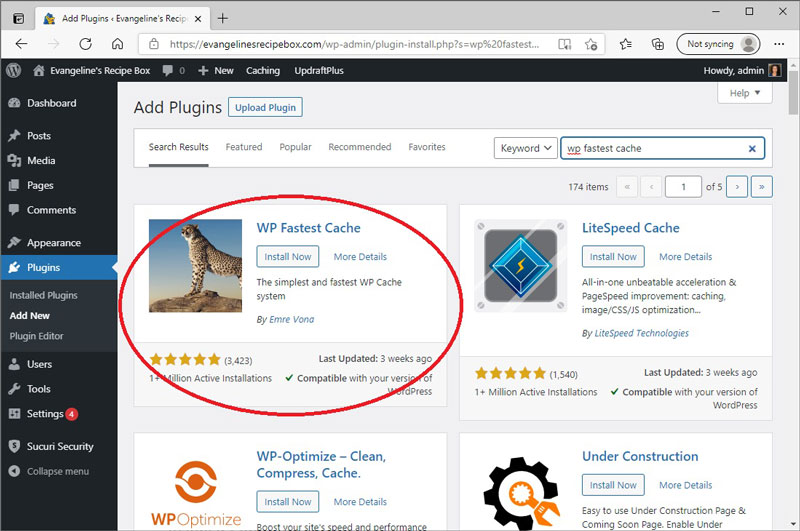
Ideally, you want your website to be as fast as possible. You can always pay to speed up your site with a plugin such as WP Rocket. I have always used the free plugin, W3 Total Cache. However, at the moment, the free performance plugin that seems to have best reviews is WP Fastest Cache. I am going to install and activate this plugin on my daughter’s site to check it out.
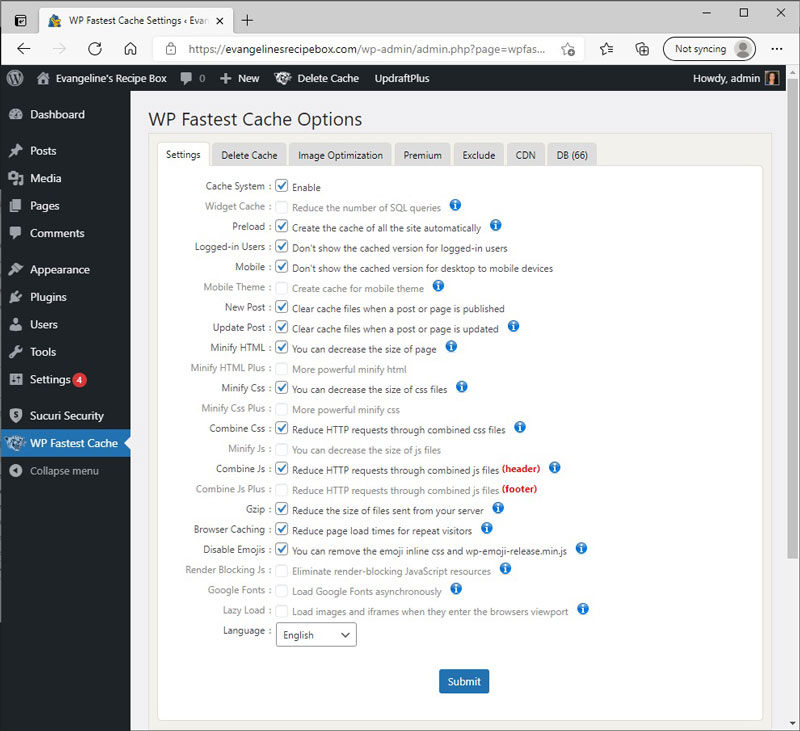
Once it is activated, you will see WP Fastest Cache in the left hand menu. Click on that and you will have the option to select which settings you want. I checked all the boxes to hopefully maximize my site as much as possible. For some of the options, extra dialogue boxes open once you check a box. I left all of those as the default except for “Preload.” For that one, I just selected homepage, though I may look into it more and go back and change that one at some point. If I do, I will note it here.
Install a Contact Form Plugin
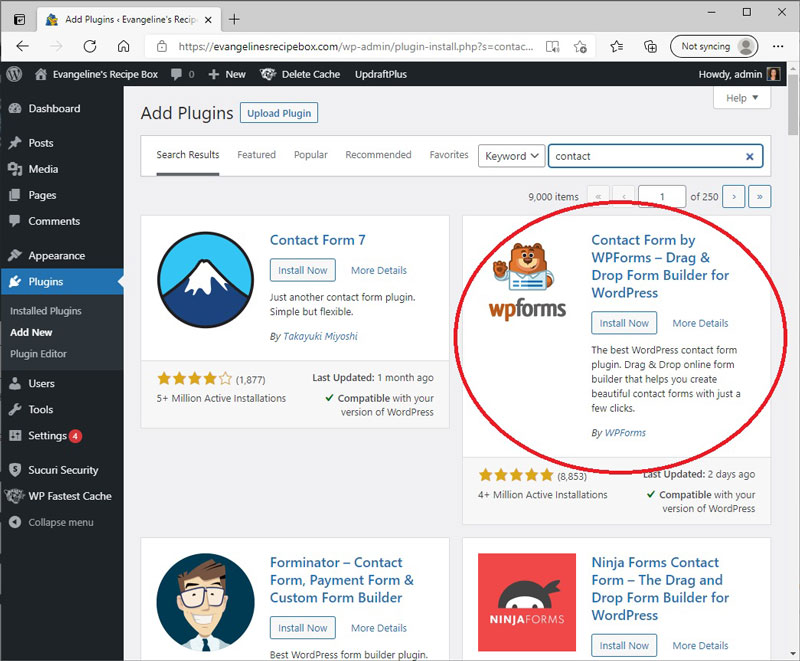
Another feature which is nice to have is a contact page. This is made easy using a contact form plugin. Personally, I have always used the Contact Form 7 plugin, but as I am looking through what is available, I see that Contact Forms by WPForms has much better reviews and is also widely popular. I am going to try that one instead for my daughter’s site. To this, I click Install Now, then Activate.
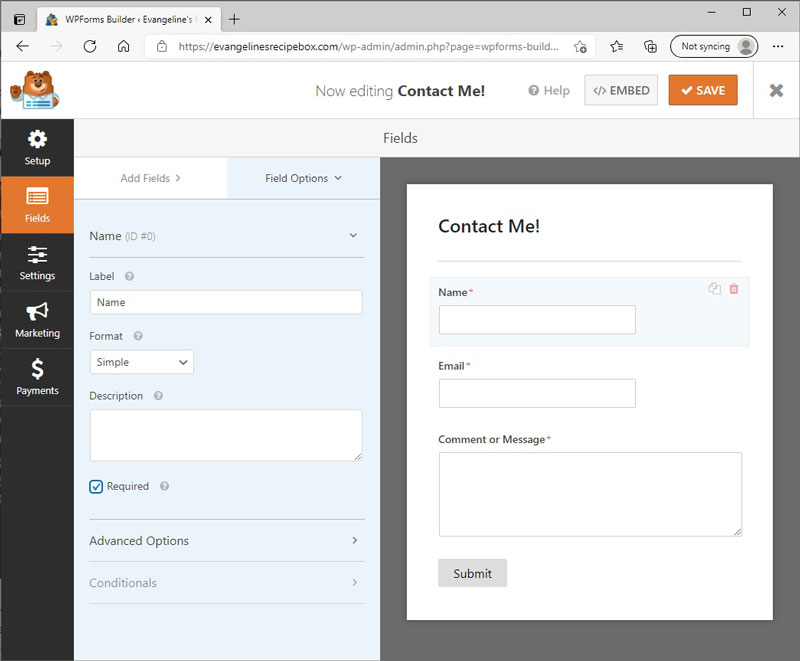
Once I activated this plugin, it directed me to a page with a 6 minute tutorial for how to use this plugin which was very helpful. Following the instructions in the tutorial, I created a simple form called Contact Me.
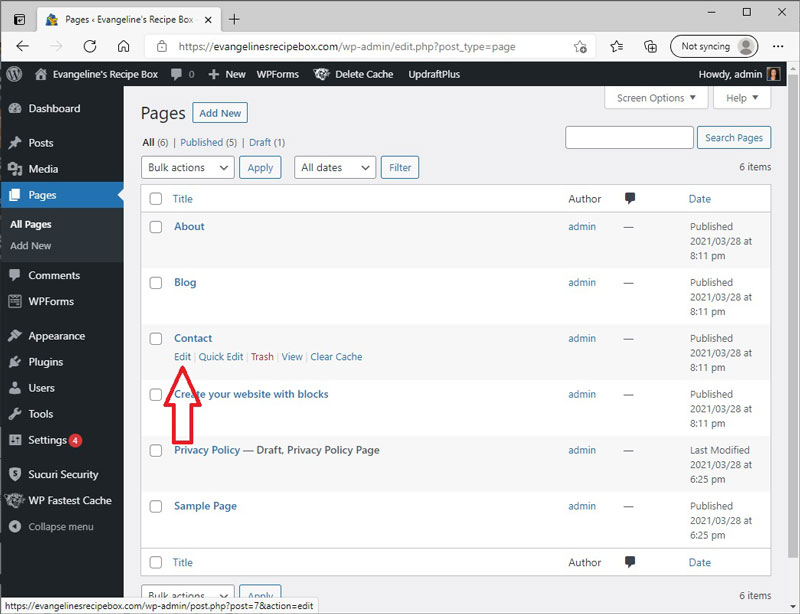
Once I created the form, I went to my Pages list, because a contact form was already pre-created with installation. I clicked that I wanted to edit this form.
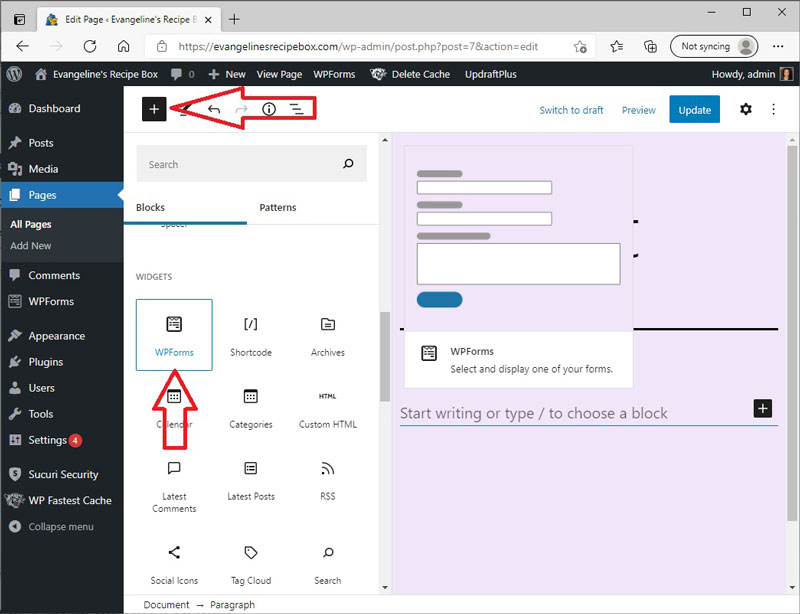
Once inside this form, I edited the text that was already there and added a new block by clicking the plus sign at the top of the page. Then I scrolled down to the widgets section and selected WPForms. From there, you are able to choose which form you want to include on the page. I only had one listed (Contact Me), so that was the form I chose.
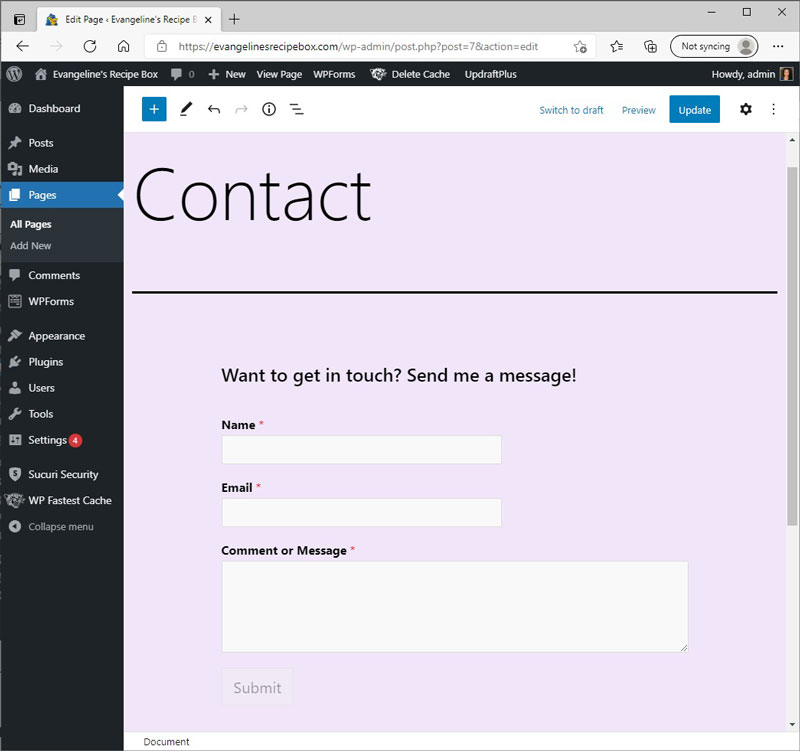
Now I have a clean looking contact page, that I can link to from the main menu! Personally, I prefer this form plugin a lot more than the old one I was using.
Install a Plugin for Social Sharing
If you are hoping to gain traffic to your site, you may want to make it easy for people to share your content. On this site you are currently reading, Research Parent, I actually pay $29 each year for Social Warfare Pro which allows me more customization options. For this site I am building for my daughter, however, I don’t want to pay anything extra, so I will go with a free plugin. The most popular and highly rated plugin at the moment seems to be Social Media Share Buttons Popup & Pop Up Social Sharing Icons. However, with this one I noticed that a lot of the features I wanted seemed to only be available via the premium version. Next I tried Social Sharing Plugin- Sassy Social Share. This one looked more promising in terms of customization, but when I tried to change a single setting, it directed me to the page to update to the premium version.
This is the first real hiccup I am coming across in setting up my daughter’s site. All I really want is some social media icons at the bottom of each post to make sharing easy. Next I am going to try WordPress Social Sharing, Related Posts, and Analytics by Shareholic.
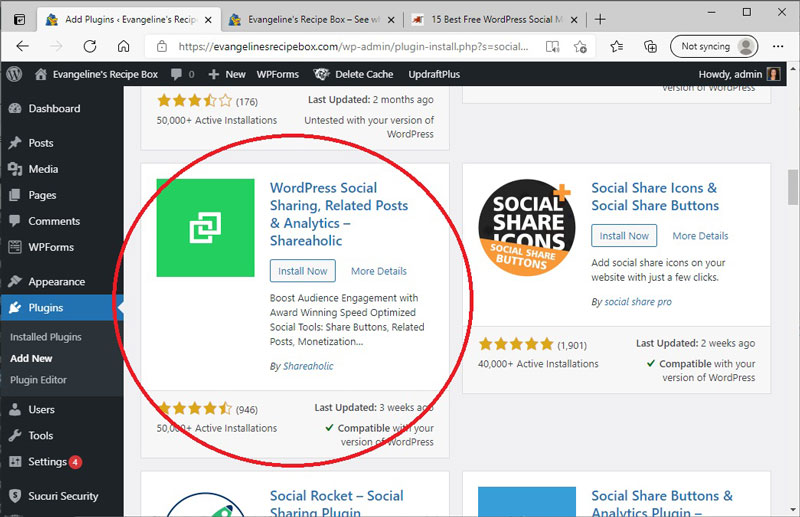
I installed and activated the plugin, then selected Get Started from the prompt that popped up. It asked me a few questions which I answered. It seems to be a winner, right out of the box for me. Within the Apps menu there is a section called Share Buttons, which is what I was hoping to add. I customized each of the four sections, though really the only that is necessary is likely the posts and maybe the pages section.
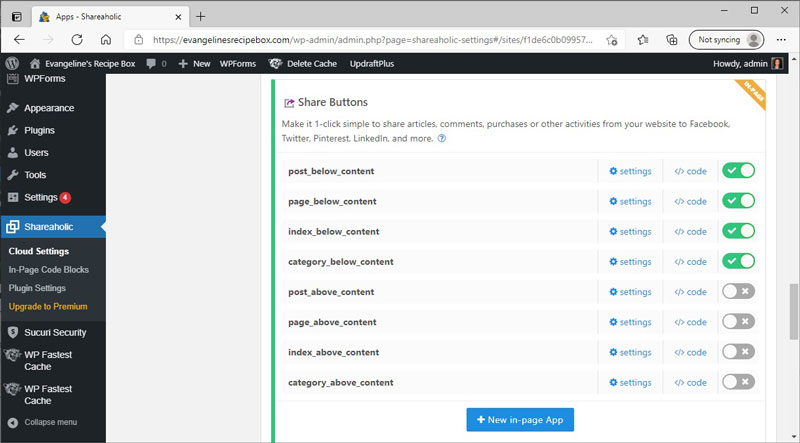
Within this section I was able to customize the sharing menu to have them look exactly how I wanted. You can also choose which sharing methods you want to promote. I chose Facebook, Twitter, Pinterest, a couple recipe sites since my daughter is starting a cooking blog, plus I also added options for email and printing.
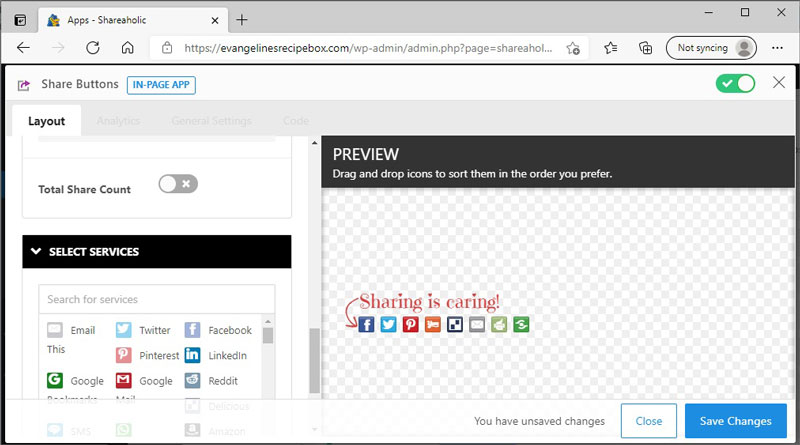
This seems like a very powerful plugin. Personally, I chose to disable the floating share buttons. They might be effective, but I find them distracting. You can also use this plugin to link to related content at the bottom of each post which is useful for decreasing your bounce rate and getting visitors to stay longer. You can also set up follow buttons for each of the platforms you are active on. When I update my daughter’s theme and finish customizing how I want it to look, I will likely use this feature to add follow buttons to a sidebar. This Shareaholic plugin also gives you the option to add sharing icons on top of images, which is a helpful feature if you have a very visual blog. There are a lot of other options, as well, but I don’t see myself using them anytime soon.
Install a Comment Subscription Plugin
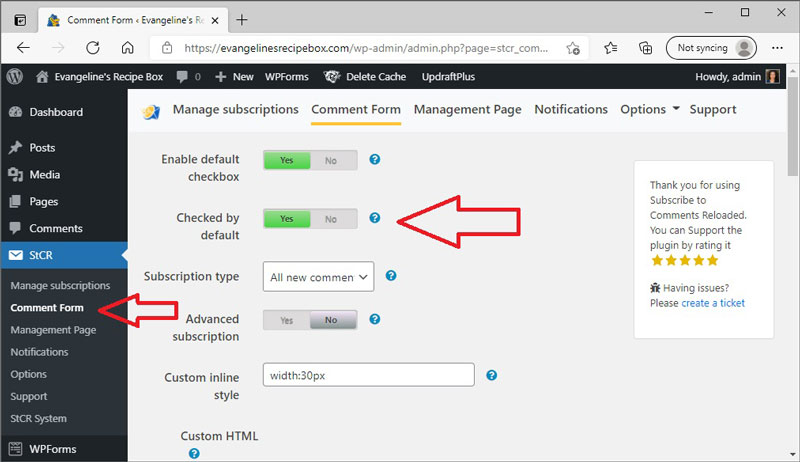
Depending on the purpose of your blog, you may or may not even have comments turned on. However, if you do, having a “subscribe to comments” feature is nice to have. This means that when someone comments on your blog and subscribes, they will get an email notification when you reply to their comment. This allows bloggers to have a back and forth dialogue with their readers. The plugin that I have used for this purpose, which has worked out well for me is called Subscribe to Comments Reloaded.
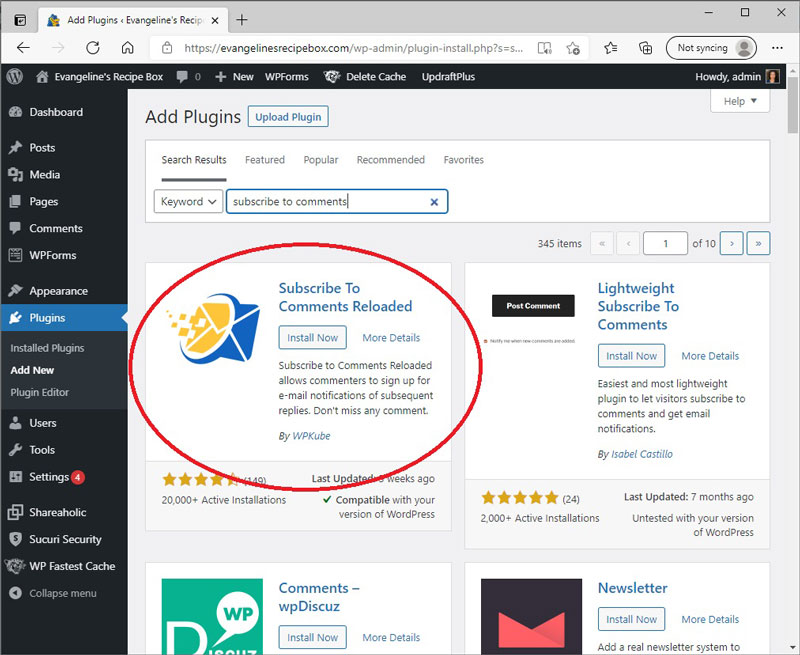
This plugin will work right out of the gate. The only change I made to the default settings was I told it to check the box that subscribes a commenter by default. If they do not want to subscribe, they will have to uncheck this box. You can find this setting under the StCR (Subscribe to Comments Reloaded) menu on the left hand side, under Comment Form.
Install a Plugin for Search Engine Optimization (SEO)
If this blog is just for fun, then you absolutely do not need to consider search engine optimization (SEO). SEO is the process by which you try to write your blog posts to make them most likely to be ranked highly by Google or some other search engine. This can be helpful if you want to receive traffic through search engines. However, if you don’t care about your SEO and you don’t want to write to try to manipulate some sort of computer algorithm, then you probably don’t need this plugin.
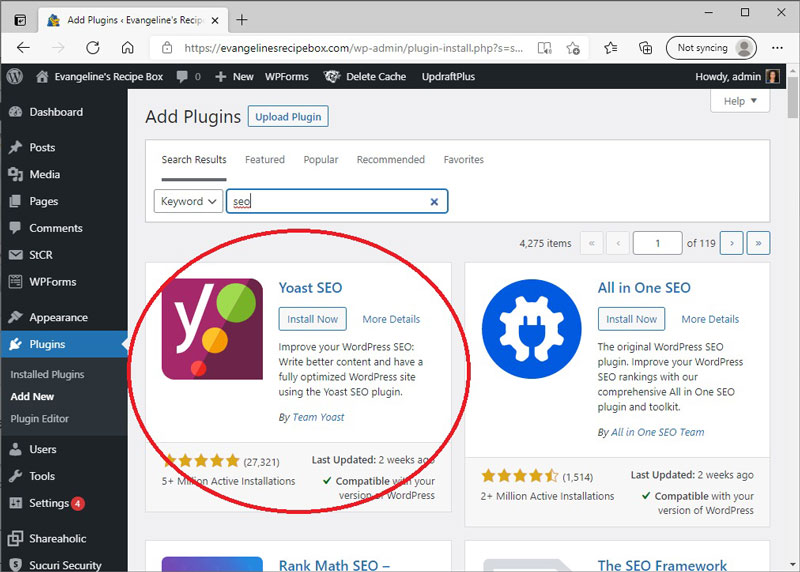
If you do care about SEO, then you will want to install Yoast SEO. This is by far the most popular go-to plugin for this purpose with over 5 million installs. An advantage of this plugin is that it will tell you how clearly you are writing, which can be good to know even if you don’t care about SEO. I do not change any of the default settings. If you like, you can go through the configuration wizard and it will help customize how your site appears on Google and other search engines. You can also sign up for their newsletter or watch their tutorials which will guide you through the process of maximizing the plugin’s benefit.
“Starting a Blog” Series
This post will be part of a multi-part series! I will add links as I write and post these articles.
- Part 1: How to Start a Blog for a Kid
- Part 2: Setting Up HostGator Email
- Part 3: I’ve Set Up My Blog! Now What? (this post)
- Part 4: Customizing a Premium WordPress Theme
- Part 5: Monetizing Your Blog


Leave a Reply