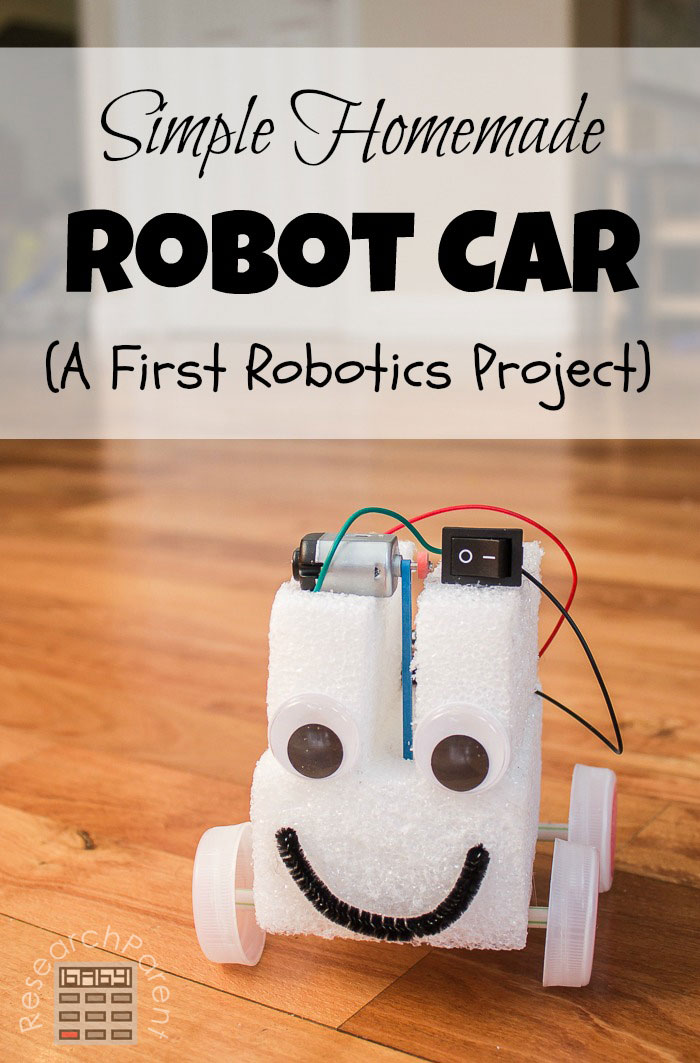
Do your kids think robots are cool? I know mine do. We started off with our wigglebot and wobblebot which both moved in fun ways while more or less staying in the same spot. Then I made a propeller car which moved in a straight line by pushing air with a propeller. The supplies for all of these projects are fairly inexpensive EXCEPT the propeller we used was around $4. Since I’m pretty cheap, I wanted to find a new method of getting a bot traveling without a propeller. This new “robot car” directly attaches the motor to the wheels with a rubberband, so it’s definitely cheaper to make. Also, the googly eyes are really what sell my kids on thinking this is a robot. :)
Technically, none of these projects are actual robots, since they are unable to sense and respond to their environment. My kids still have a great time making and playing with them though, and little by little, we’re working our way there. One day, I fully intend to make a real (though probably very simple) robot using computer hardware.
I have several simple projects in mind before that though. I’m hoping soon to FINALLY use those solar garden lights I got from the 99 cent store over a year ago to power a project. Also, I’d love to devise a car, similar to this one, that uses a switch to automatically back up when it runs into something. (Baby steps!) If your child is also a robot enthusiast, sign up for my newsletter to stay tuned.
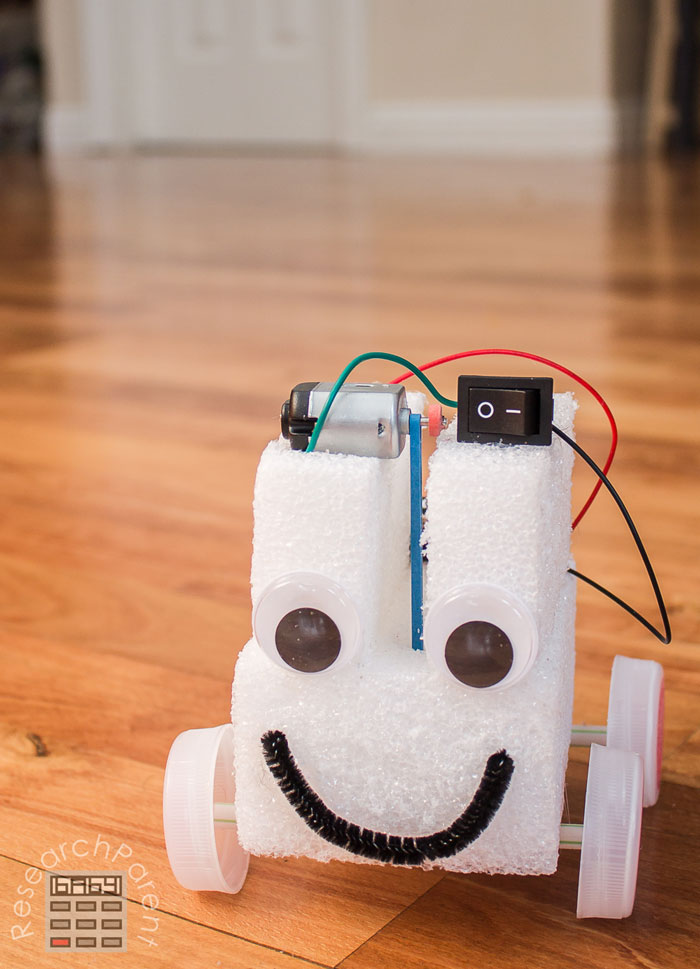
Watch below for a short clip of our simple homemade “robot” car in action!
Recommended Age Range: Kindergarten, Elementary, Middle School (younger kids will need adult supervision and assistance since this project uses hot glue)
Time Required: ~30 minutes
Difficulty: Easy to Moderate (need to get wheels glued on relatively straight)
Cost: Less than $8 in used supplies (Technically, we already had everything we needed after making our other bots, except the piece of foam. The dimensions aren’t critical, so you could probably fashion something out of packaging foam, but I bought a block from Walmart for about $1.) Buying in bulk reduces the cost per bot considerably.
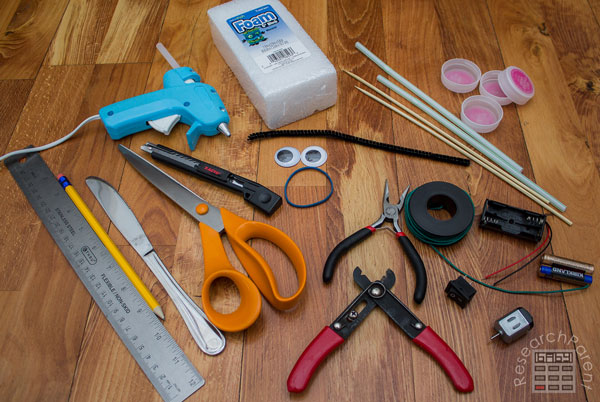
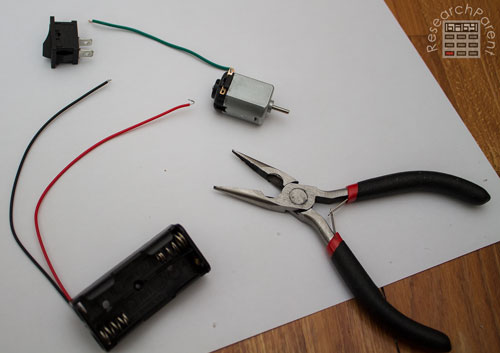
Materials:
- A firm block of foam (we used a 6″ x 3″ x 2″ piece from Walmart for $1. This piece would provide enough for a dozen cars.)
- 4 bottle lids for wheels
- 2 straws
- 2 skewers
- a rubberband (it needs to be longer than the smallest dimension of your foam when pinched flat — 2″ in my case — so that when you stick it through the foam, it will protrude on both ends).
- 2 googly eyes (optional)
- a pipe cleaner for a mouth (optional)
- 2 AAA battery holder
- 2 AAA batteries
- 1.5-3 V DC Motor
- switch
- Insulated wire (I used 22 gauge, but it’s not really important. Only a short (about 4″) piece is needed.)
Supplies & Tools:
- Scissors
- Wire strippers
- Needle nose pliers
- Hot glue gun
- Ruler
- Pencil
- X-acto knife (for cutting eraser)
- Butter knife for cutting foam (could also use X-acto or other knife)
Instructions:
-
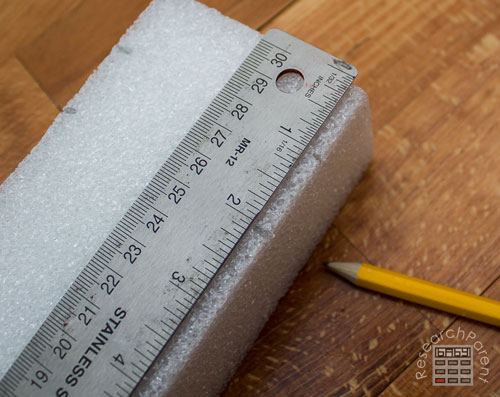
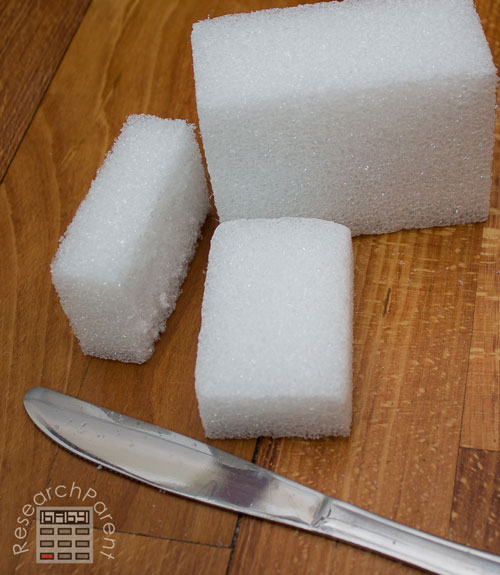
- You want to end up with 3 pieces of foam. I started off with a block that was 6″ long, 3″ wide, and 2″ thick. To start, I marked at 1 and 2 inches from the end along the long edge. This was in order to cut off two pieces that were each 3″ by 2″ by 1″.
-
- Cut off the pieces using a butter knife or some other tool. Ideally, the final dimensions will be 4″x3″x2″, 3″x2″x1″, and 3″x2″x1″. However, you are more than welcome to try any pieces of foam that you have. The considerations are that you want the car to be wide enough for stability and tall enough that the rubberband attached to the motor and axle will be taut. You also don’t want the entire car to be too big, otherwise it will be too heavy for the motor to move. Technically, I didn’t even need the second small piece of foam that is not holding up the motor. I just added it so that the eyes would be symmetric.
-
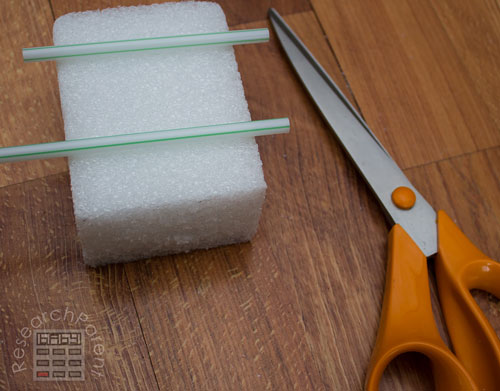
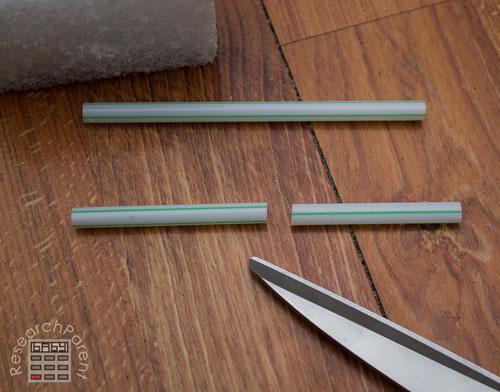
- Cut two straws slightly wider than the base of the car. They should be at least the length of the car plus about the width of each wheel (bottle cap/lid) on either end (in other words, the width of the car plus two times the width of the wheel). A little longer than that is fine.
-
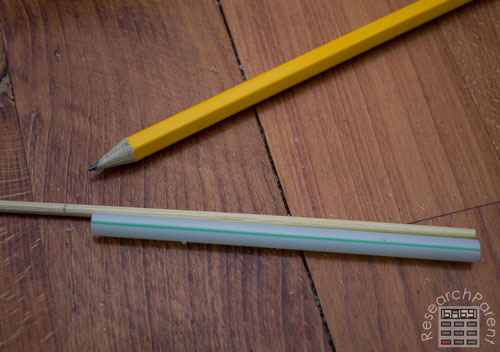
- Next you want to mark the skewers such that they are a little bit longer than the length of the straws. (About the length of the straws plus enough to allow for a bead of hot glue on either end.) I cut the amount shown in the picture and ended up needing to trim the straw a little bit to allow room for the hot glue, but that worked out totally fine.
-
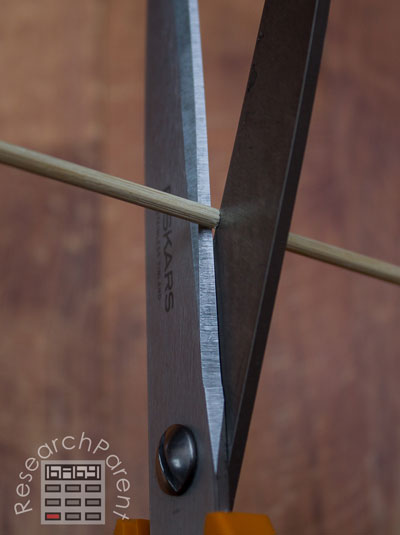
- Cut both skewers at the length marked to make two axles.
-
- Cut one of the straws in half.
-
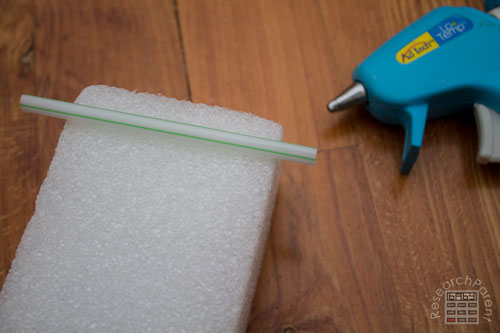
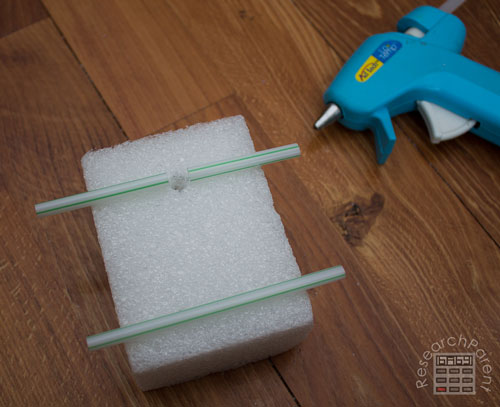
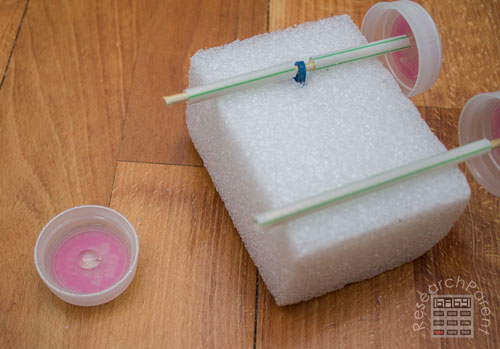
- Hot glue the larger length of straw on one end of the base of your foam.
-
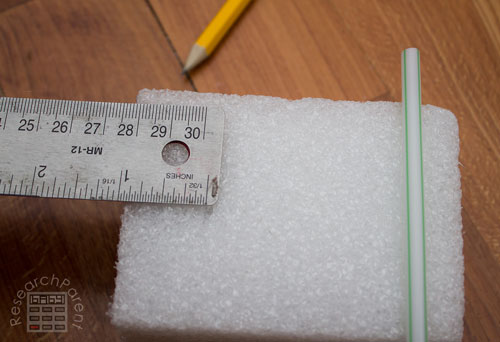
- Next, use a ruler to mark a point in the middle of the other end about 1″ from the end.
-
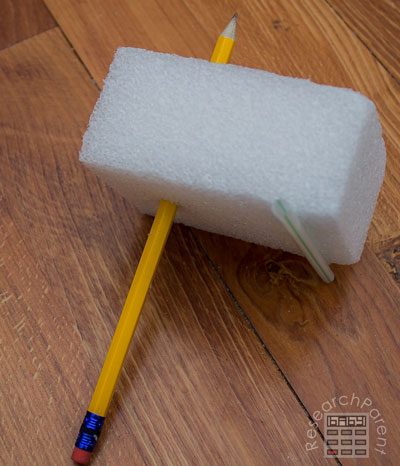
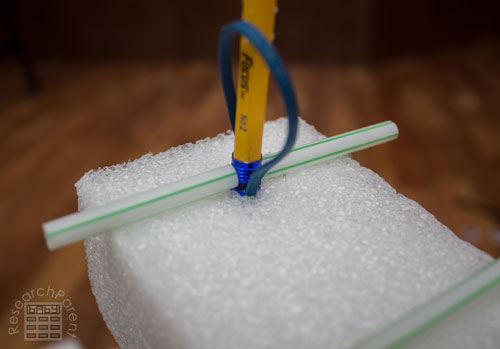
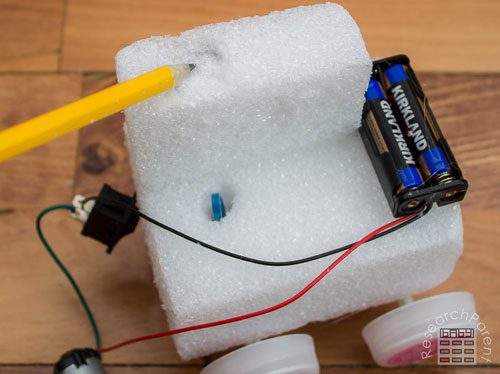
- As straight as possible, use a pencil to make a hole through the foam at this location.
-
- Glue the two smaller pieces of straw on either side of the hole.
-
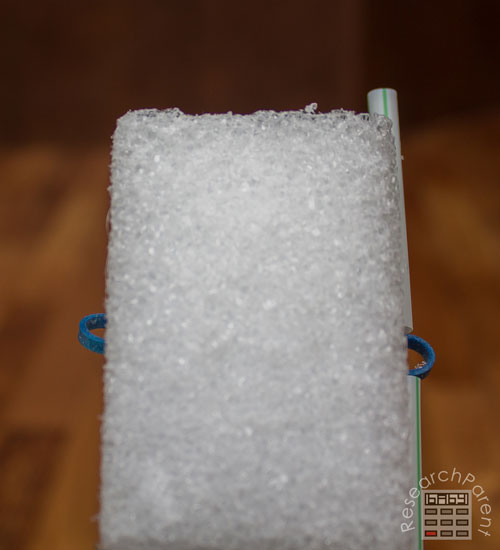
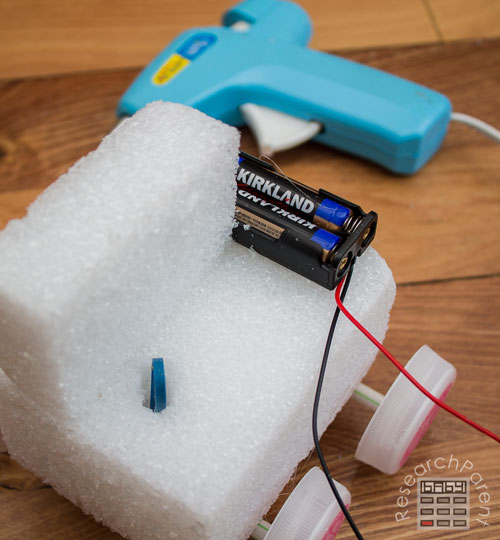
- Use the pencil to push the rubberband through the hole.
-
- Make sure you choose a rubberband long enough that it will stick out on both end of foam at the same time.
-
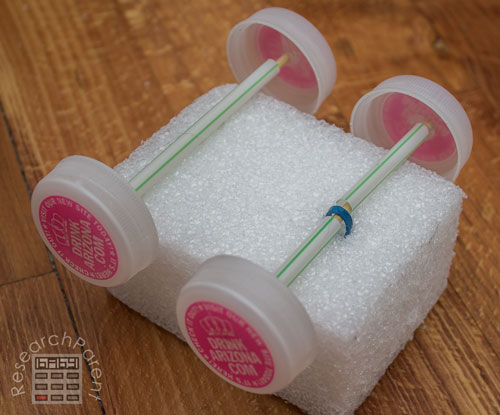
- Next, use hot glue to attach a bottle cap to one end of each your two axles.
-
- Stick your axles through the straws. Make sure that one of them is threaded through the rubberband.
-
- Use hot glue to attach a bottle lid to the other end of each axle. This was probably the hardest step of the whole process for us, because first I accidentally touched the straw with the hot glue. I ended up trimming the straws on all 4 ends to give us a little more clearance for the hot glue. Also, you need to hold the bottle lid in place for a minute or so while it is drying to make sure that it doesn’t dry crooked.
-
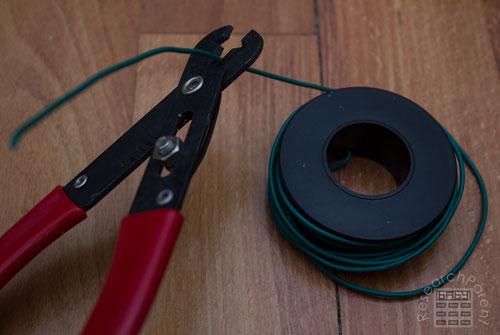
- Next make the circuit that powers the motor. You will need to connect the motor, the battery pack and the switch. Technically, if you’re willing to pull the battery out each time, you don’t need a switch. However, if you are going to use the switch, you will need a third piece of wire to connect the motor to the switch. Start off by a piece about 4 inches long.
-
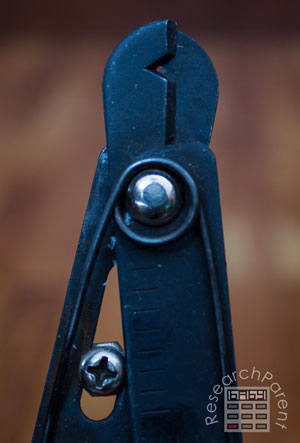
- You will need to strip the insulation off both ends of the piece of wire you just cut. Before you do this, you will need to make sure your wire strippers are set properly. Adjust the location of the screw until there is a small hole remaining when you close the wire strippers completely.
-
- Use the wire strippers to strip off about a quarter inch off each end of your short piece of wire. You may need to strip off insulation from the ends of the wires attached to your battery pack if necessary.
-
- Get your 3 components (battery pack, motor, and switch) ready to connect. For the most reliable connection, these components should all be soldered together. However, it works nearly as well for our purposes to just wrap the wire around the leads. This makes it a little more child-friendly than a hot soldering iron and also easier to disassemble for future projects.
-
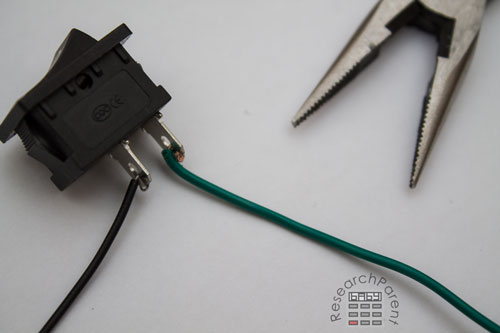
- Connect all the components in a loop by wrapping the exposed metal of the battery pack leads to the motor and switch and using the piece of wire to attach the motor to the switch. I find it works best if I use the needle-nosed pliers to make a small hook in the end of the wire. After putting the hook through the hole in the connector, use the pliers to wrap the end of the wire around the connector.
-
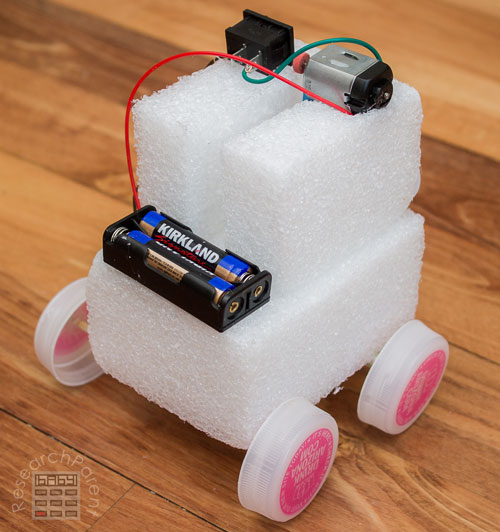
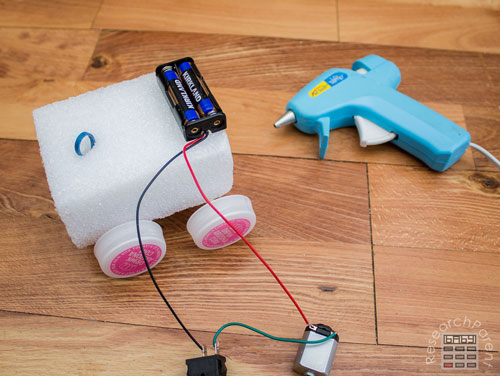
- Once your circuit is made, insert some batteries and try flipping the switch to make sure it works. Provided it does, hot glue the battery pack onto the back of the car (the end that doesn’t have the rubberband).
-
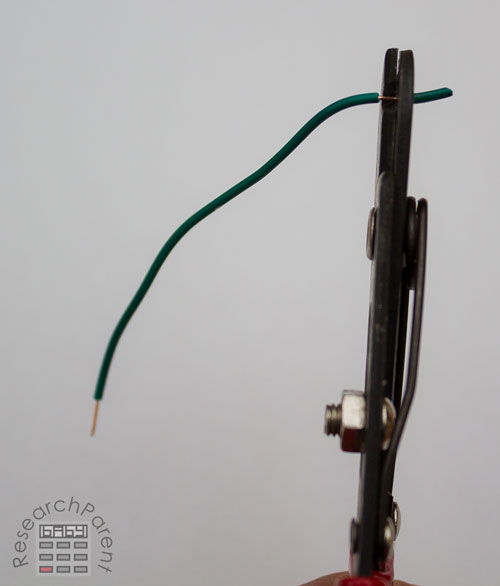
- When you flip the switch, the motor will spin. The spinning motor will connect to the rubberband which will turn the axle which turns the wheels. It would be nice to know which way your motor is spinning so your car moves forwards and not backwards. I checked this by hooking the rubberband over the motor while I held the motor and turning the battery pack on and off to see which way the wheels turned. If the wheels turn the wrong way, just put the motor on the other side of the car. Once you know which side the motor should be on, hot glue the piece of foam onto the side that will hold up the battery. (If it’s hard to test while holding the motor, you can just glue on both pieces and test it in both spots before gluing it down. Also, note that if your rubberband is super stiff, you may need to cut down the length of your foam a bit. You want the rubberband to be taut, but it should not be super difficult to hook the rubberband over the motor shaft.)
-
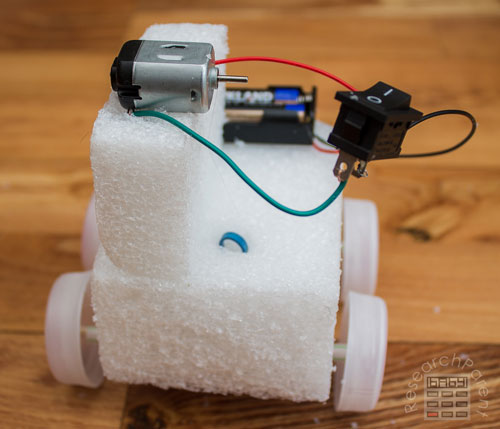
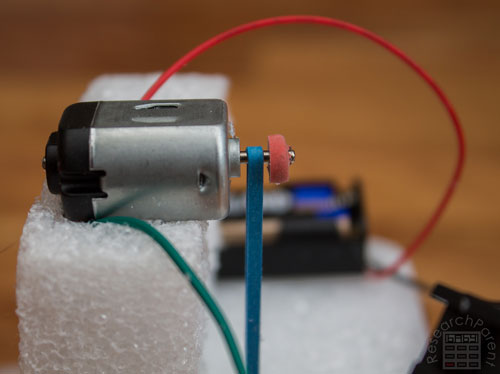
- You want the shaft of the motor to be perpendicular to the rubberband (parallel to the floor). Since my leads stuck out a little bit, I used a pencil to dig out a little well to glue the motor into so that it would sit flat on top of the piece of foam directly over the rubberband.
-
- Glue the motor in place. At this point, it should be easy to confirm that you put the motor on the right side by hooking on the rubberband and turning on the switch.
-
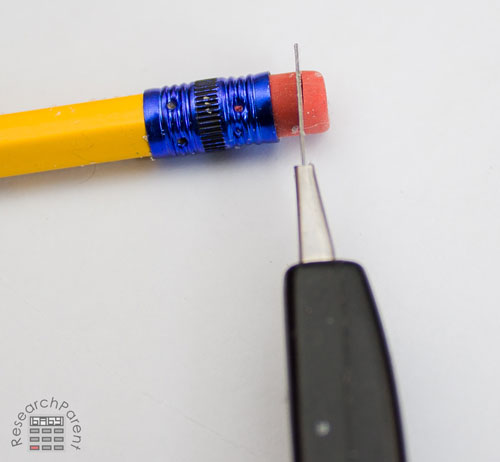
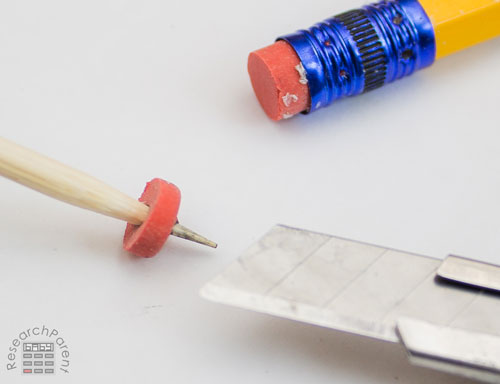
- Even though my motor shaft was pretty flat, I still had a little trouble getting my rubberband to stay on when my car was driving. To fix this problem, I first cut off half of my pencil eraser using the x-acto knife.
-
- Then I used a skewer to poke a hole in the middle.
-
- Next I hooked the rubberband onto the motor and pushed on the eraser tip to keep it from falling off. Make sure that the rubberband is not twisted and is not rubbing against the foam at all. It should come up perfectly vertically through the hole before attaching to the motor.
-
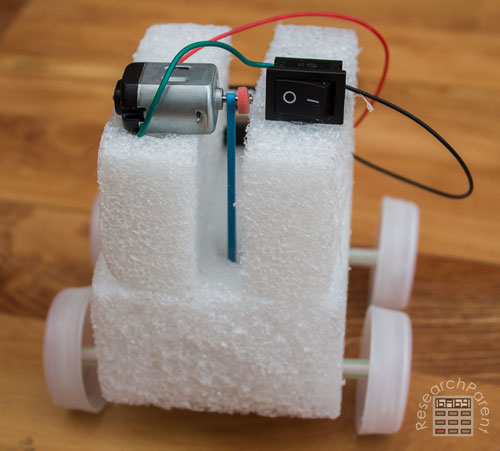
- Next glue on the other piece of foam for symmetry, then glue the switch on top as shown. (Technically, you do not need this piece of form and could glue the switch somewhere else if desired.)
-
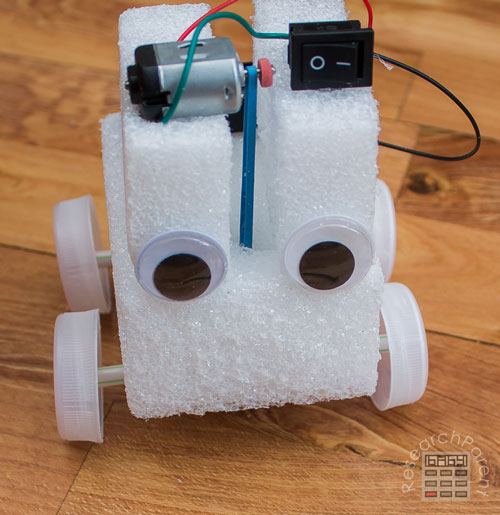
- Attach some googly eyes (totally optional!)
-
- Give him a pipe cleaner smile (or not! Completely up to you!)
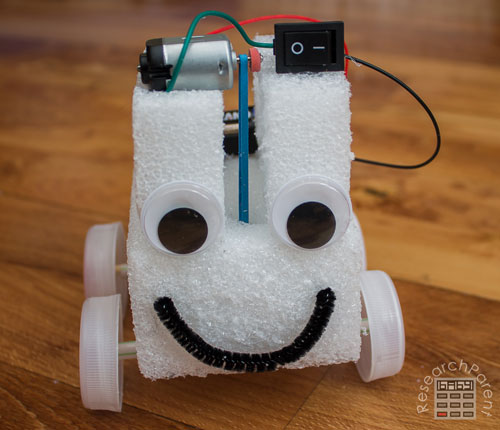
You’re all done. Turn him on and watch him go! Ours was able to start moving on it’s own, though it wasn’t super fast. As you can see from our video above, with the added weight of my 4 year old’s small toy, it was no longer able to start moving on it’s own. However, with a little extra push to overcome static friction, it was on it’s way!
Click here for more Robotics activities for kids.

Related Links
Learning Activities for Kids
Science Activities for Kids
Math Activities for Kids

Wow, Michelle–you have done it again! My kids and I LOVED the wigglebots, and they will be so excited to try this activity! Thank you so much for sharing!
Thanks, Kristy! I’m so glad your kids enjoyed them. I’m hoping to get around to a few more simple bots this summer!
We have the whole thing done, but even with trying the eraser on the end the motor pin several times, the rubber band keeps coming off….any other suggestions??
That stinks! I guess my suggestion would be to try angling the motor slightly. If the rubberband wants to slip off the motor, try gluing the motor on such that the shaft is angled upwards a little bit. The trick is to keep it as close to horizontal as possible, but the tension from the rubberband might be pulling it down too far, so I would try starting with it aimed a little upward. Good luck!
Great idea…Made the foam robot,however it will not move, when I lift it off the floor the aisle spends
That’s too bad, Shirley! I’m sorry you’re having trouble. My suggestions include 1) make sure you have new batteries, 2) give it a little push to get it started (sometimes it just has trouble overcoming static friction, but will keep going once it’s barely started), 3) lighten the weight of your car (not sure that would be possible), 4) make sure your wheels and axles are not too crooked (re-glue if necessary), 5) try a bigger propeller. Without seeing your car, it would be hard to know what’s going wrong. Good luck!
where do you acquire the motor?
Hi, Holly! I got mine off Amazon. Just search for “dc hobby motor” or you can find a link in the materials section of this post.
With colleagues, I am developing a comprehensive math lab. We would like to build activity cards based on your wobblebots, (those built on paper cups and CDs) and the little car made of polystyrene.
Our work will be copyrighted and publlished for profit. We’re wondering if you would like us to include some of your ideas and wondering if you know of the copyright implications. You do cite Kathy Ceceri’s Robotics. Was there any discussion surrounding that?
I’ll be signing up for your newsletter momentarily.
Our website needs a great deal of work. But it’s cited here to give you an idea of how we and our project look.
Thanks for all your wonderful ideas.
Nancy
Hi Nancy. I wish you luck with your project. You are more than welcome to use my ideas, but please do not use my images or copy my text directly. If you wanted to cite my blog in your material, that would be appreciated, but it’s completely up to you. I did not contact Kathy Ceceri regarding my projects that were inspired by her books. I simply link to it in case my readers wish to purchase her book. Good luck!